Positioning and erecting of the ladder, Telescopic ladder – Brennenstuhl Aluminium Double-Sided Stepladder special trade quality 2x2 rungs Height of stepladder 0,7m User Manual
Page 19
19
GB
Positioning and erecting of the ladder
NOTE: Rung hooks
12
and the lifting lock
13
must be engaged.
Stepladder with attached extension
ladder down:
i
Bolt the side cross bar to the supporting part
(see Fig.
d
).
i
Take out the sliding part downwards and turn
it around, so that the open side of the rung
hooks points up (see Fig.
e
,
f
). Note that
the lifting locks must engage (see Fig.
g
).
NOTE: All 4 rung hooks
12
and the lifting
lock
13
must be engaged and locked.
Standing possibilities:
q
Telescopic ladder
0
0
a
0
0
c
d
65°-75°
b
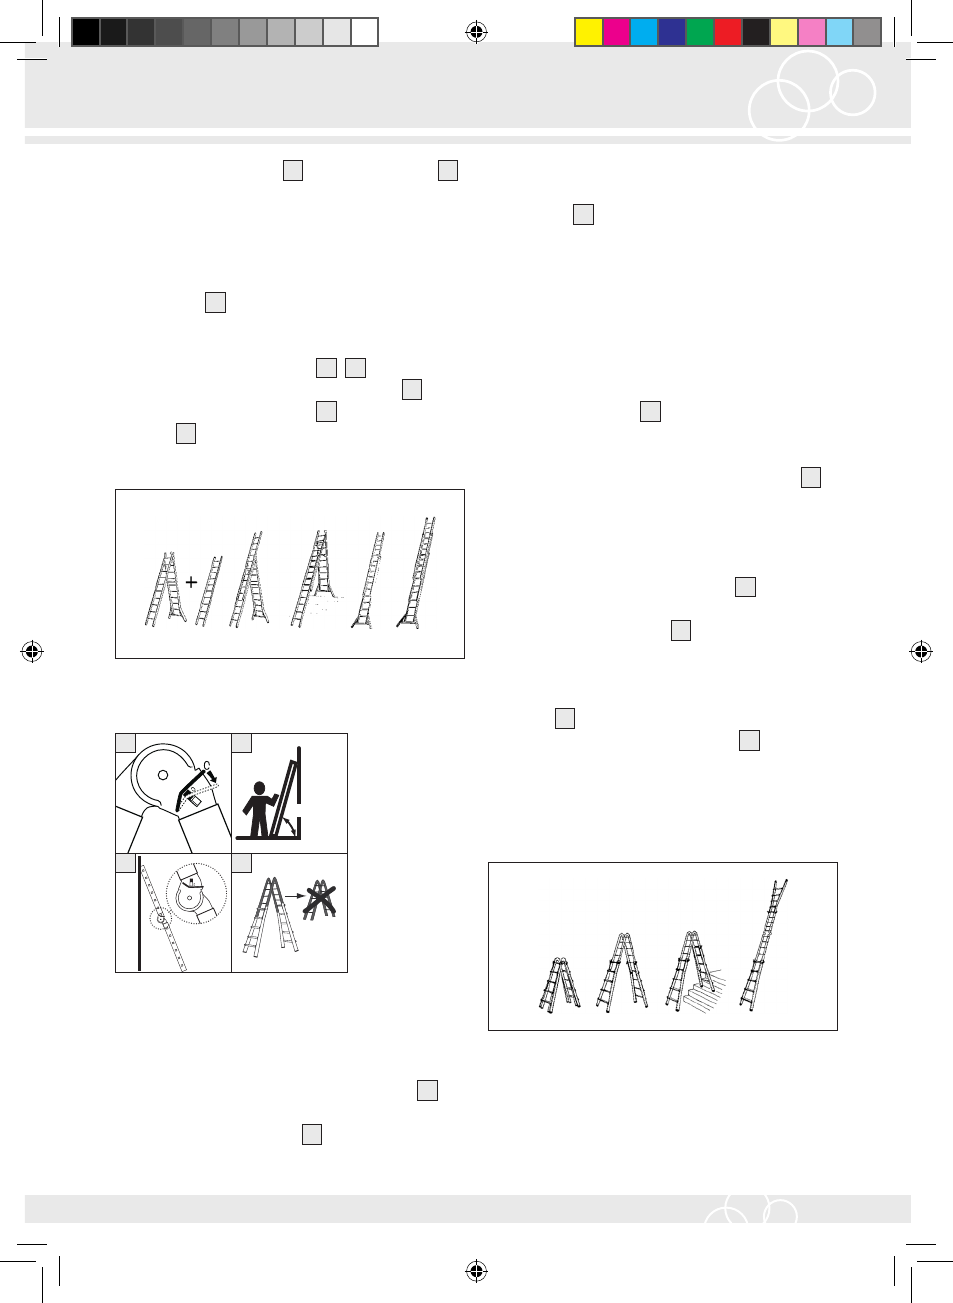
Erecting: Straight/leaning ladder
1. Spread the ladder parts – the hinges will lock
automatically in the next position.
2. Unlock again for further spreading (Fig.
a
).
3. Check the position of the pin: 0 = unlocked,
C = engaged (see Fig.
a
).
4. Cover the hinges during dirty work.
i
Check if the hinges are properly engaged
before mounting the ladder (pin position »C«,
see Fig.
a
).
Collapsing:
1. Unlock the hinges.
2.
NOTE: The ladder can now be collapsed in
one step.
Straight ladder:
NOTE: An angle of 65° to 75° to the horizontal
must be kept (see Fig.
b
).
i
Make sure that the hinges are facing the wall and
the locking pin is in position “C“ (see Fig.
c
).
NOTE: The “C“ must be positioned down.
Using the Telescopic ladder:
NOTE: Use of the inner part of the ladder as
stepladder is not permitted (see Fig.
d
).
i
Pull both locking grips
11
outwards and fixate
them on the side.
i
Bring the telescopic part of the ladder to the
required rung height and engage both locking
grips
11
.
i
Make sure that the locking grips
11
are
engaged properly.
NOTE: The telescopic part of the ladder must
not be extended to the last rung.
Standing possibilities:
Leitern_Content_DE_GB_FR_NL_IT.indd 19
23.07.14 13:44
- Aluminium Double-Sided Stepladder special trade quality 2x3 rungs Height of stepladder 0,9m Aluminium Double-Sided Stepladder special trade quality 2x4 rungs Height of stepladder 1,1m Aluminium Double-Sided Stepladder special trade quality 2x5 rungs Height of stepladder 1,3m Aluminium Double-Sided Stepladder special trade quality 2x6 rungs Height of stepladder 1,5m Aluminium Double-Sided Stepladder special trade quality 2x7 rungs Height of stepladder 1,7m Aluminium 2-section Ladder 2x8 rungs, Length extension ladder 2,5 - 4,2m Aluminium 2-section Ladder 2x12 rungs, Length extension ladder 3,6 - 6,1m Aluminium 2-section Ladder 2x15 rungs, Length extension ladder 4,5 - 7,5m Aluminium 2-section Ladder 2x9 rungs, Length extension ladder 2,8 - 4,5m Single Aluminium Ladder 6 rungs, Length of ladder 1,9m Single Aluminium Ladder 8 rungs, Length of ladder 2,5m Single Aluminium Ladder 10 rungs, Length of ladder 3,1m Single Aluminium Ladder 12 rungs, Length of ladder 3,1m Single Aluminium Ladder 15 rungs, Length of ladder 4,5m Single Aluminium Ladder 18 rungs, Length of ladder 5,3m Multi-purpose 3-section Aluminium Ladder 3x6 rungs, Length extension ladder 2 - 4,2m Height of stepladder 1,9 - 2,9m Multi-purpose 3-section Aluminium Ladder 3x8 rungs, Length extension ladder 2,5 - 5,6m Height of stepladder 2,4 - 3,7m Multi-purpose 3-section Aluminium Ladder 3x10 rungs, Length extension ladder 3,1 - 7,3m Height of stepladder 3 - 4,8m Multi-purpose 3-section Aluminium Ladder 3x12 rungs, Length extension ladder 3,7 - 8,7m Height of stepladder 3,5 - 5,9m Brenette 6-Hinge Aluminium Multi-purpose Ladder 12 rungs, Height of stepladder 1,8m Length of ladder 3,6m Brenette 6-Hinge Aluminium Multi-purpose Ladder 16 rungs, Height of stepladder 2,3m Length of ladder 4,8m Telescopic Aluminium Ladder 4x4 rungs, Height of stepladder max.2,1m Length of ladder max.4,2m Telescopic Aluminium Ladder 4x5 rungs, Height of stepladder max.2,6m Length of ladder max.5,3m Multi-purpose 3-section Ladder Premium 3x8 rungs, Length extension ladder 2,5 - 5,3m Height of stepladder 2,4 - 3,8m Multi-purpose 3-section Ladder Premium 3x10 rungs, Length extension ladder 3,1 - 7,3m Height of stepladder 3 - 4,8m Multi-purpose 3-section Ladder Premium 3x12 rungs, Length extension ladder 3,7 - 8,7m Height of stepladder 3,5 - 5,9m