Tv components – Dynex DX-L321-10A User Manual
Page 8
4
TV components
3 Align the base with the bottom of the TV, then secure the base to
the TV with the three M4 x L10mm screws provided.
4 Set your TV upright on a stable surface.
Removing the stand
To remove the stand from the stand column:
1 Lay your TV face down on a table or bench. Make sure that you
put down a soft cushion or cloth so that your TV is not scratched).
2 Remove the three M4 x L10 mm screws securing the base to the
TV, then remove the base.
Installing a wall-mount bracket
If you want to attach the TV to a wall-mount bracket (not provided), you
should first remove the stand pedestal if it is pre-attached (see above).
To attach your TV to a wall-mount bracket:
Warning: These servicing instructions are for use by qualified service
personnel only. To reduce the risk of hazards, do not perform any
servicing other than that contained in the operating instructions
unless you are qualified to do so.
• Secure the wall-mount bracket to the back of your TV using the
four screws provided with the bracket.
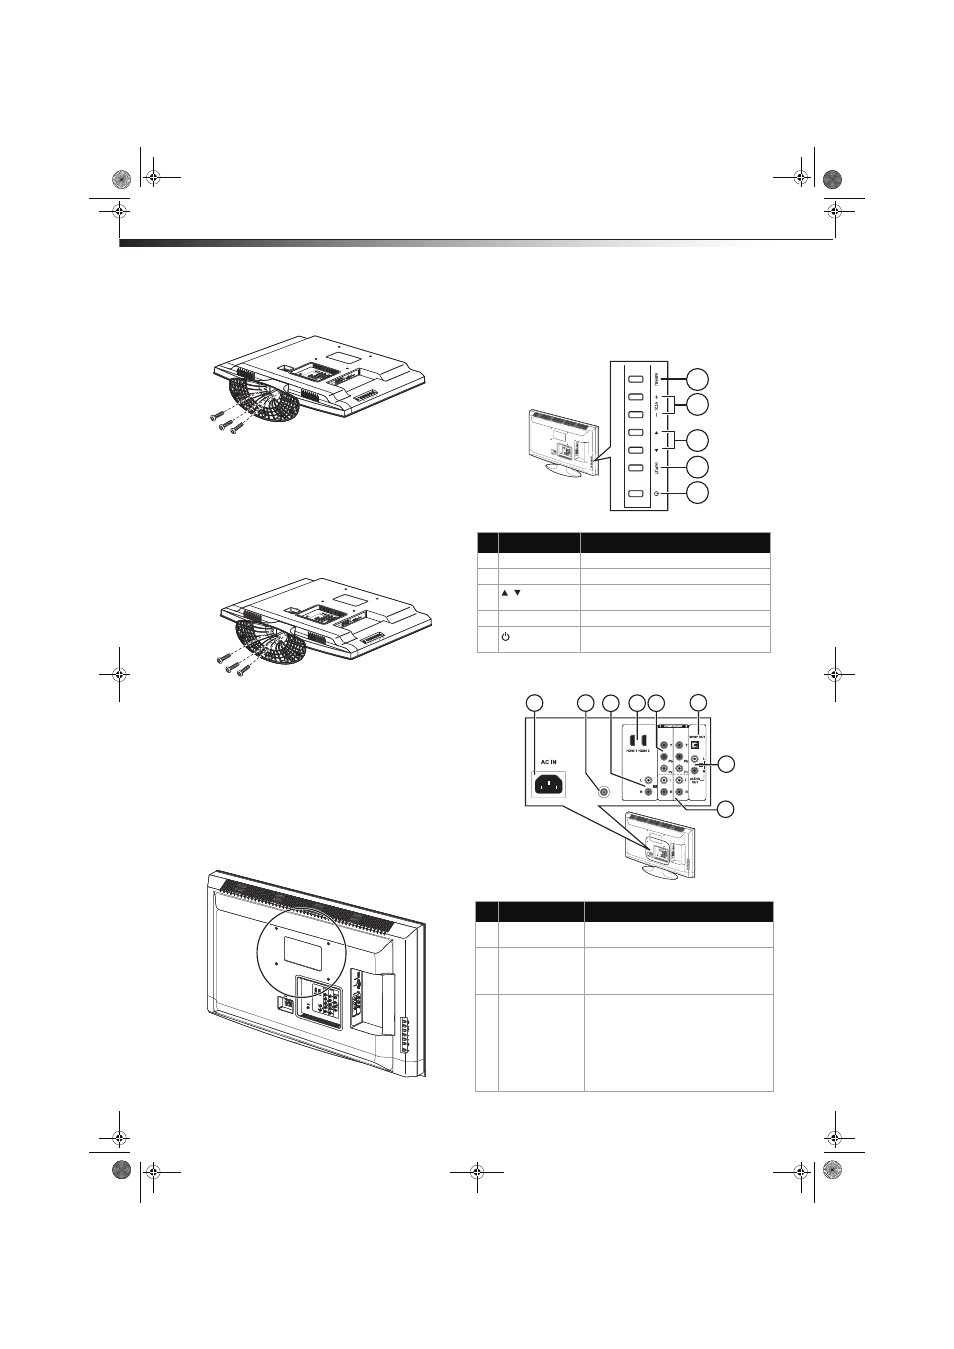
TV components
Side controls
Back connections
#
Component
Description
1
MENU
Press to open the on-screen menu.
2
VOL+/VOL–
Press to increase or decrease the volume.
3
/
Press to go to the next or previous channel
in the channel list.
4
INPUT
Press to select the video input source.
5
(Power) button Press to turn on your TV. Press again to put
your TV in standby mode.
##
Component
Description
1
AC in
Connect the AC power cord to this
connector.
2
ANT/CABLE IN jack Connect an antenna, cable TV, or a satellite
box to this jack. For more information, see
“Connecting an antenna, cable TV, or
satellite TV box” on page 7.
3
HDMI/DVI Audio in
jacks
Connect audio cables (L and R) from an
external audio source, such as a DVD player
with HDMI/DVI connections, to these jacks.
Note: HDMI devices do not require
separate audio connections since the audio
is carried in the HDMI cable, however if you
are using an HDMI-to-DVI converter cable
you will require separate audio
connections.
1
2
5
3
4
1
2 3 4 5
6
7
8
ANT/CABLE IN
DX-L321-10A_09-0407_MAN_ENG_V3.book Page 4 Wednesday, May 13, 2009 11:38 AM