Mini 2012 Coupe Roadster Convertible User Manual
Page 234
Replacing components
MOBILITY
233
Light-emitting diodes LEDs
Light-emitting diodes installed behind translu-
cent lenses serve as the light sources for many of
the controls and displays in your vehicle. These
light-emitting diodes are related to conven-
tional laser diodes, and legislation defines them
as Class 1 light-emitting diodes.
Do not remove the covers or expose the
eyes directly to the unfiltered light source
for several hours; otherwise, this could cause
irritation of the retina.
<
Headlamp glass lens
In cool or humid weather, condensation may
occur on the interiors of the headlamps. The
condensation disappears a short time after the
light is switched on. The headlamps do not need
to be changed.
Do not remove the condensation from head-
lamps, despite driving with lights on, and if
condensation increases, e.g., because of water
droplets, have this checked by your MINI dealer.
Xenon lamps
The service life of these bulbs is very long and
the probability of failure very low, provided that
they are not switched on and off an excessive
number of times. If a xenon lamp fails neverthe-
less, switch on the fog lamps and continue the
journey with great care, provided that local leg-
islation does not prohibit this.
Work on the xenon lighting system,
including lamp replacement, is only to be
carried out only by your MINI dealer. Due to high
voltage, there is a risk of fatal injury if work on
the xenon lamps is carried out improperly.
<
Halogen low beams and high beams
H13 bulb, 60/5 watts
The H13 bulb is pressurized. Therefore,
wear safety glasses and protective gloves.
Otherwise, there is a risk of injury if the bulb is
damaged.
<
Be careful when installing the cover;
otherwise, leaks could occur and cause
damage to the headlamp system.
<
Accessing the lamp from the engine
compartment
The low-beam/high-beam bulb can be changed
from the engine compartment.
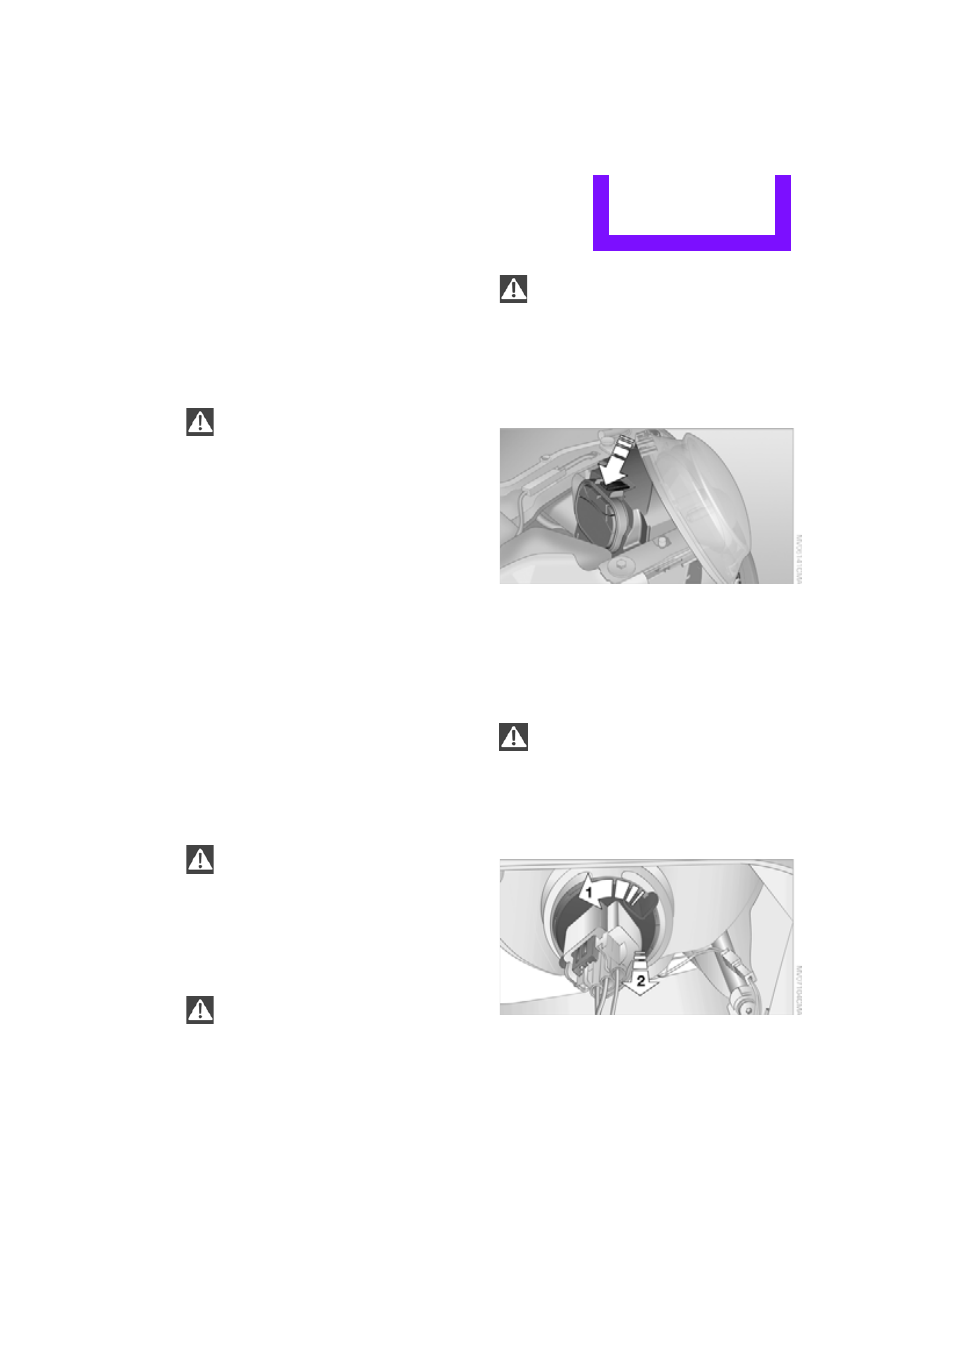
Removing the cover:
1.
Press the tab.
2.
Flip open the cover and take it out of the
holder.
Follow the same steps in reverse order to
reattach the cover.
Be careful when installing the cover;
otherwise, leaks could occur and cause
damage to the headlamp system.
<
Replacing the bulb
1.
Turn the lamp counterclockwise, arrow 1,
and remove it, arrow 2.
Online Edition for Part no. 01 40 2 904 077 - © 03/12 BMW AG