Installation – Lenco CS-351 BT User Manual
Page 6
5
INSTALLATION
INSTALLATION
INSTALLATION
INSTALLATION
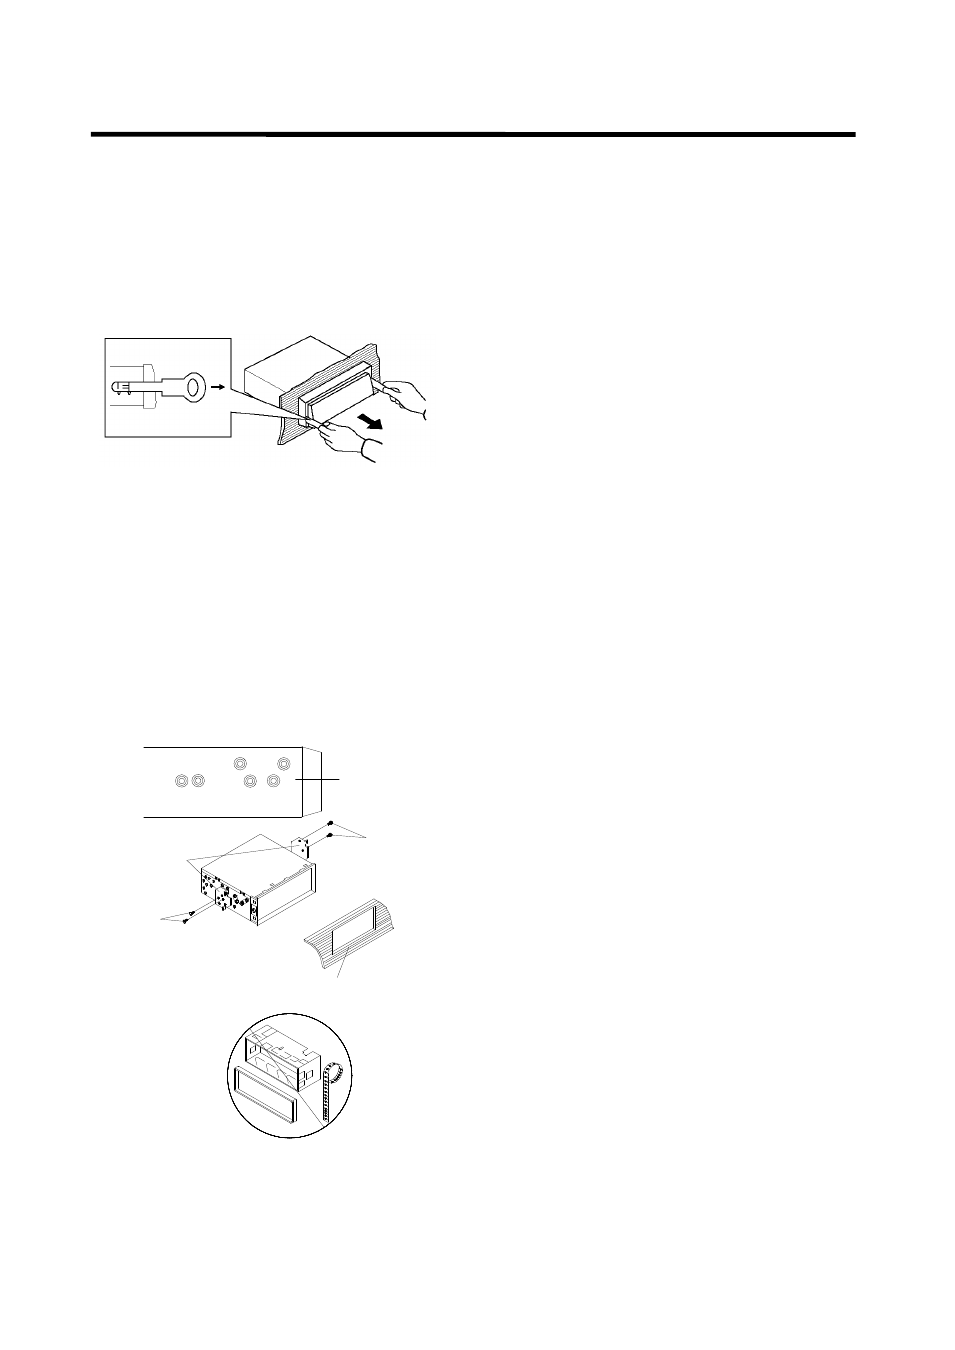
4. Lift the top of the outer trim ring then pull it
out to remove it.
5. Insert both of the supplied keys into the
slots at the middle left and right sides of the
unit, then pull the unit out of the dashboard.
DIN
DIN
DIN
DIN REAR-MOUNT
REAR-MOUNT
REAR-MOUNT
REAR-MOUNT (Method
(Method
(Method
(Method B)
B)
B)
B)
If your vehicle is a Nissan, Toyota, follow these
mounting instructions.
Use the screw holes marked T (Toyota), N
(Nissan) located on both sides of the unit to
fasten the unit to the factory radio mounting
brackets supplied with your vehicle.
Dashboard or Console
Screw
Factory Radio
Mounting Bracket
Side View showing
Screw Holes marked
T, N
Screw
To fasten the unit to the factory radio mounting
brackets.
Align the screw holes on the bracket with the
screw holes on the unit, and then tighten the
screws (5x5mm) on each side.
Note: the outer trim ring, sleeve and the metal
strap are not used for method B installation.