Nexen FMBES-875 827343 User Manual
Page 9
FORM NO. L-20323-D-0300
5
BALL BEARINGS, COMPRESSION SPRINGS, WAVED SPRING, AND O-RING SEALS FMBES-CC
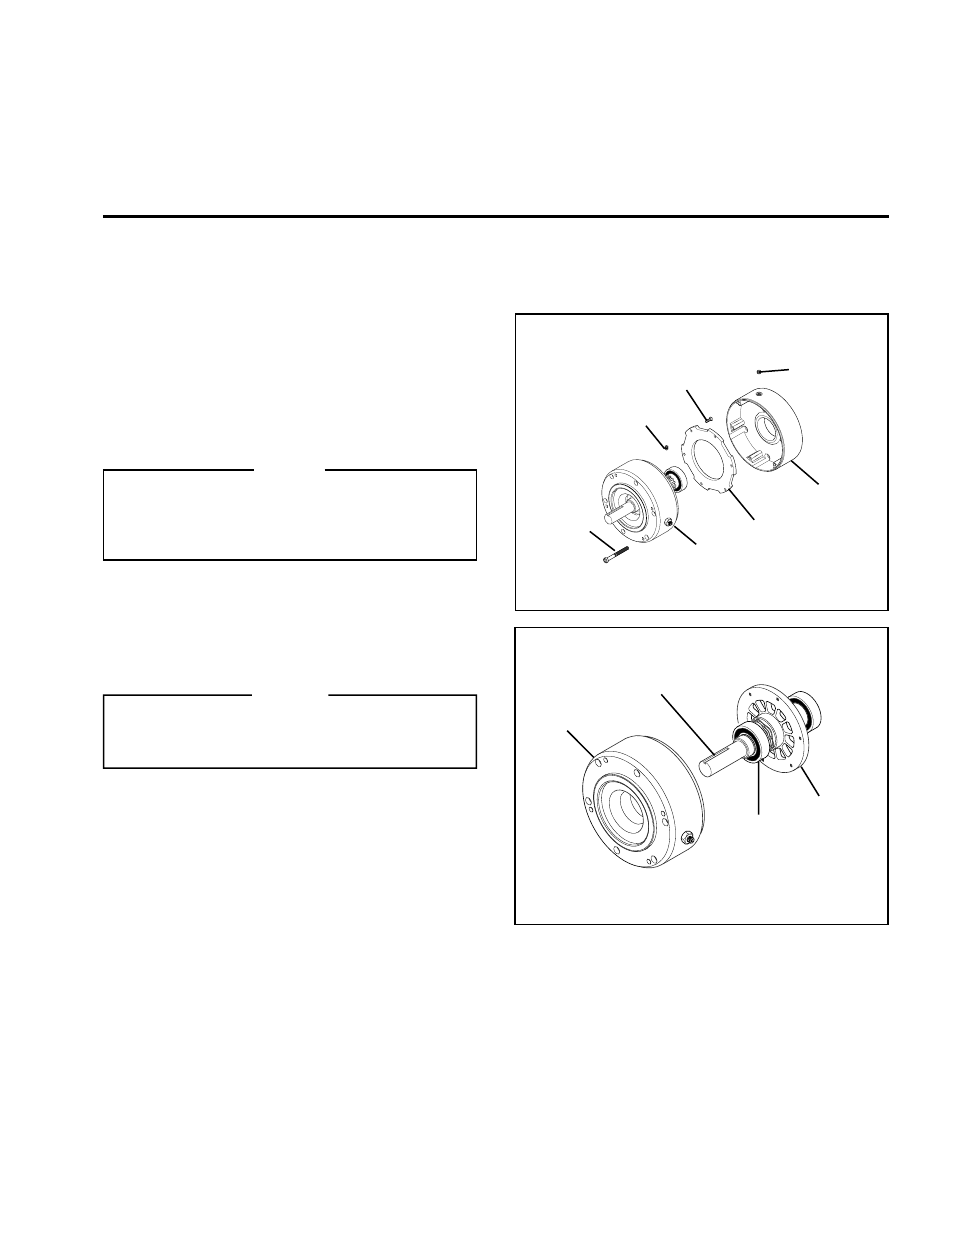
1.
Remove the six Socket Head Cap Screws (Item 11)
(See Figure 7).
2.
Remove the Pipe Plug (Item 30); then, loosen the Set
Screw (Item 29) (See Figure 7).
3.
Separate the two halves of the FMBES-CC (See
Figure 7).
CAUTION
The Disc Plate (Item 8) is under pressure from the
Compression Springs (Item 14). Alternately and evenly
remove the Socket Head Cap Screws (Item 10). Always
wear safety goggles when working with spring or tension
loaded fasteners or devices.
4.
Remove the six Socket Head Cap Screws (Item 10);
then, remove the Disc Plate (Item 8) from the Piston
(Item 5) (See Figure 7).
5.
Press the Shaft (Item 1), Ball Bearing (Item 9), and Rotor
(Item 2) from the Housing (Item 7) (See Figure 8).
WARNING
Special attention should be exercised when working
with retaining rings. Always wear safety goggles
when working with spring or tension loaded fasteners
or devices.
6.
Remove the Retaining Ring (Item 16) from the Shaft
(Item 1) (See Figure 9).
7.
Press both old Ball Bearings (Item 9) off the Shaft (Item
1) (See Figure 9).
8.
Remove the Retaining Ring (Item 15) from the Shaft
(Item 1) (See Figure 9).
9.
Slide the Washer (Item 18) and Waved Spring (Item 17)
from the Shaft (Item 1); then, install the new Waved Spring
and reinstall the Washer (See Figure 9).
FIGURE 7
10
8
11
FIGURE 8
7
1
9
2
30
6
29
7
11. Secure the Disc Plate (Item 8) to the Piston (Item 5)
using the six Socket Head Cap Screws (Item 10); then,
alternately and evenly tighten the six Socket Head Cap
Screws (Item 10) to 40 In. Lbs. [4.5 N•m] torque (See
Figure 7).
12. Reinstall the FMBES-CC, referring to Steps 3 through 8
of INSTALLATION (See Page 1).