Top front, Operating instructions, Seasoning your smoker – Weston Outdoor Propane Vertical Smokers User Manual
Page 7: Adding water to your smoker, Adding wood/charcoal to your smoker, Wood flavor choices for your smoker
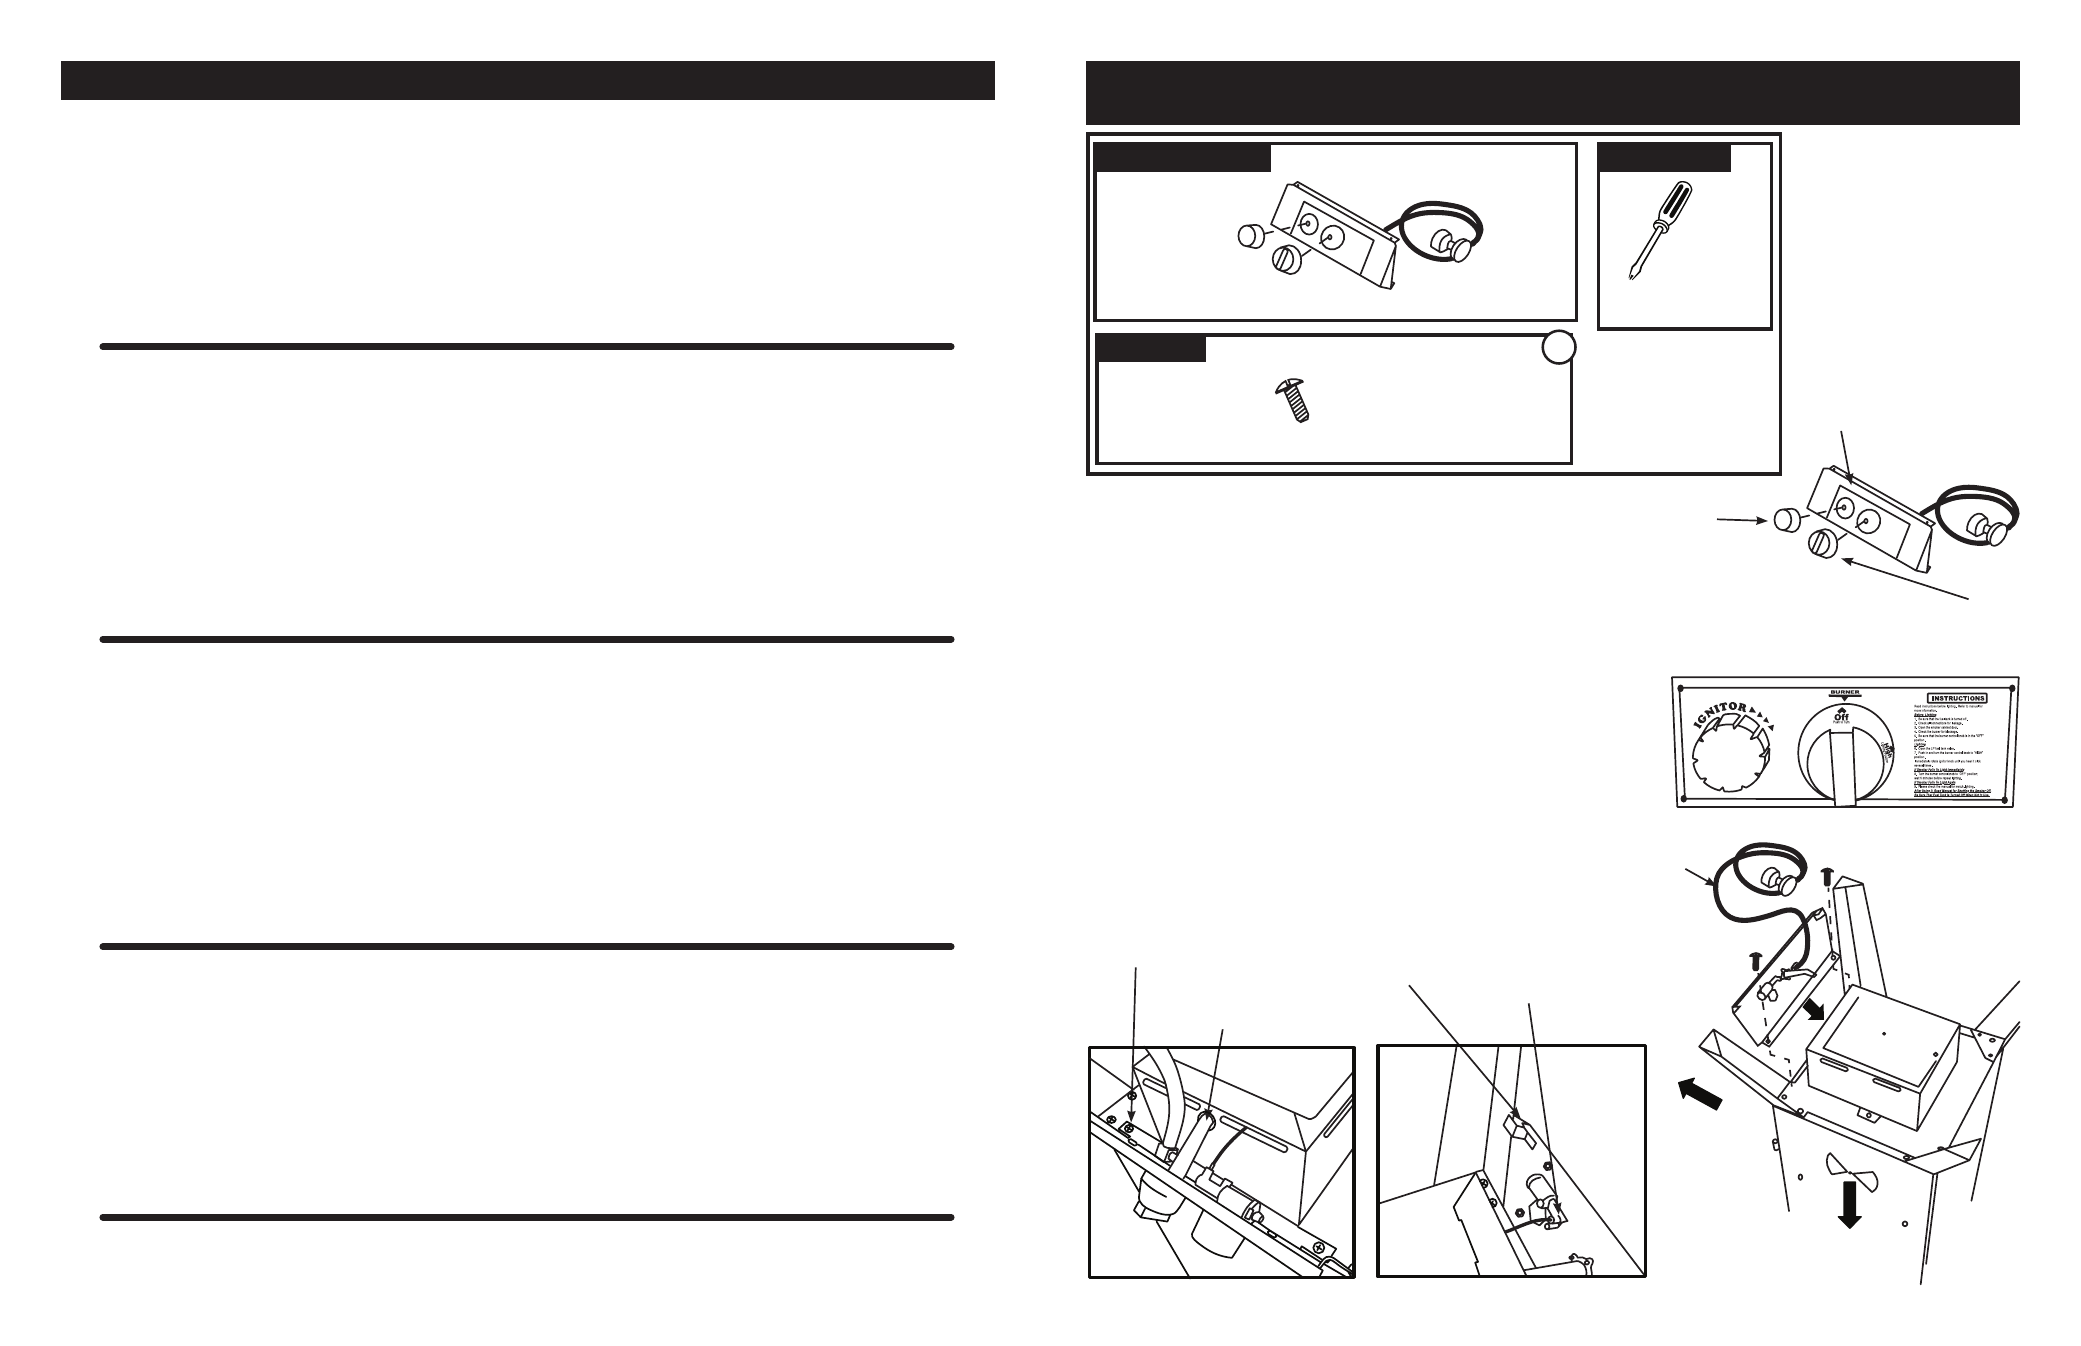
ASSEMBLY STEP 3
CONTROL PANEL / HVR SYSTEM / IGNITOR INSTALLATION
SEASONING YOUR SMOKER
Before you cook food in your
Smoker, it is important to “season” your Smoker. Seasoning seals the paint and interior of your Smoker to
enhance flavoring, durability, and overall performance. This is also referred to as the “break -in” Process.
.
To season your
Smoker, simply use it as you normally would, only do not cook any food. You will need to follow all of the operating
procedures in the next few sections of this manual.
.
Using your desired flavoring woods and marinades, burn your
Smoker at low temperature (around 175°F) for 45-60 Minutes. Let the
Smoker cool, and clean out the used water and wood.
.
Once the seasoning is complete, your
Smoker’s interior will have a durable, seasoned coating.
ADDING WATER TO YOUR SMOKER
.
To add water BEFORE cooking, simply remove the
Water Bowl and fill it with water up to 1” below the rim. Then replace the Water
Bowl to the bottom of the Rack.
.
To add water WHILE the
Smoker is hot, DO NOT pull the Water Bowl out beyond the Rack! The water and the Water Bowl will be
extremely HOT!
.
To make adding water easier and safer, use a clean watering can or jug with a long spout.
.
Line the
Water Bowl with aluminum foil before each use. This will make it easier to clean and extend the life of the Water Bowl.
ADDING WOOD/CHARCOAL TO YOUR SMOKER
.
To add wood chips BEFORE cooking, simply fill the
Wood Chip Box with your choice of flavoring hardwood chips. The amount and
type of wood you use is entirely up to you. One full box is typically enough for several hours of smoking. Once the
Wood Chip Box
is filled, place the
Wood Chip Box Lid on top of the Wood Chip Box and set the Wood Chip Box in the Smoker.
.
To add wood chips WHILE cooking, we recommend using tongs or long handled pliers to remove the
Wood Chip Box Lid and to
place the pieces into the
Wood Chip Box without removing it. IT IS NOT RECOMMENDED to remove the Wood Chip Box while
the
Smoker is in operation.
CAUTION: The Wood Chip Box and the Wood Chip Box Lid get very HOT! Avoid handling them while in use. ALWAYS wear
protective oven mitts when handling hot components!
WOOD FLAVOR CHOICES FOR YOUR SMOKER
Small wood chips work best inside the
Wood Chip Box. Use dry hardwoods such as hickory, pecan, apple, cherry, or mesquite. Most
fruit or nut tree woods produce excellent smoke flavoring. Do not use resinous woods such as pine or plywood. These usually produce
unpleasant flavoring. Let your taste be your guide – experiment with different types and quantities of wood chunks, chips, or sticks. You
can even mix woods.
To produce more smoke and to prevent fast burning, pre-soak the wood chips in a separate bowl of water for at least 20 minutes, or wrap
the chips in perforated aluminum foil. Most smoke flavoring occurs within the first hour of cooking. Adding wood chips after the first hour is
typically not necessary unless extra smoke flavoring is desired.
NOTE: To catch drippings that may come from the bottom of the Smoker, place a metal tray underneath.
OPERATING INSTRUCTIONS
-7-
-14-
Tools needed:
LOCATE THESE PARTS
TOOLS NEEDED
IGNITOR
KNOB
CONTROL
KNOB
CONTROL
PANEL
ASSEMBLY
1. Leave the
Cabinet positioned upside down.
2. Attach the
Ignitor Knob and the Control Knob to the Control
Panel Assembly.
FIGURE 5
Make sure the
Control Knob
properly seats on the keyed shaft.
FIGURE 6
3. Line up the
Control Panel.
FIGURE 7
4. The (Hose/Valve/Regulator)
HVR stem must be inserted into
the
Venturi.
FIGURE 8
WARNING!
Improper installation may
cause a fire outside of the Smoker!
5. When sliding the
Control Panel into place, make sure the tabs
capture the front
Legs.
FIGURE 9
6. Connect the
Ignitor wire to one of the prongs on the Ignitor.
FIGURE 9
7. Insert the 2 remaining
Bolts from Hardware Bag A through the
tabs on the
Control Panel and thread them into the mounting
holes.
FIGURE 8
8. Firmly tighten all of the
Bolts, including the loose Bolts
on the front
Legs.
FIGURE 5
FIGURE 7
HVR STEM
inserted into the
VENTURI.
REMAINING
BOLT
FIGURE 8
Be sure the tab fits
around both sides
of the LEG.
IGNITOR WIRE
connects to
the IGNITOR.
FIGURE 9
A
HARDWARE
HARDWARE BAG
NOTE:
Hardware Bag
A includes 12 Bolts.
You will need 2 bolts
for this step. The other
10 bolts were used in
Step 2.
CONTROL
PANEL
ASSEMBLY
IGNITOR
KNOB
CONTROL
KNOB
VENTURI
HOSE
PHILLIPS
HEAD
SCREWDRIVER
TOP
FRONT
FIGURE 6
HVR
ASSEMBLY
2 BOLTS