Vortech 1964-1967 Pontiac GTO Carbureted User Manual
Page 19
11
9. CARBURETOR ENCLOSURE INSTALLATION
CON'T
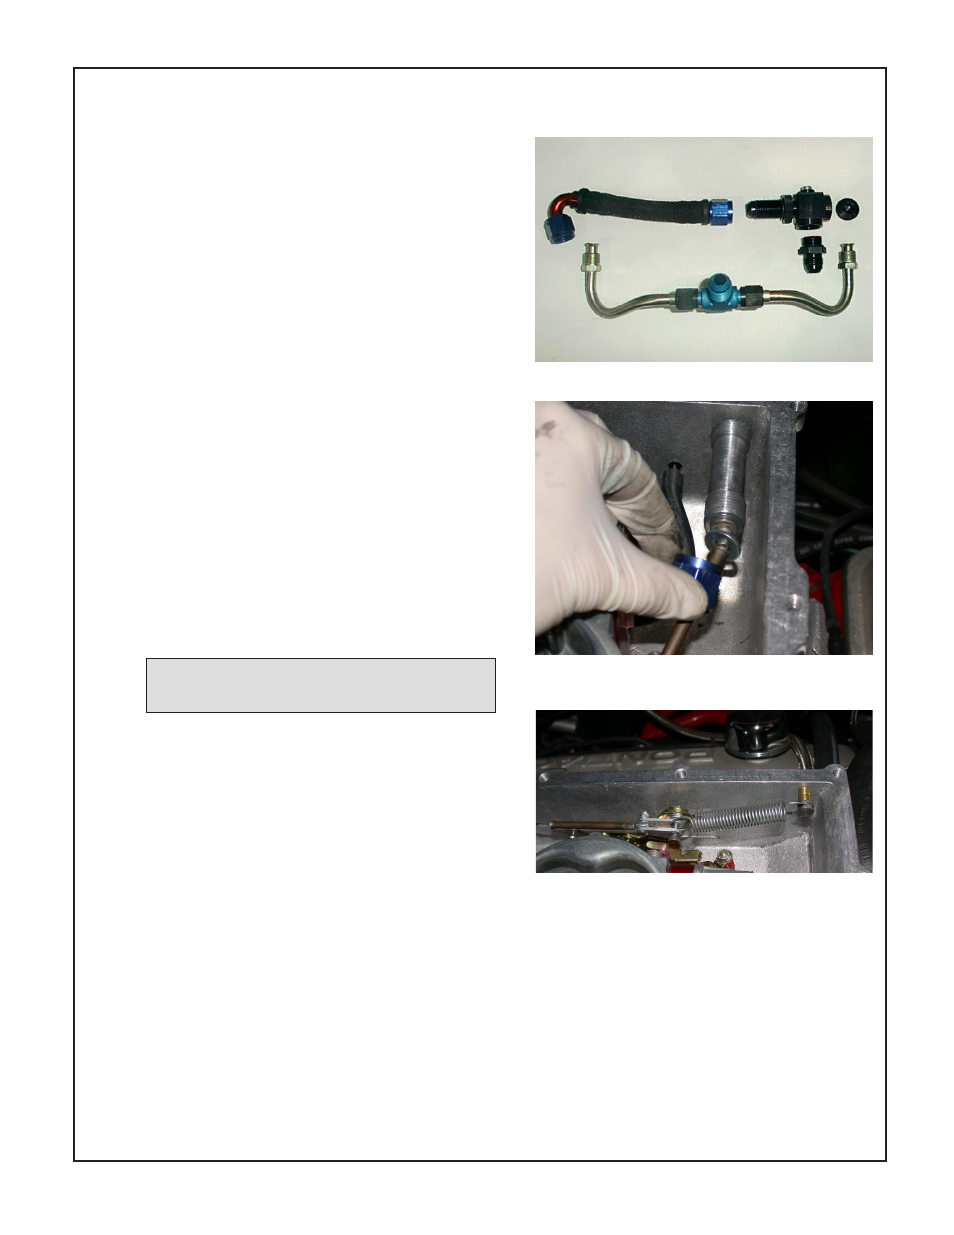
I.
Install the fuel lines on the carburetor as
follows:
1. Install the –8 bulkhead nut and O-ring on
the bulkhead fitting.
2. Thread the bulkhead fitting into the front
hole in the carburetor enclosure.
3. Loosely install fuel lines onto the
carburetor float bowls (some fuel lines
come with additional fittings).
4. Connect the free end of each fuel line to
the –8/-6/-6 TEE.
5. Install the –8 straight hose barb fitting on
the inside of the bulkhead fitting. Install the
–8 120º fitting on top of the TEE.
6. Measure and cut the supplied pushlock
hose so that it will fit well between the two
installed barb fittings.
7. Remove the barbed fittings, coat the
barbs with grease, and fully insert the
barbed fitting in the hose.
8. Adjust the TEE so that it does not
interfere with installation of the enclosure
cover. Install the fuel hose assembly and
tighten all of the fuel line connections.
J.
Connect the fuel supply from the fuel pump
to the bulkhead fitting. Plug the unused
holes in the bulkhead fitting with a –8 and
1/8” NPT plug
K.
Insert the OEM throttle cable through the
bulkhead fitting mounted through the rear
of the carburetor enclosure. Install the split
washer behind the rib on the end of the
throttle cable. Install the threaded cap over
the washer and cable assembly and hand
tighten.
L.
Install a 10-24 x ¾” cap screw through the
two supplied brackets and sandwich the
end of the throttle cable between the plates
and two washers as shown. Secure with
the nylock nut so that the brackets are free
to rotate.
M.
Install the throttle nut through the large
hole on the outside of the throttle arm. Use
the supplied shoulder bolt installed through
the brackets on the end of the throttle
cable and then through a 10-24 washer and
the #10 fender washer and into the throttle
nut.
R.
Install the throttle return spring bolt through
the two small spacers and into the inside
front of the enclosure as shown. Install the
throttle return spring.
Fig. 9-a
Fig. 9-b
Fig. 9-c
Note: All -8 fittings must have an
O-ring installed before using.