Iii. method 2: root certificate authority, Continued) – SurgeX SX-AX20 User Manual
Page 6
SX-AX15 (20) Certificate
Utility User Manual
Page 6
III. Method 2: Root Certificate Authority
(continued)
Step 2: Install the Root Authority Certificate into one or more PCs
Using Internet Explorer (continued)
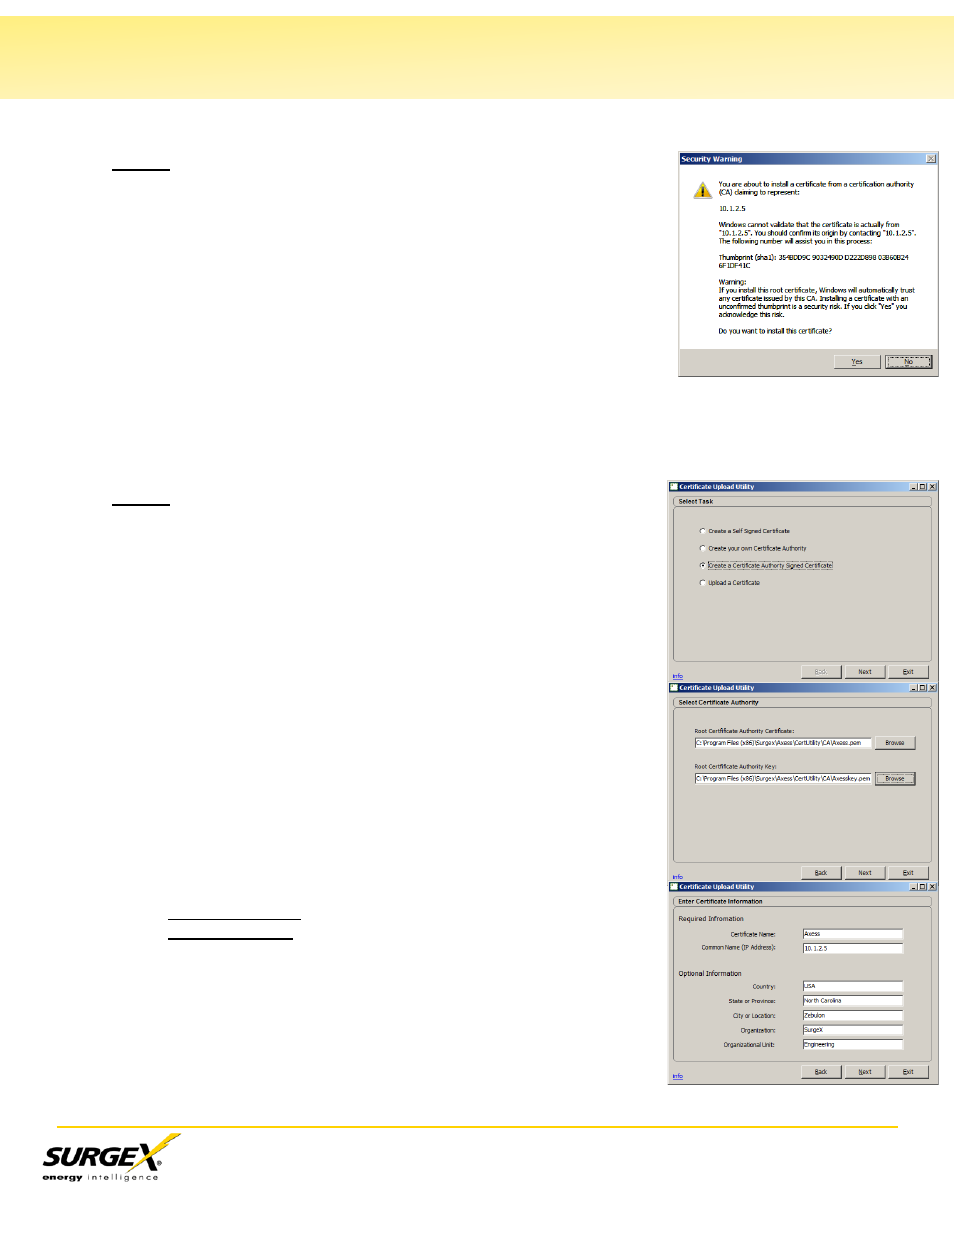
g. Review and accept the Security Warning. Click “Yes” to install
the certificate permanently.
Repeat Step 2 for all PCs that need to communicate securely with the
Axess units. Copy the three files created in this step to each of the PCs,
and install the Root Authority Certificate in each.
Step 3: Create Certificates for each Axess using the Root
Authority Certificate.
a. Open the CU.
b. Click on Create a Certificate Authority Signed Certificate.
c. Click Next.
d. Enter or Browse to the Root Certificate Authority file location
(default is
matching the name of the Certificate Authority created above.
e. Enter or browse to the key file (*key.pem) matching the name of
the Certificate Authority created above.
f. Click Next.
g. Enter the Required Information about the Certificate in the fields
as shown.
Certificate Name: This is the filename for the certificate.
Common Name: Usually the IP address of the Axess that will
use the certificate.
h. Enter the Optional Information if desired.