Ii. method 1: self signed certificates – SurgeX SX-AX20 User Manual
Page 2
SX-AX15 (20) Certificate
Utility User Manual
Page 2
II. Method 1: Self Signed Certificates
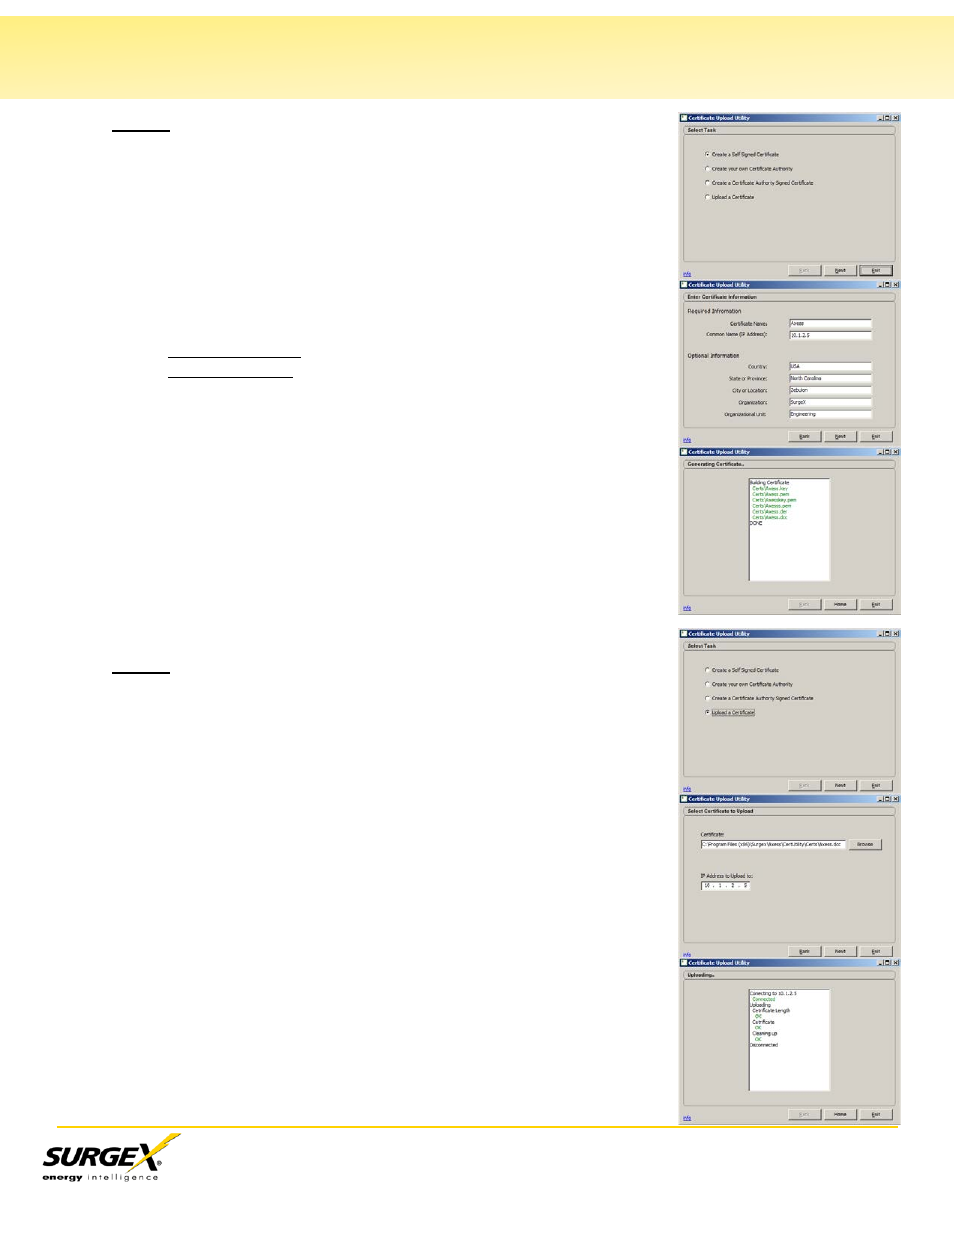
Step 1: Create a Self Signed Certificate
a. Open the CU.
b. Click on Create a Self Signed Certificate.
c. Click Next.
d. Enter the Required Information about the Self Signed Certificate
in the fields as shown.
Certificate Name: This is the filename for the certificate.
Common Name: Usually the IP address of the Axess that that
will use the certificate.
e. Enter the Optional Information if desired
f. Click Next when done.
g. The CU will generate the required files and store them in the
h. Click Home when Done.
Step 2: Upload the Certificate to the Axess
a. Open the CU.
b. Click on Upload a Certificate.
c. Click Next.
d. Enter or Browse to the location of the certificate files. The default
location is
e. Enter the IP address of the Axess to upload the certificate to.
f. Click on Next.
g. The certificate upload progress is displayed. When complete,
Click Home.
h. After receiving the certificate, the Axess needs to be rebooted via
the CLI (Telnet, Serial) or the front panel switch. This will not
affect the status of the outlets.