StorCase Technology InfoStation 12-Bay 4U Ultra320/SATA User Manual
Page 14
InfoStation 12-Bay RAID Installation Guide - B00
StorCase Technology, Inc.
Installation
9
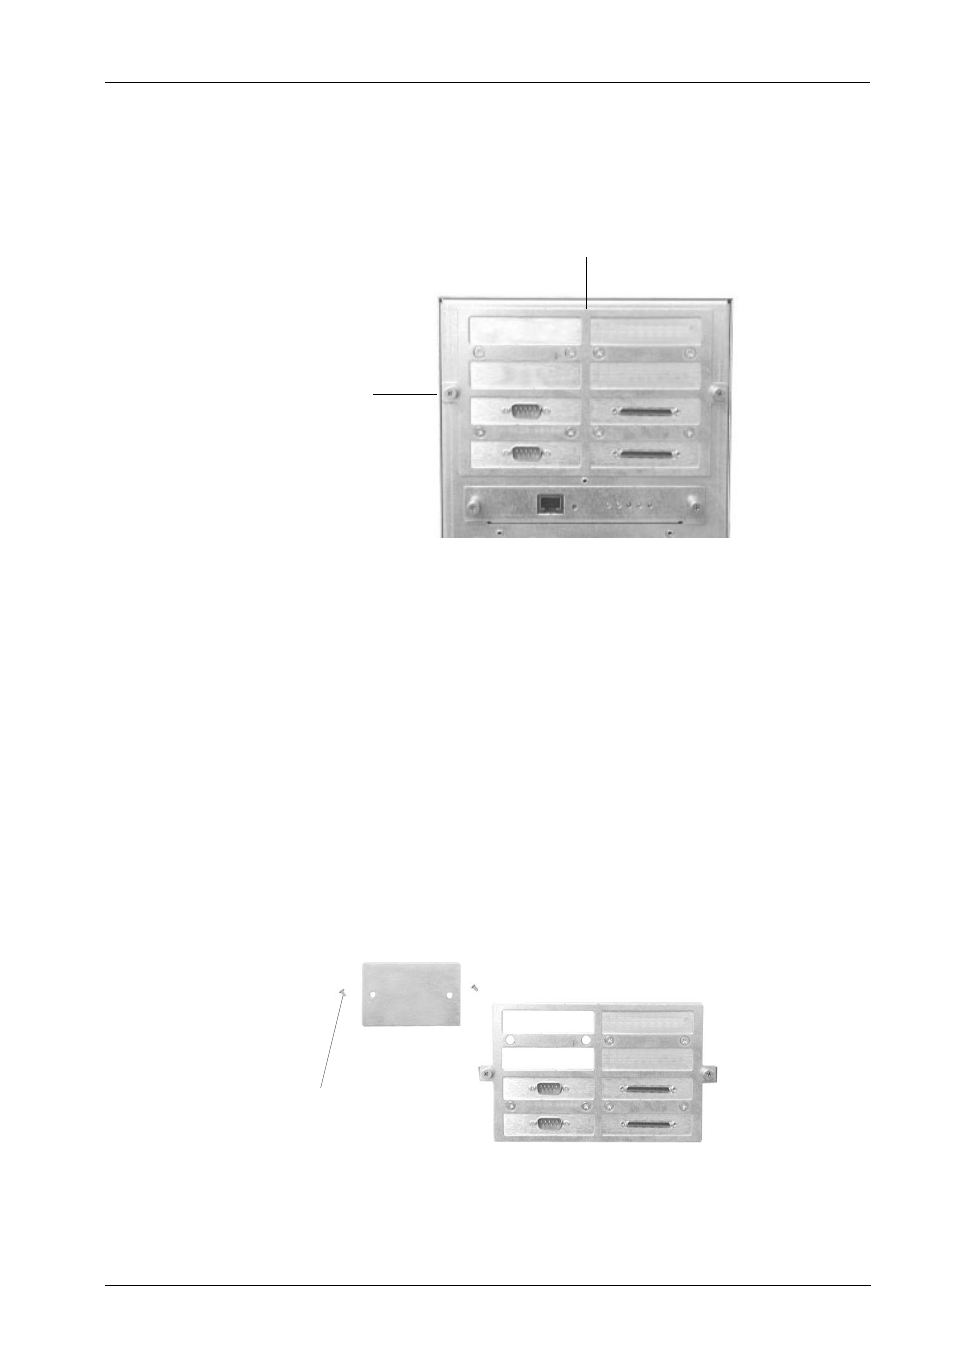
7.Carefully remove the I/O Panel (located in the rear of the chassis) by loosening the
two (2) Captive Screws (Figure 7). The attached cables will provide enough slack
for the I/O Panel to be removed a few inches from the chassis.
8.Once I/O panel is removed, loosen and remove the two (2) #6-32 Phiilips Flat Hd.
screws securing the I/O Blank Plate to the I/O Panel (Figure 8). Remove the ap-
propriate I/O Blank Plate necessary to accommodate your particular SCSI cabling
configuration. Save the screws! They will be used in Step 10.
NOTE:
Blank plate (provided) must be installed if module slot is left empty. Installa-
tion of the blank plate is necessary for proper cooling inside chassis.
Figure 8: Removing the I/O Blank Plate from the I/O Panel
(SCSI-to-SATA version shown)
I/O Panel
Captive Screw
(2 Total)
I/O Blank
Plate
#6-32 Phillips Screw
(2 per Plate)
I/O Panel
Figure 7: Removing the I/O Panel
(SCSI-to-SATA version shown)