Installing the drive into the bracket – StorCase Technology DS351 User Manual
Page 16
8
Installation
StorCase Technology, Inc.
DS351 User's Guide - Rev. B02
Installing the Drive into the Bracket
NOTE:
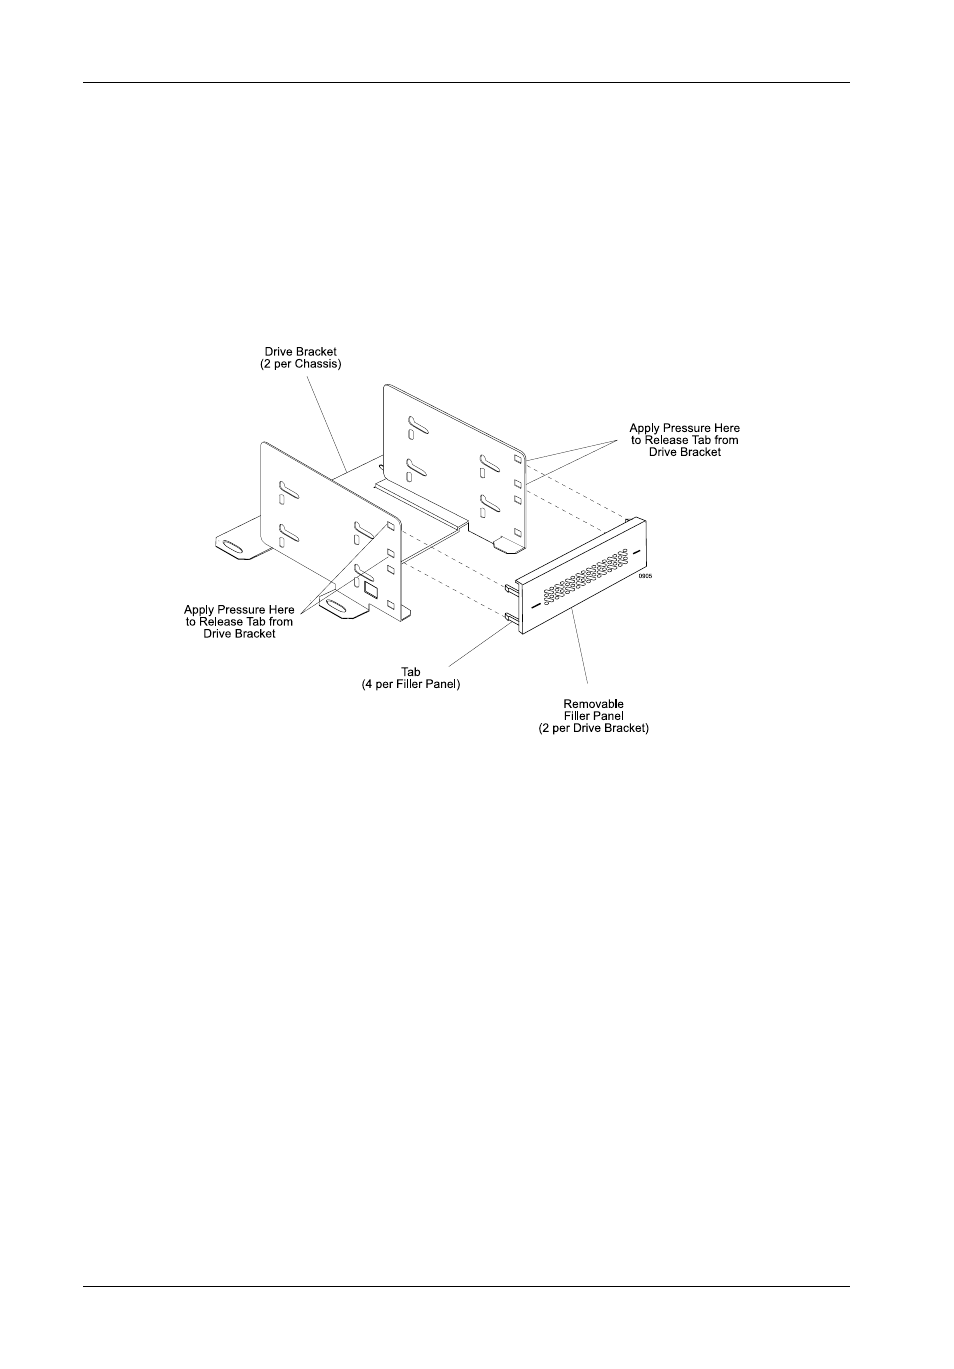
Removal of the filler panel(s) is required in order to install the drive(s) into the drive
bracket.
1.
Carefully remove filler panel(s) by applying pressure to the tabs with the tip of a flat
blade screwdriver (Figure 7).
2.
Install the drive(s) into the drive bracket. Drive(s) must be side-mounted to the drive
brackets using either M3 or #6-32 Phillips screws (Figure 8).
NOTE:
Do not fully tighten the screws that fasten removable media devices into the drive
bracket at this point. The screws should be tightened after the drive bezel clearance
has been checked with the chassis bezel.
3.
After the drive(s) have been installed into the drive bracket, carefully insert the
bracket back into the chassis (Figure 9).
NOTE:
Make any adjustments necessary to the drive(s) to ensure a good fit between the
drive bezel and the chassis bezel at this point. Tighten screws after necessary
adjustments have been made.
4.
Secure the drive/bracket assembly to the chassis with four (4) screws (Figure 9).
Figure 7: Removing the Filler Panel