Sioux Tools SIOUX 1557 User Manual
Page 5
5
successfully disabled the drill until the unit’s
vacuum pad is securely locked to the working
surface.
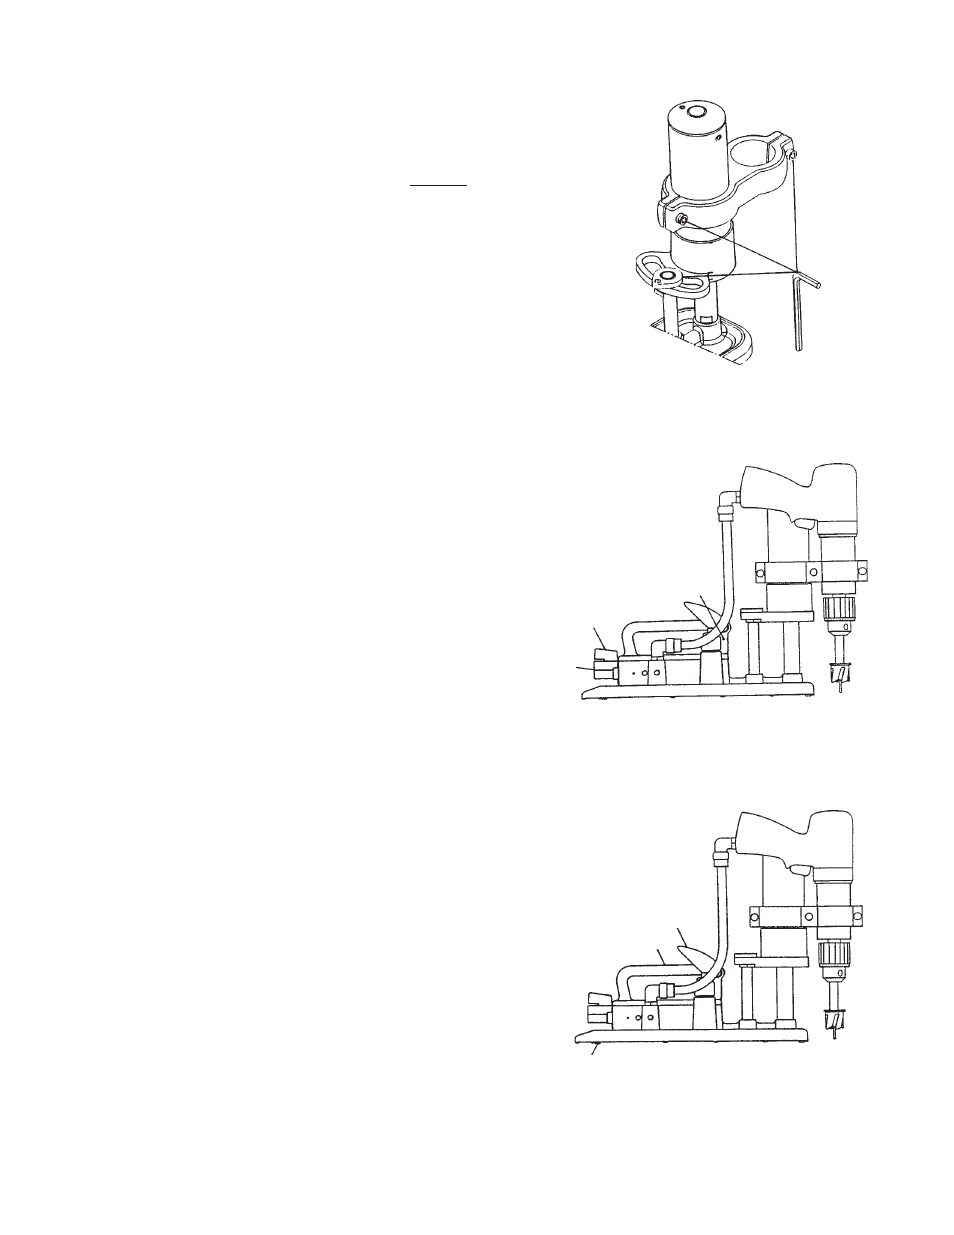
10. To accurately drill in the desired location, press
the drill feed lever with your left thumb until the
drill has reached full travel, as shown in figure 6.
Place center of cutting point in the center punch
mark. Hold the vacuum pad at an equal distance
or level with the working surface and slowly
lighten the left thumb pressure on the drill feed
lever until the vacuum pad rests evenly on the
working surface. Firmly press the vacuum pad
into the working surface to ensure vacuum seal
has taken effect.
11. 1557 is now ready to work for you. Simply turn on
the air drill and slowly press the drill feed lever
while ensuring that the center of the cutting tool
locates in the center punch mark. Now proceed to
cut your hole.
12. If drill slows or stops, then slowly lighten the left
thumb pressure on the drill feed lever, until the
drill reaches normal operating speeds. This is the
optimum drilling force. The drill feed lever controls
the amount of drilling force that the air cylinder
applies to the drill. The more you push A down on
the drill feed lever, the more drilling force you
indirectly give to the drill. When the drill feed
adjustment is screwed down (clockwise) fully,
your thumb pressure has the ability to produce up
to 155 lb (70 kilograms) of direct drilling force. In
many cases, 155 lb (70 kilograms) is too great for
obtaining the optimum drilling force. The drill feed
adjustment enables you to reduce the drilling
force from 155 lb (70 kilograms) down to 0 by
screwing the drill feed adjustment
counterclockwise.
13. Use cutting lubricant as required to prolong
cutting tool life and improve your cutting time.
14. When hole is complete, slowly lift thumb off the
drill feed lever until the cutter is clear of the hole
and then stop the drill.
15. Press release button with left index finger to
release 1557 from the working surface.
16. Turn air supply valve to off position to conserve
air supply.
Figure 4
Figure 5
1/4" NPT
Inlet
Air Supply
Control Vavle
Exhaust Hole
Figure 6
Vacuum Pad
Drill Feed Lever
Handle