Mounting the svmx, Connecting the svmx – RODE Microphones Stereo VideoMic X User Manual
Page 9
16
17
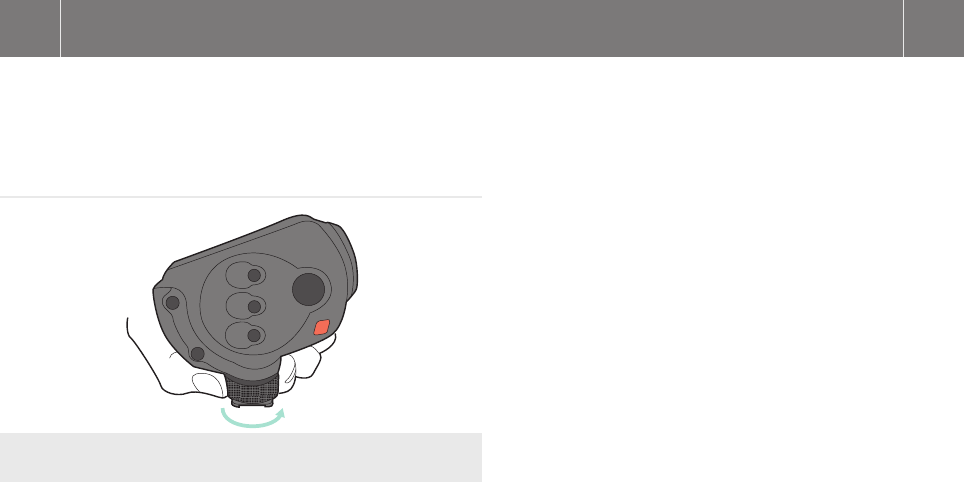
Mounting the SVMX
Before sliding the camera shoe into place, loosen the fastening ring
by turning anti-clockwise until it is loose enough to fit easily into
your camera’s shoe mount. Once the shoe is in place, gently tighten
by turning the fastening ring clockwise until the Stereo VideoMic X
is seated firmly in place.
Diagram 5 - Twist the fastening ring anti-clockwise to loosen
The Stereo VideoMic X delivers a mic-level signal to the video camera
via the stereo minijack audio port on the underside of the microphone
body, or via the Mini XLR output connections on the right hand side of the
Stereo VideoMic X body.
Connecting via Minijack: To connect to your camera via the 3.5mm
minijack connection, first connect the red cable supplied with your
microphone to the socket on the underside of the Stereo VideoMic X.
The minijack should be connected to the camera via the camera’s
“audio-in” socket – refer to your video camera user manual for the
location of the socket on your camera model. Now that you have the
Stereo VideoMic X securely fastened to your camera and the audio output
lead connected, you can switch the microphone on and start recording.
Connecting via Mini XLR: To connect the Stereo VideoMic X to a
professional recording device via the mini XLR connectors, lift the
protective cover on the side of the microphone to expose the mini XLR
jacks. Ensuring that the levels on your recording device are set to zero,
connect a mini XLR cable (available separately) to each of the two jacks
on the microphone, followed by the corresponding ends on your recording
device. Power on the microphone and then increase the recording levels
of your recording device as required.
Connecting the SVMX