Loading paper cont, Turning the power on, Selecting the display language – Pitney Bowes DP50S Color Printer User Manual
Page 3: Network connection, Test printing
Page 3 of 4
Quick Installation Guide
Impressia Digital Multi-Media Press
Next Sheet
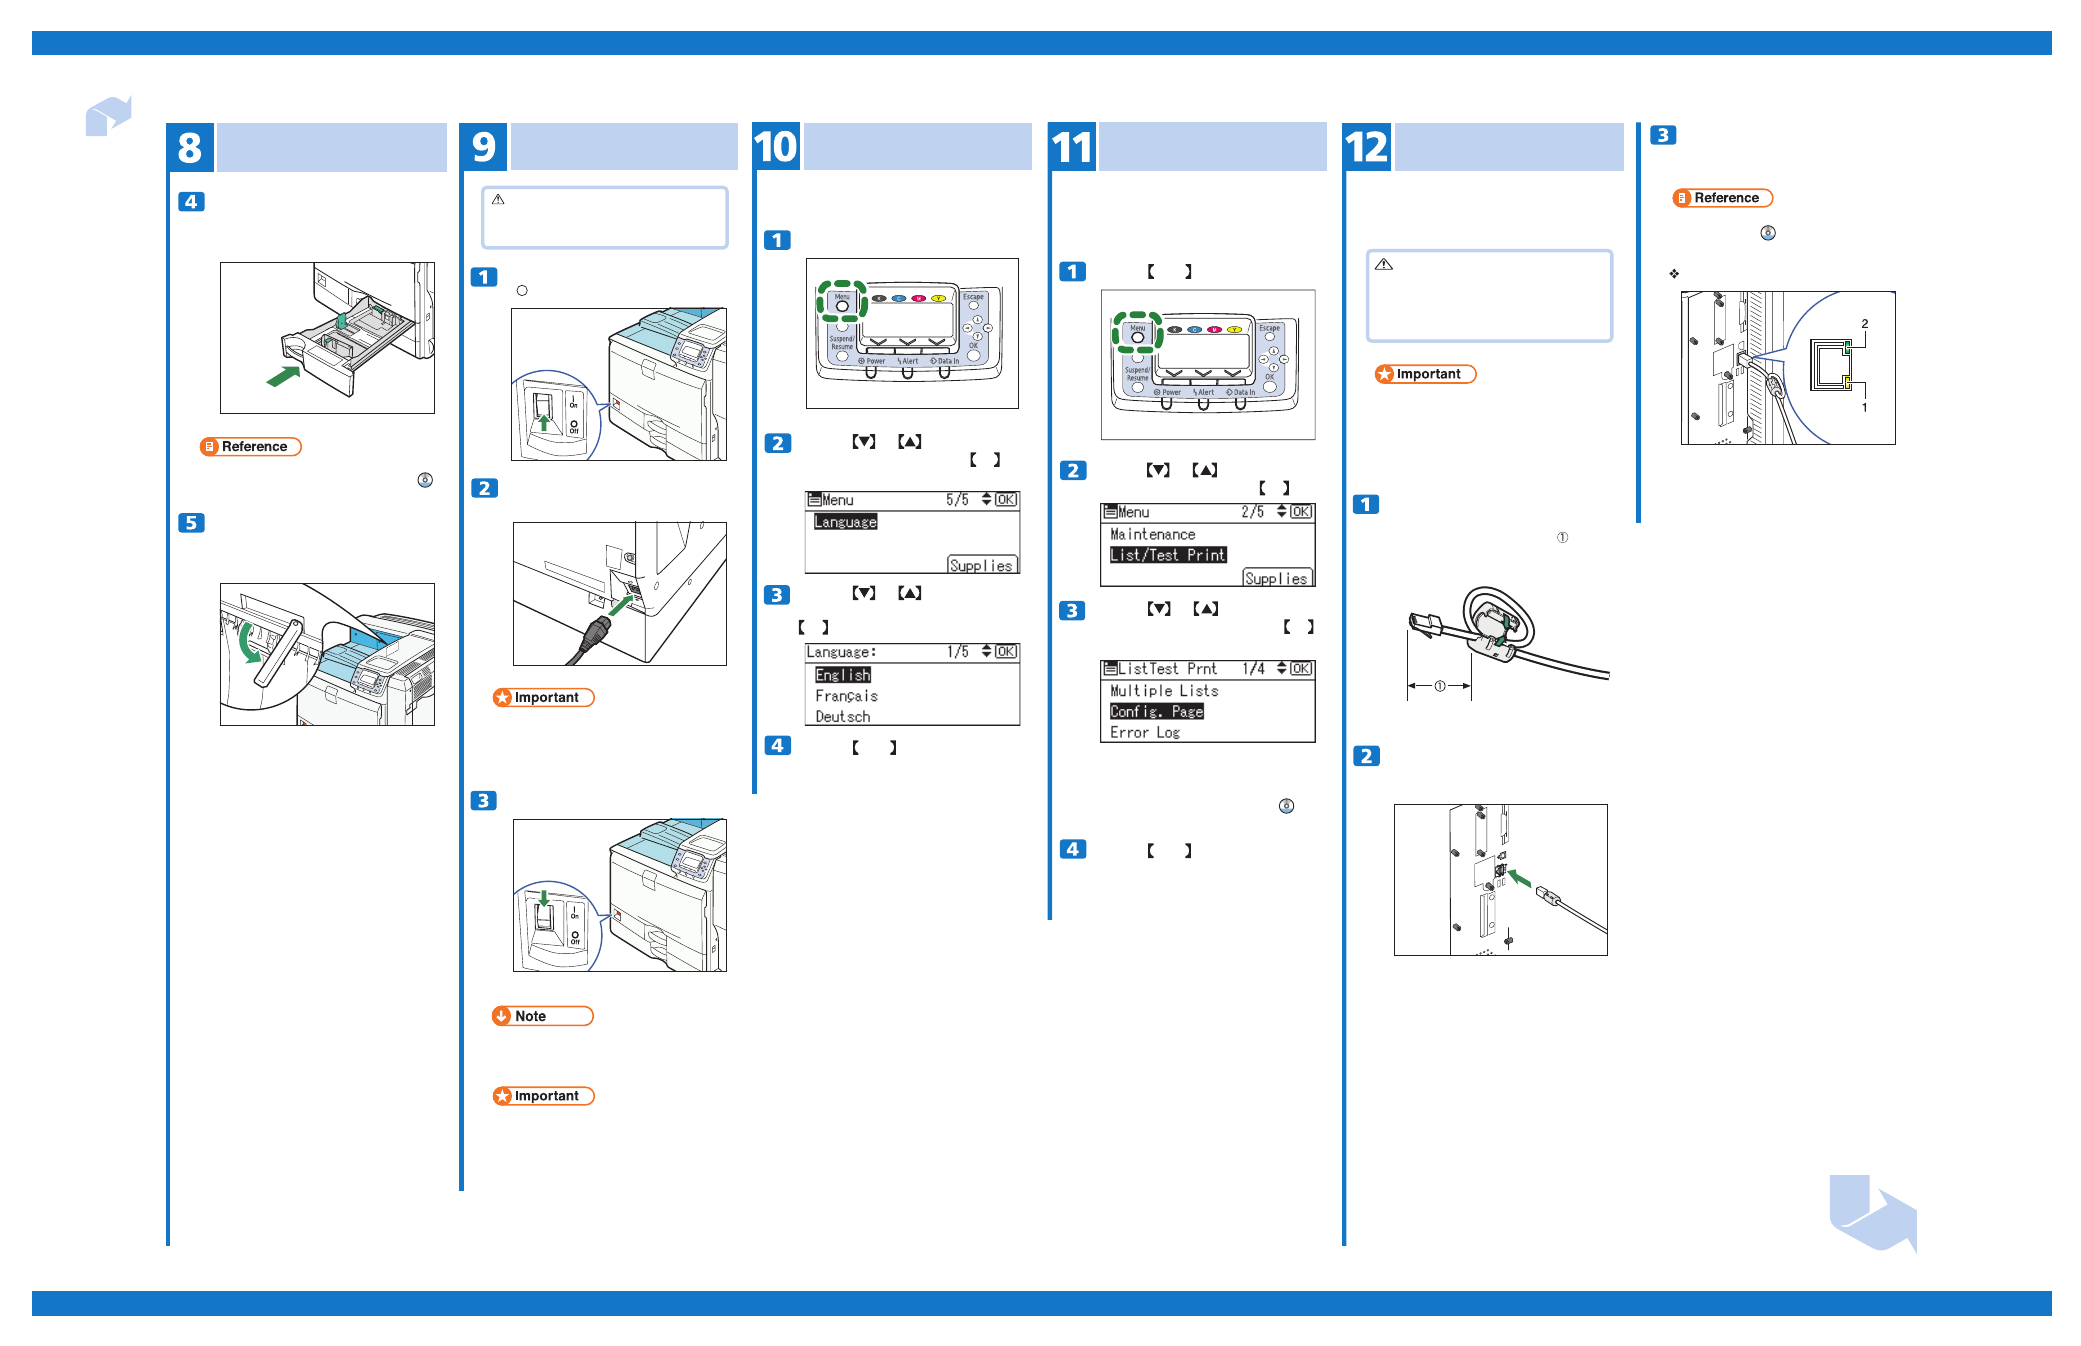
Loading Paper cont.
Push tray 1 carefully into the printer
until it stops.
If you push the tray forcefully, the paper guides might
move.
Slide out the Paper-full detector.
The printer automatically stops ejecting paper when
the Paper-full detector detects that the standard
output tray has become full.
• For details about types of paper supported by this
printer, see “Loading Paper”,
Hardware Guide ( ).
Press the key to return to the
initial screen.
Make sure the power switch is set to
“ ” Off.
Turning the Power On
Plug the power cord into the rear of the
printer.
Turn the power switch on.
The power indicator on the control panel lights up.
Selecting the Display
Language
Displays are shown in the selected language. The
language is set to English by default.
Press the
{{{{{ Menu }}}}}
key.
Press the key to select
[
Language
]
, and then press the
key.
or
OK
• Make sure the power cord is plugged securely into
the wall outlet.
• Turn the power switch off when plugging and
unplugging the power plug.
• Wait until “Ready” appears on the display panel.
• The machine may make a noise while initializing.
This noise does not indicate a malfunction.
• Do not turn off the power switch until initializing is
complete. Doing so results in malfunctions.
Warning
• It is dangerous to handle the plug with wet hands.
Doing this may result in receiving an electric shock.
MENU
Press the key to select the
perferred language, and then press the
key.
or
OK
Network Connection
Attach the ferrite core supplied with this
printer at the printer end of the Ethernet
cable about 5 cm (2.5 inches) ( ) from
the connector, making a loop as shown.
Connect the Ethernet cable to the
Ethernet port that is located on the left
side of the printer.
Connect the other end of the cable to the
network, for example using a hub.
Test Printing
Reading the LED Lamps
1. Yellow: turns on when 100BASE-TX is in use. It
turns off when 10BASE-T is in use.
2. Green: turns on when the printer is properly
connected to the network.
Prepare a hub and other network devices, and
connect the Ethernet cable to the printer. Connect
10BASE-T or 100BASE-TX cable to the printer’s
Ethernet port.
Print a test print in order to verify that the printer is
working inormally. Test printing checks printer
performance only; it does not test the connection to the
computer.
Press the key to select
[
Config. Page
]
, and then press the
key.
or
OK
Press the key to select
[
List/
Test Print
]
, and then press the key.
or
OK
Press the key to return to the
initial screen.
MENU
Press the key.
MENU
The configuration page will be printed.
If printing is not normal, check if an error message
appears on the display. If there is an error message,
see “Troubleshooting”,
Hardware Guide ( ).
Caution
• Properly shielded and grounded cables and
connectors must be used for connections to a
host computer (and/or peripheral) in order to
meet FCC emission limits.
• The Ethernet cable must be an Unshielded Twisted
Pair cable (UTP) or Shielded Twisted Pair cable
(STP), and Category type 5 or higher.
• An Ethernet cable is not supplied with this printer.
Select your cable according to the network
environment.
• For details about network environment settings, see
Software Guide ( ).