ParkZone PKZ5880 User Manual
Page 9
EN
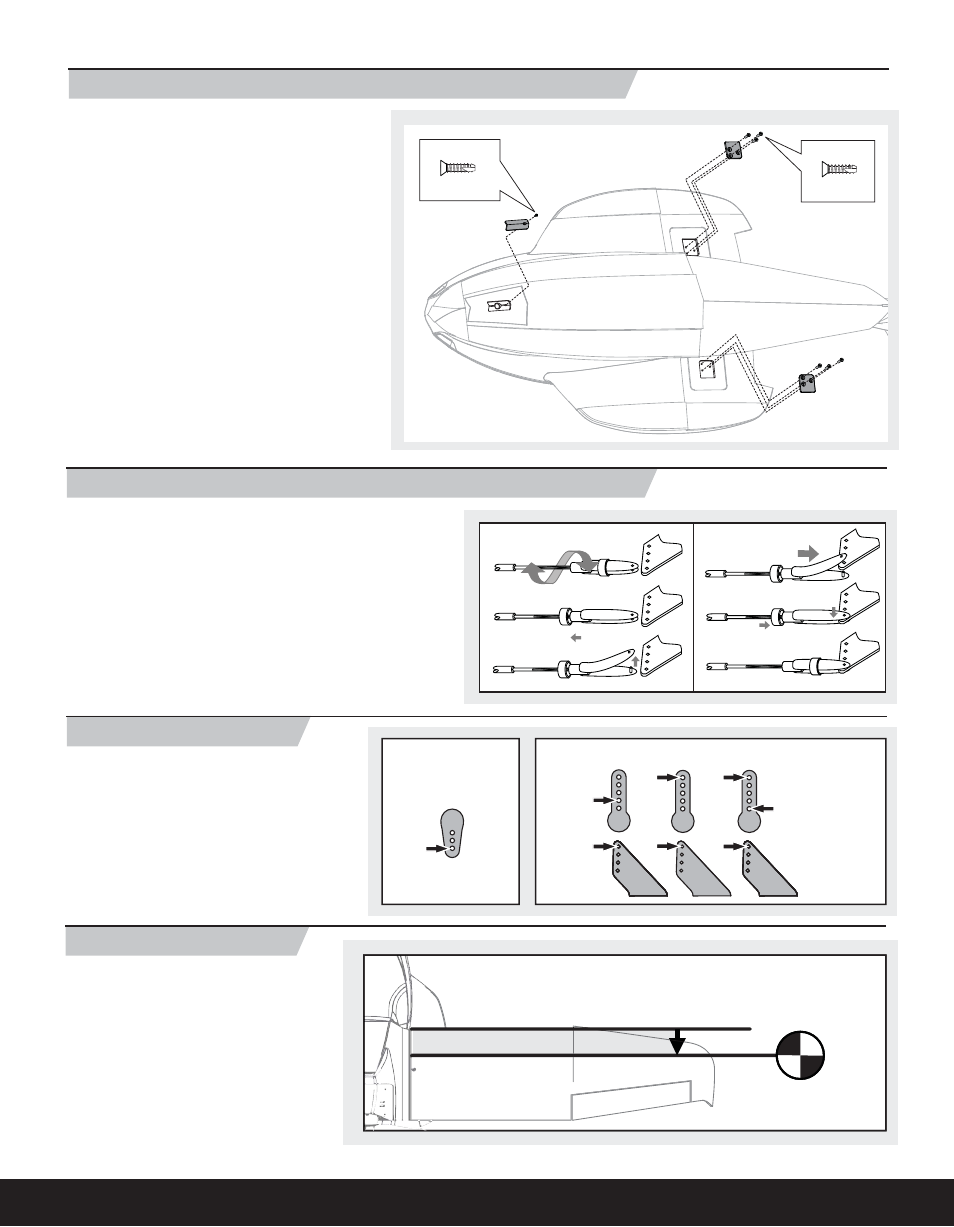
Tip: Turn the clevis clockwise or counterclockwise on the linkage.
• Pull the tube from the clevis to the linkage.
• Carefully spread the clevis and put the clevis pin into the desired
control horn.
• Move the tube to tighten the clevis onto the control horn.
After binding a transmitter to the model receiver, set trims and sub-trims
to 0, then adjust clevises to center the control surfaces.
1.
4.
5.
6.
2.
3.
Fly the model at factory settings before making
changes. For pilots who wish for more control throw,
adjust the position of the linkages on the servo arms
and control horns for increased travel.
Start with the battery all the way forward in the
fuselage and hold the battery in place using a hook
and loop strap. It is easiest to balance the ICON
A5 with the aircraft upright. Make adjustments as
needed to obtain the correct balance (as shown)
before fl ying.
Center of Gravity (CG)
Factory Settings
Installing Clevises on Control Horns and Control Centering
Installing Fuselage Gear Covers (Water takeoff and landing)
1. Cover the nose gear hole with the nose plate
using a screw (A).
2. Install the left and right rear gear covers
(marked L and R) using six screws (B).
NOTICE: When removing or installing the nose
plate, ensure the O-ring is not damaged or lost.
A
2 X 8mm (1)
B
2 X 8mm (6)
Ailerons
Arms
Horns
Elevator
Nose Gear
Servo Arm
Rudder
Nose Gear
Steering Clevis
30-35mm
(1.18-1.38 inches) from
leading edge of the wing.
9