Palram SUNOPA User Manual
Page 2
SUNOPAK® 76 / 18 (Greca/ Trapeze)
Installation Guide
2
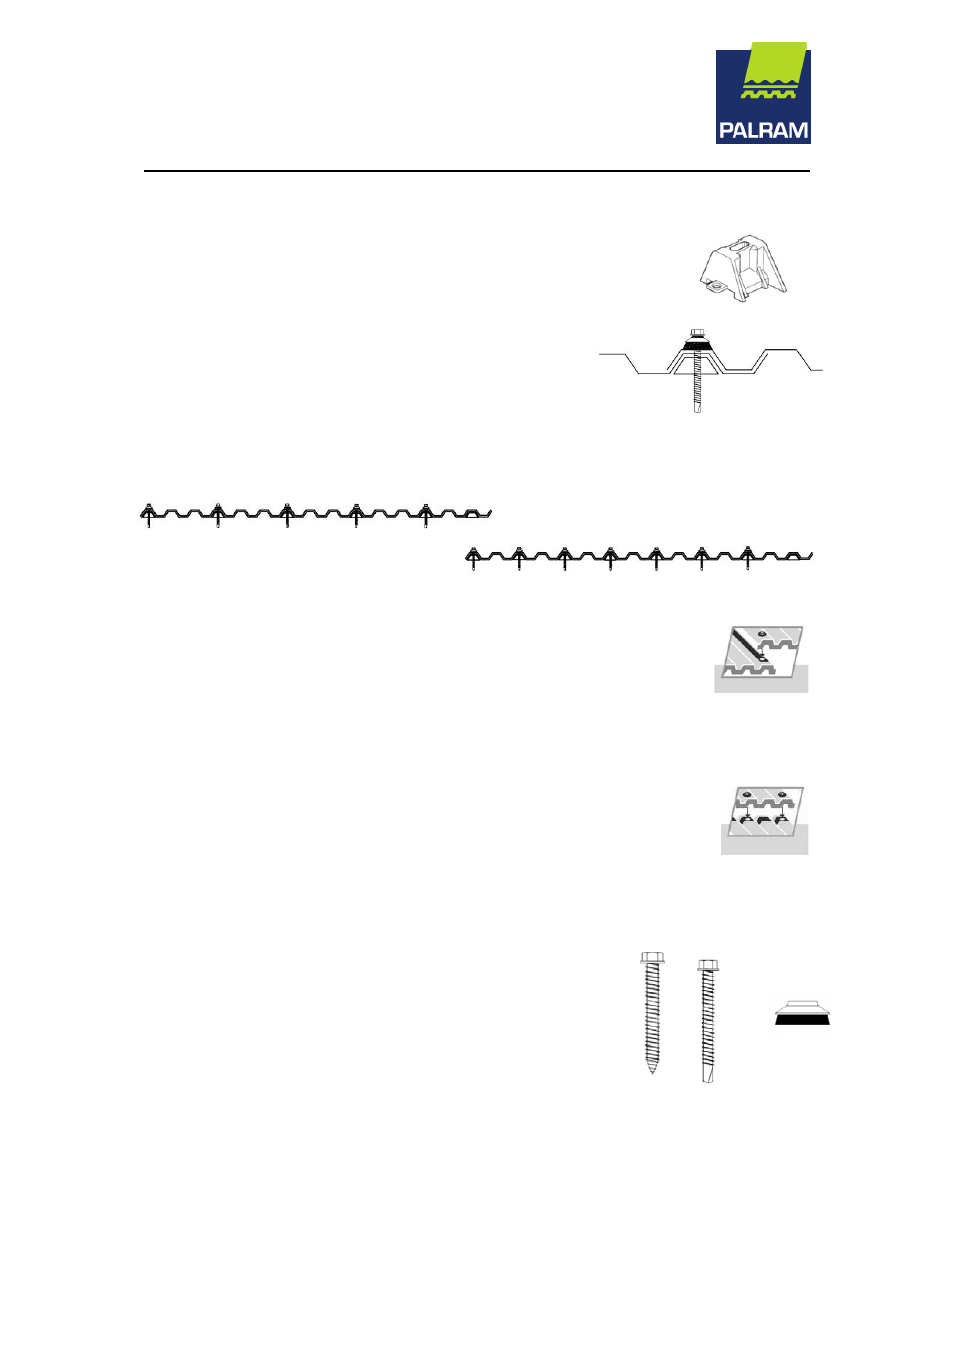
Roof and Wall Positioning and Fastening
Use plastic shaped spacing supports.
Start fastening the screws on the Side Lap where the
SUNTUF sheet over-laps the previous installed sheet.
Fasten on the corrugation crest at every purlin.
Fasten the screws on the lower edge purlin, each second
corrugation crest, starting at the same side.
Fasten at the internal purlins, at each third corrugation crest.
Fasten at the upper edge purlin, at each second corrugation crest, starting at the same side.
Wall mounting (cladding) – The fasteners at the corrugations valley, except at the side-laps.
Internal Purlin Fasteners location
External Purlin Fasteners location
Side-Lap
Use 1
1
/
2
corrugations Side Lap.
Start from the side where the SUNOPAK sheet over-laps the previous sheet.
Apply sealing tape along the crest centerline.
End-Lap
Maximum overhang up to 100 mm from screw centerline.
Minimum overhangs 50 mm from screw centerline.
Apply sealing tape along screws centerline.
Roof edge – not more than 100 mm
Screws and Washers
Crest fixing – 5.5mm x 50mm wood or metal screw.
Valley fixing – 5.5mm x 38mm wood screw (wall covering).
Recommended washer/gasket: 19mm diameter- galvanized /
aluminum / stainless metal washer attached to EPDM rubber
gasket of 55 to 65 shore hardness and minimum 4mm thickness.
Never use PVC washers or any unapproved material.
PALRAM washers are highly recommended.
Pre-drill the screw holes in the SUNOPAK sheets, 3-4 mm bigger
than the screw diameter (9-10mm).