Palruf® technical guide profile: 0100 industrial – Palram PALRU User Manual
Page 2
PALRUF® Technical Guide
Profile: 0100 Industrial
©PALRAM Industries. All rights reserved.
Positioning
Make sure the UV protected side faces out.
Side-lap of PALRUF panels must be installed against the primary direction of rain.
The PALRUF panels must be located and installed without any stresses.
Do not pull, stretch or force the sheets when the profiles are not perfectly matched.
Fastening
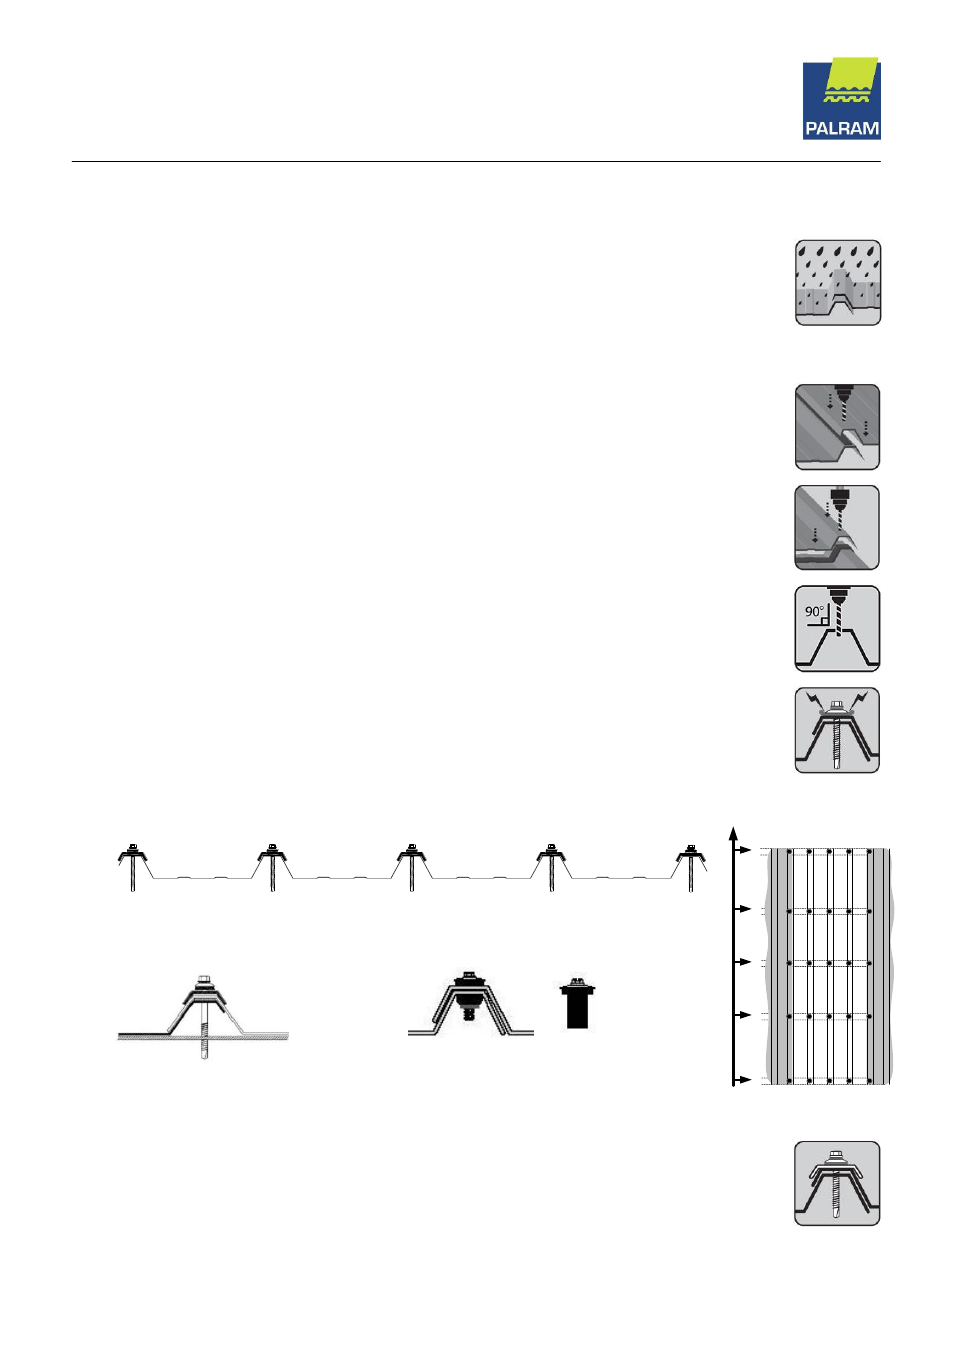
Apply sealing tape over the PALRUF panel side-lap corrugation crests, where covered by the next panel.
Apply sealing tape along the bottom and top End-lap (if there is), along screws centerline or two tapes on
both sides of screw centerline.
Pre-drill 10mm holes at crests where screws are positioned.
Start fastening the screws from the first side-lap (left) through the pre-drilled holes (2).
Start fastening the screws on the lower edge purlin (End-lap), on each corrugation crest (1).
Fasten screws at the internal and upper edge purlins, at each corrugation crest, starting at the same side
(1, 2).
Do not over-tighten!
Fasten the stitching screws at every 300 mm (3).
Fastening Location
(1)
(2) (3)
Screws and Washers Specification
Crest fixing: Self-drilling 5.5mm x 75mm (3") screw + matched metal crest rider (Storm washers) with
EPDM gasket.
Side Stitching: 5.5mm x 25mm (¼”x1") Stitching Screws (Grommet seals) with EPDM seal.