Install post bracket assembly and gate bracket, Post bracket assembly, Step 1 – Mighty Mule MM402 User Manual
Page 18: Step 2, Step 3, Step 4
8
Mighty Mule FM402 Installation Instructions
rev 082211
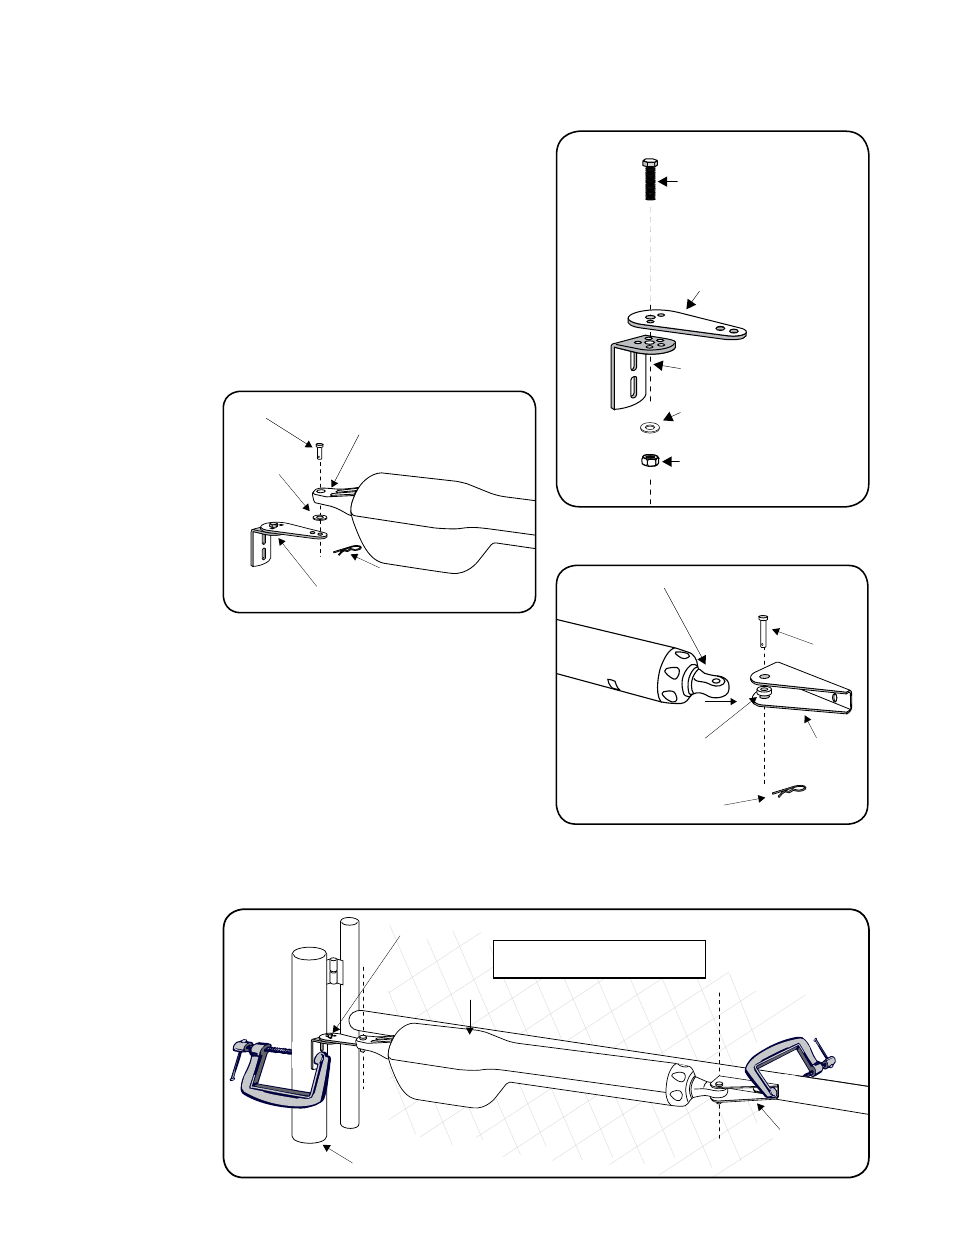
Install Post Bracket Assembly and Gate Bracket
Step 1
Insert the
3
/
8
" x 1
1
/
2
" bolt through the center hole of the post brackets
and post pivot bracket. Secure with a
3
/
8
" washer and
3
/
8
" lock nut.
DO NOT overtighten the lock nut (the post pivot bracket will have to be
adjusted later).
Step 2
Attach post bracket assembly to the rear mount of the opener with a
clevis pin and a
3
/
8
" washer. Secure the clevis pin with a hairpin clip.
Step 3
Attach gate bracket to the front mount of the opener with a clevis pin
and a
3
/
8
" bushing. Secure the clevis pin with a hairpin clip.
Step 4
With the gate in the
fully open position and the opener arm fully retracted, adjust the post bracket assembly and
gate bracket until the opener is level. While holding the opener level, use C-clamps to temporarily secure the post bracket
assembly and gate bracket to the post and gate.
3
/
8
" x 1
1
/
2
" Bolt
3
/
8
" Lock Nut
Post Pivot Bracket
Post Bracket
Post Bracket Assembly
3
/
8
" Washer
Clevis Pin
Hairpin Clip
Post Bracket Assembly
3/8” Washer
Rear Mount
Opener
Clevis
Pin
Hairpin Clip
Gate Bracket
Front Mount
Bushing
Fence Post
Gate in Open Position
Opener Arm Fully Retracted
LEVEL horizontal cross member
Post Bracket Assembly
Gate Bracket
Level Opener