HITEC Lynx FM User Manual
Page 4
1234567890123456789012345678901212345678901234567890123456789012123456789012345678901234567
1234567890123456789012345678901212345678901234567890123456789012123456789012345678901234567
1234567890123456789012345678901212345678901234567890123456789012123456789012345678901234567
1234567890123456789012345678901212345678901234567890123456789012123456789012345678901234567
1234567890123456789012345678901212345678901234567890123456789012123456789012345678901234567
1234567890123456789012345678901212345678901234567890123456789012123456789012345678901234567
1234567890123456789012345678901212345678901234567890123456789012123456789012345678901234567
1234567890123456789012345678901212345678901234567890123456789012123456789012345678901234567
1234567890123456789012345678901212345678901234567890123456789012123456789012345678901234567
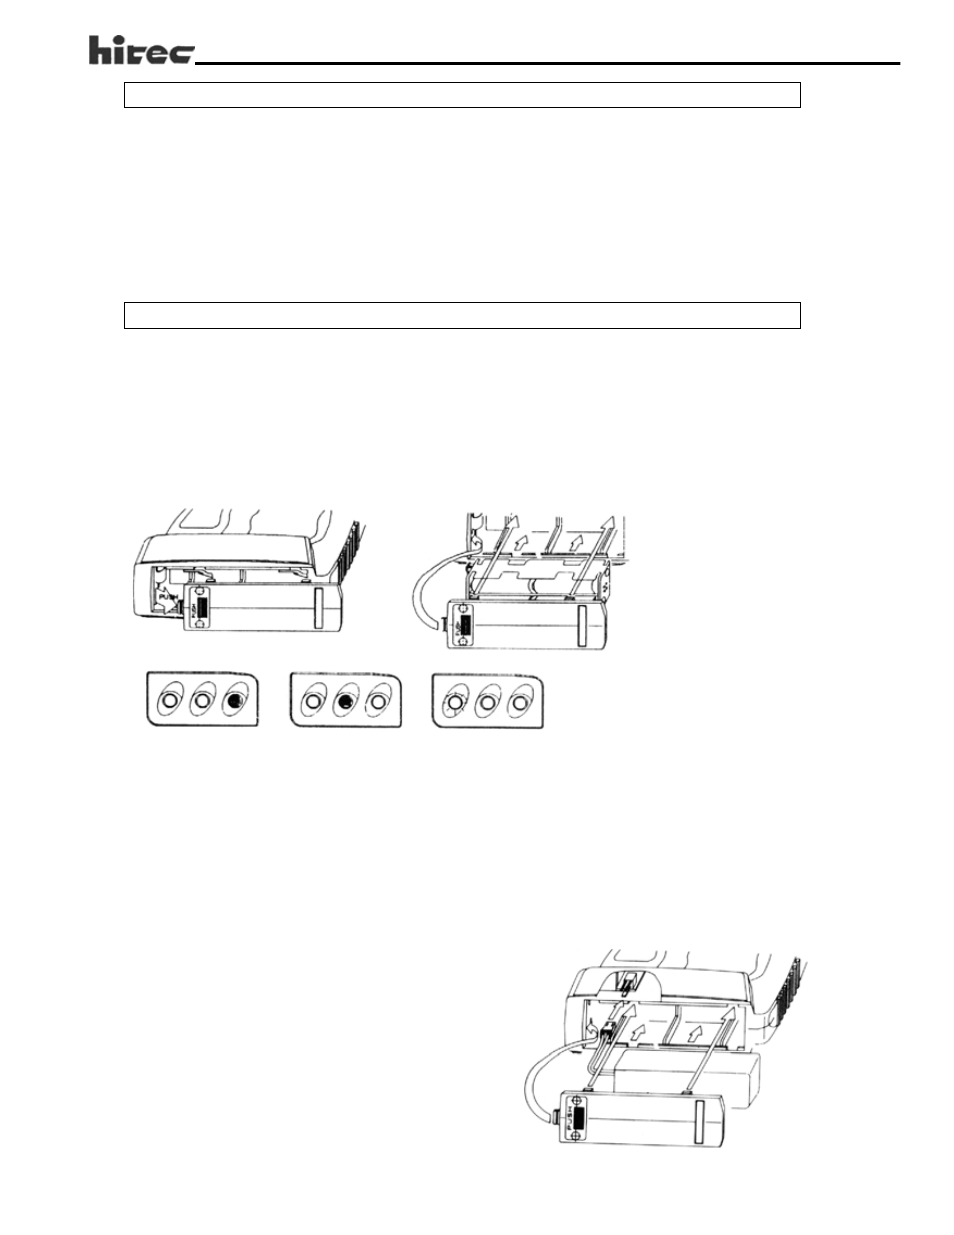
Reading the LED Battery Indicators
Reading the LED Battery Indicators
Reading the LED Battery Indicators
Reading the LED Battery Indicators
Reading the LED Battery Indicators
Full Power:
Gr
Gr
Gr
Gr
Green
een
een
een
een
Normal:
Amber
Amber
Amber
Amber
Amber
Warning:
Flashing Red
Flashing Red
Flashing Red
Flashing Red
Flashing Red
Illustration:
3
FEA
FEA
FEA
FEA
FEATURES
TURES
TURES
TURES
TURES AND SPECS
AND SPECS
AND SPECS
AND SPECS
AND SPECS
Pistol Grip 2 Channel FM Proportional System
Servo Reversing Switches (Both Channels)
Steering Rate Adjustment. Thumb Controlled (40% - 100%)
Adjustable Steering Rate Override button (40% - 100%)
End Point adjustment (E.P.A.) Throttle and Brake
3 LED Battery Status Indicators
Power Output: 500mW
Current Drain: 180mA
SETTINGS
SETTINGS
SETTINGS
SETTINGS
SETTINGS AND OPERA
AND OPERA
AND OPERA
AND OPERA
AND OPERATION
TION
TION
TION
TION
1. TRANSMITTER
■ Loading batteries:
Loading batteries:
Loading batteries:
Loading batteries:
Loading batteries:
You may us either NiCad batteries or Alkaline “AA” size batteries (NiCad recommended)
✷ Push the bottom battery cover in the direction of the arrow then lift up the cover.
✷ Load 8 “AA” batteries (be sure the polarity is correct).
✷ Reinstall battery case with installed “AA” batteries with connections to the top left.
✷ NiCads should be charge before use.
With new alkaline or freshly charged NiCads the
Gr
Gr
Gr
Gr
Green
een
een
een
een
light should be lit. With use the
Gr
Gr
Gr
Gr
Green
een
een
een
een
light will turn to
Amber
Amber
Amber
Amber
Amber
. If the
Red
Red
Red
Red
Red
light begins to flash, operation should be stopped and the
batteries should be recharged or replaced immediately.
■ Optional NiCad Battery Installation (part # 58207).
1. Plug the white battery plug into the receptacle in the bottom of the pistol grip handle.
(Refer to Illustration)
2. Push the pack up into the battery bay.
3. Replace the cover.
4. Check the power level.
5. Charge if needed. (Refer to illustration below)