Step 4 step 5 – HITEC P-51 Mustang User Manual
Page 5
Tools Required for Assembly:
#0 and #1 Phillips Head Screwdrivers
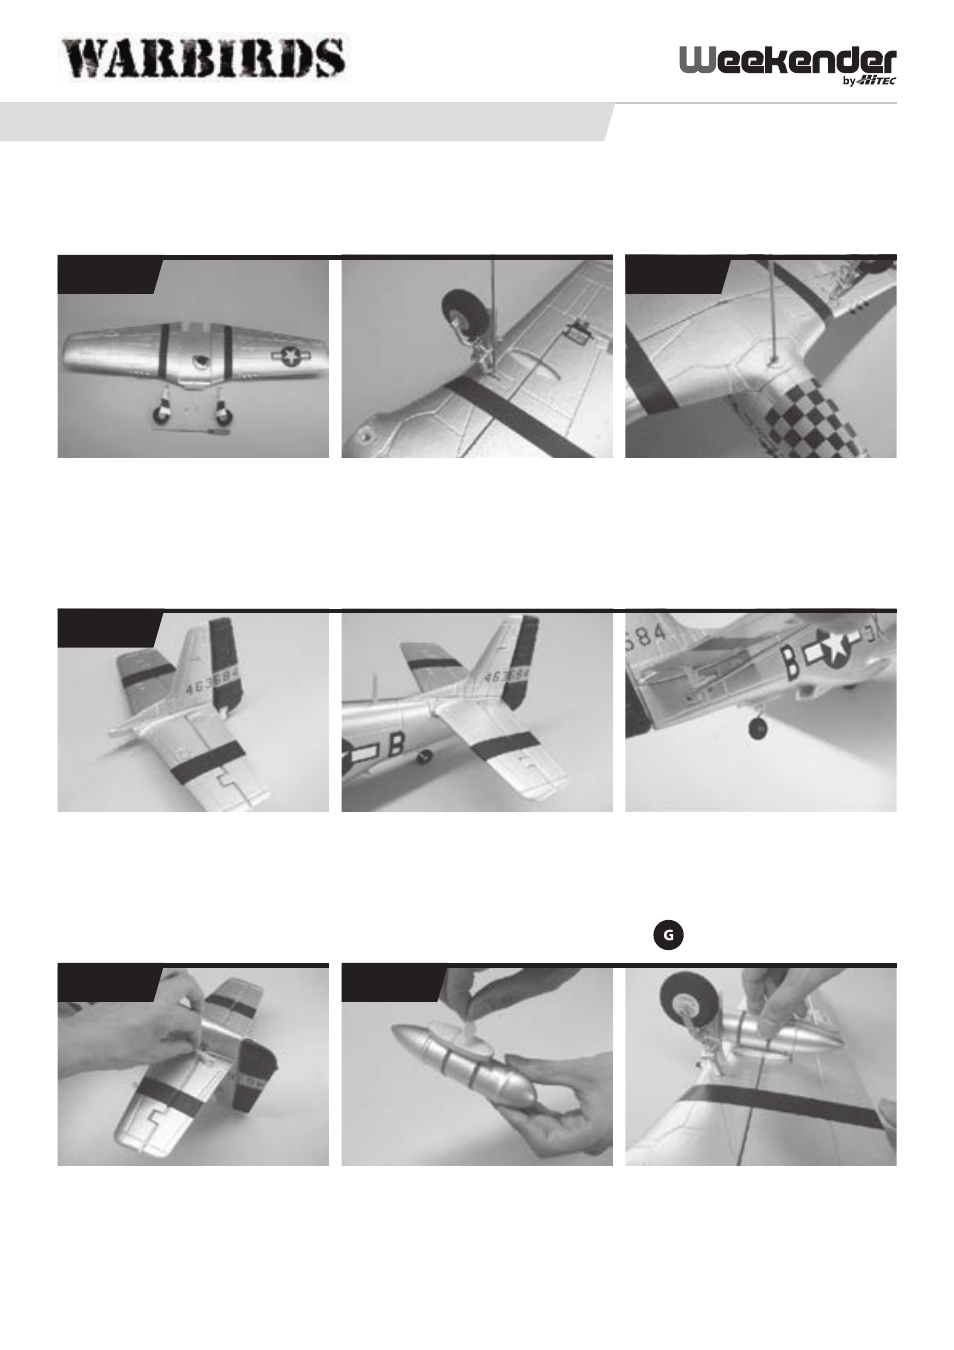
Step 1: Landing Gear Assembly
Slide the landing gear into the slots of the main wing
making sure they are in the correct position. Using
a #0 Phillips head screwdriver and the 2, 2.0 x 8 mm
screws, secure the landing gear to the wing.
Step 2: Attach the Main Wing
Attach the main wing to the fuselage by sliding the tab into the rear
of the fuselage making sure to guide the servo leads through the
hole in center of the fuselage. Using a #1 Phillips head screwdriver
and the 4 x 45mm machine screw, secure the wing to the fuselage.
STEP 1
STEP 3
STEP 2
ASSEMBLY INSTRUCTIONS - P51D MUSTANG (cont.)
Step 4: Attaching the Control Linkages
Insert the elevator clevis into the outer-
most hole on the control horn and snap
the clevis closed. Repeat this procedure
for the rudder.
Step 5: Attach the Auxiliary Fuel Tanks (optional)
To attach the auxiliary fuel tanks to the wings peel off the
double sided tape and position them in place.
STEP 4
STEP 5
Step 3: Assembly of the Tail Plane
a. Slide the tabs of the vertical stabilizer
through the slot in the top of the hori-
zontal stabilizer as shown in the picture.
b. Next slide the tail plane assembly
though the slot in the top of the
fuselage.
c. Secure the assembly to the fuselage
using the 2, 2 x 10mm screws and a
#0 Philips screwdriver.
- 5 -