Hanna Instruments HI 95725C User Manual
Page 6
10
11
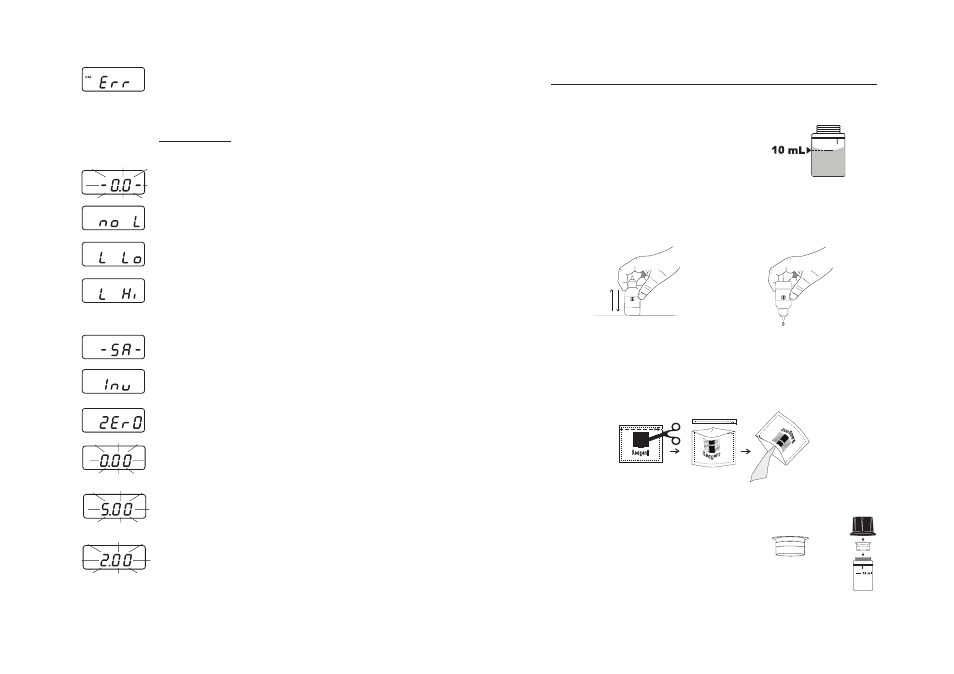
The instructions listed below should be carefully followed
during testing to ensure best accuracy.
• For a correct filling of the cuvet: the liquid in the cuvet
forms a convexity on the top; the bottom of this convex-
ity must be at the same level of the 10 mL mark.
• Proper use of the dropper:
(a) to get good reproducible results, tap the dropper on the table for several times and wipe
the outside of the dropper tip with a cloth.
(b) always keep the dropper bottle in a vertical position while dosing the reagent.
• Proper use of the powder reagent packet:
(a) use scissors to open the powder packet;
(b) push the edges of the packet to form a spout;
(c) pour out the content of the packet.
• It is important that the sample does not contain any debris. This would corrupt the reading.
• In order to avoid reagent leaking and to obtain more
accurate measurements, it s recommended to close the
cuvet first with the supplied HDPE plastic stopper and
then with the black cap.
• Each time the cuvet is used, the cap must be tightened
to the same degree.
(a)
(b)
“Error”: the concentration of the calibration solution used is not correct.
Repeat the
calibration procedure with the right standard solution, and
verify it is not expired. If the calibration procedure fails again, contact your
dealer or the nearest Hanna Customer Service Center.
ERROR MESSAGES
a) on zero reading
This indicates that the zeroing procedure failed due to a low signal-to-noise
ratio. In this case press ZERO again.
“No Light”: the instrument cannot adjust the light level. Please check that
the sample does not contain any debris.
“Light Low”: there is not enough light to perform a measurement. Please
check the preparation of the zero cuvet.
“Light High”: there is too much light to perform a measurement. Please check
the preparation of the zero cuvet.
b) on sample reading
There is too much light for the sample measurement. Please check if the right
sample cuvet is inserted.
“Inverted”: the sample and the zero cuvet are inverted.
“Zero”: a zero reading was not taken. Follow the instruction in the
measurement procedure for zeroing the meter.
Under range. A blinking "0.00" indicates that the sample absorbs less
light than the zero reference. Check the procedure and make sure you
use the same cuvet for reference (zero) and measurement.
A flashing value of the maximum concentration indicates an over range
condition. The concentration of the sample is beyond the programmed
range: dilute the sample and re-run the test.
A flashing value lower than the maximum concentration indicates a low
signal-to-noise ratio condition. In this case accuracy of the result is not
guaranteed. Repeat the
measurement procedure.
GENERAL TIPS FOR AN ACCURATE MEASUREMENT