Calibration procedure – Hanna Instruments HI 95747C User Manual
Page 16
16
CALIBRATION PROCEDURE
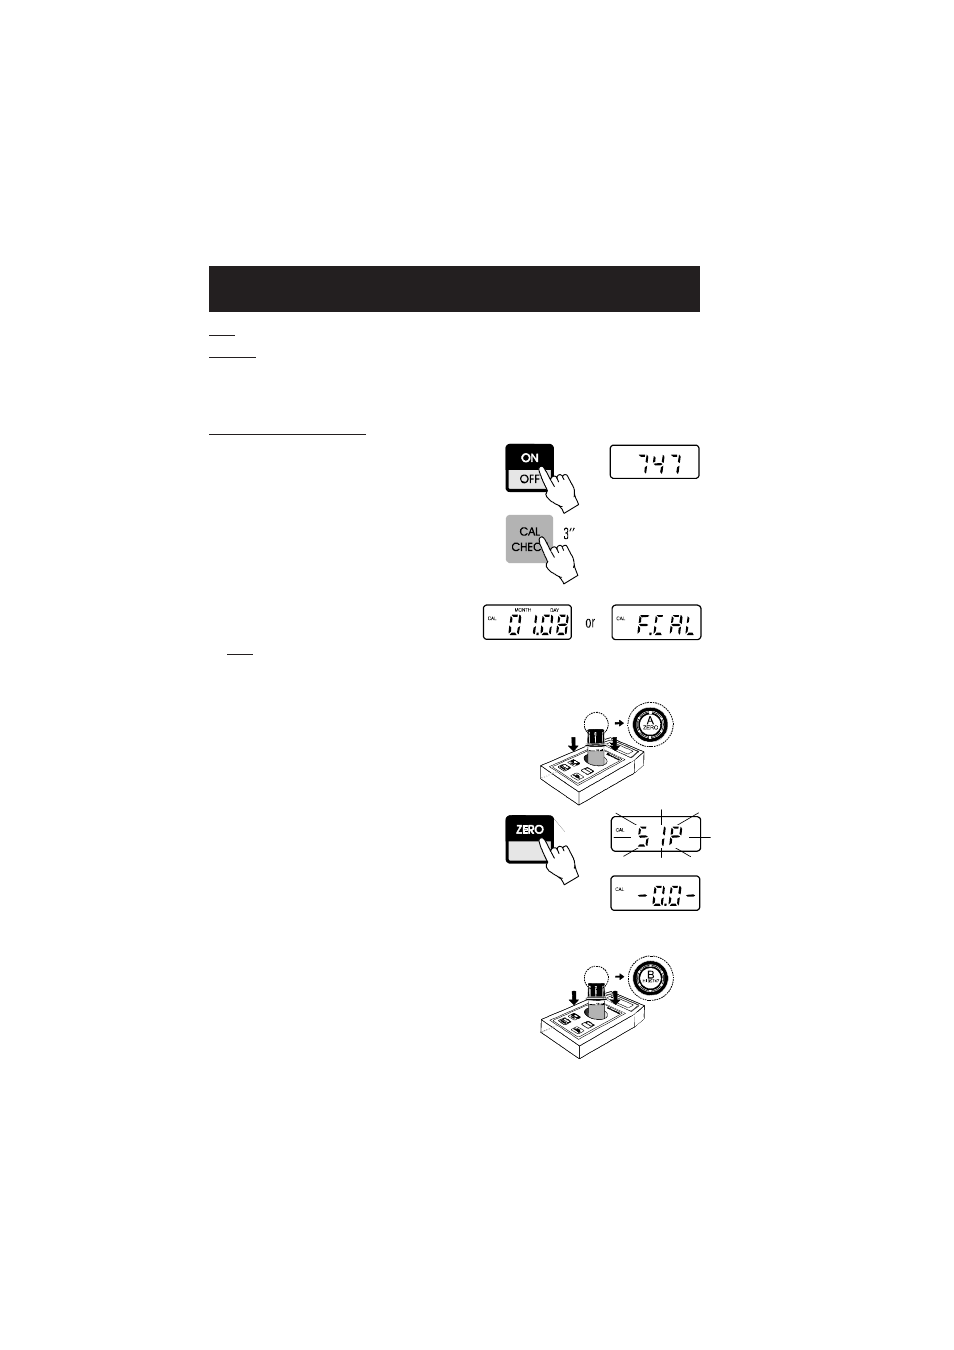
• Turn the meter on by pressing ON/OFF.
When the LCD displays “747”, it is ready.
• Enter the
calibration mode
by holding CAL
CHECK
TM
for three seconds
.
• The date of the last calibration appears (e.g.:
month “01”, day “08”). “F.CAL” means that
the factory calibration is selected.
Note: at this point it is possible to reset the
instrument to restore FACTORY CALIBRATION,
see instructions page 18.
• Place the CAL CHECK
TM
Standard Cuvet A into
the holder and ensure that the notch on the
cap is positioned securely into the groove.
• Press ZERO and “SIP” will blink on the display.
• After a few seconds the display will show
“-0.0-”. The meter is now zeroed and ready for
calibration.
• Remove the cuvet.
• Place the CAL CHECK
TM
Standard HI 95747-11
Cuvet B into the holder and ensure that the
notch on the cap is positioned securely into
the groove.
CALIBRATION PROCEDURE
Note: it is possible to interrupt calibration procedure at any time by pressing ON/OFF.
Warning: do not validate or calibrate the instrument with standard solutions other than the Hanna
CAL CHECK
TM
Standards, otherwise erroneous results will be obtained. For accurate Validation and
Calibration results, please perform test at room temperature: 18 to 25°C (64.5 to 77.0°F).