Hanna Instruments HI 88713 User Manual
Page 14
26
27
LOG AND LOG RECALL
LOG AND LOG RECALL
LOG AND LOG RECALL
LOG AND LOG RECALL
LOG AND LOG RECALL
The HI 88713 Turbidity bench meter has a powerful log function that could store up to 200 records.
Each record contains:
•
the measuring mode,
•
the reading value,
•
the measuring unit,
•
the date and time of the measurement,
•
the current log number.
Notes: • The log can be saved only after a measurement is completed.
• A measurement can be saved only once.
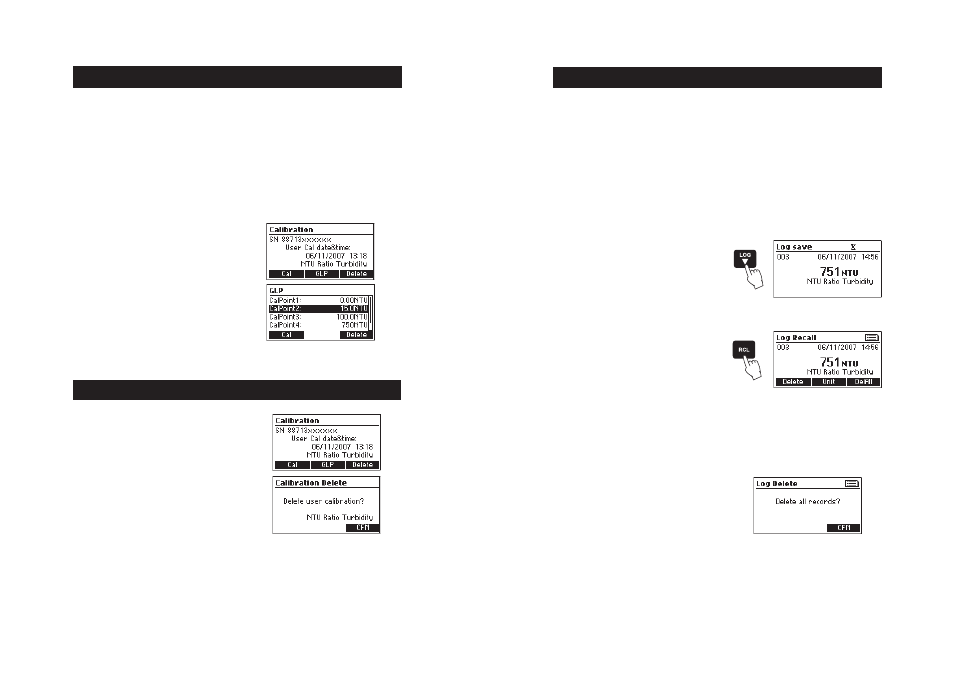
LOG SAVE
To log a record, simply press LOG key after the
measurement is completed. A record number is
assigned to each logged measurement. Each
reading can be stored only once.
LOG RECALL
The log can be consulted at any time by simply
pressing RCL key.
To exit log consulting, press RCL key again.
The log content is displayed one record at a time,
starting with the most recent one.
The information
regarding one record is displayed in one screen.
To browse the log press the UP or DOWN key.
LOG DELETE
The last log or all logs can be deleted.
To delete the last log, simply press “Delete” functional key when the last log is displayed. The log
will be deleted and the next log is immediately displayed.
To delete all logs, press “DelAll” functional key. A
confirmation screen is displayed. Press “CFM”
functional key to confirm the action. The log will be
deleted and the instrument returns in the main screen.
Note: The records for all parameters are deleted
when this action is performed.
The HI 88713 Turbidity bench meter has a built in complete GLP information. The calibration date
and the calibration points are displayed in a comprehensive mode for each range.
To display the GLP information, simply press CAL key. A screen with instrument serial number and
with information about the calibration is displayed. For further information, press the “GLP”
functional key.
The GLP contains:
• Instrument serial number
• The last user calibration date, in
selected format and time in hh.mm format. If no
calibration was performed, the “Not calibrated”
message is displayed and the meter uses only the
factory calibration.
• Parameter as NTU Ratio Turbidity, NTU
Non Ratio Turbidity, FAU Turbidity or FNU Turbidity.
• The value of each calibration point (up to
5 points for NTU ratio mode; 4 points for FNU, FAU
and NTU non-ratio modes). If the first calibration
point was skipped, the 0.00 value is displayed.
GOOD LABORATORY PRACTICE (GLP)
GOOD LABORATORY PRACTICE (GLP)
GOOD LABORATORY PRACTICE (GLP)
GOOD LABORATORY PRACTICE (GLP)
GOOD LABORATORY PRACTICE (GLP)
To restore the factory calibration for the currently
selected range, press CAL key when in the main
screen. The first screen for the GLP is displayed.
Press “Delete” functional key to initiate the
calibration delete procedure and then press “CFM”
functional key to delete the user calibration and
restore the Factory calibration.
Note: Only the user calibration for the current
selected range is deleted.
RESTORE FACTORY CALIBRATION
RESTORE FACTORY CALIBRATION
RESTORE FACTORY CALIBRATION
RESTORE FACTORY CALIBRATION
RESTORE FACTORY CALIBRATION