Hanna Instruments HI 98401 User Manual
Page 7
7
• Wait until the display stabilizes (about
10-15 minutes). The fluoride ion concen-
tration and the temperature will be
displayed on the upper and lower dis-
plays, respectively.
Note: It is recommended to mix the sample during the measurement,
using a magnetic stirrer set at around 100 rpm.
Note: If the temperature probe is not connected, the meter will
naturally not compensate for the temperature variance. In this
case, accurate fluoride measurements are only possible if the
temperature of the sample and the calibration solutions are
close (no more than ±3°C apart).
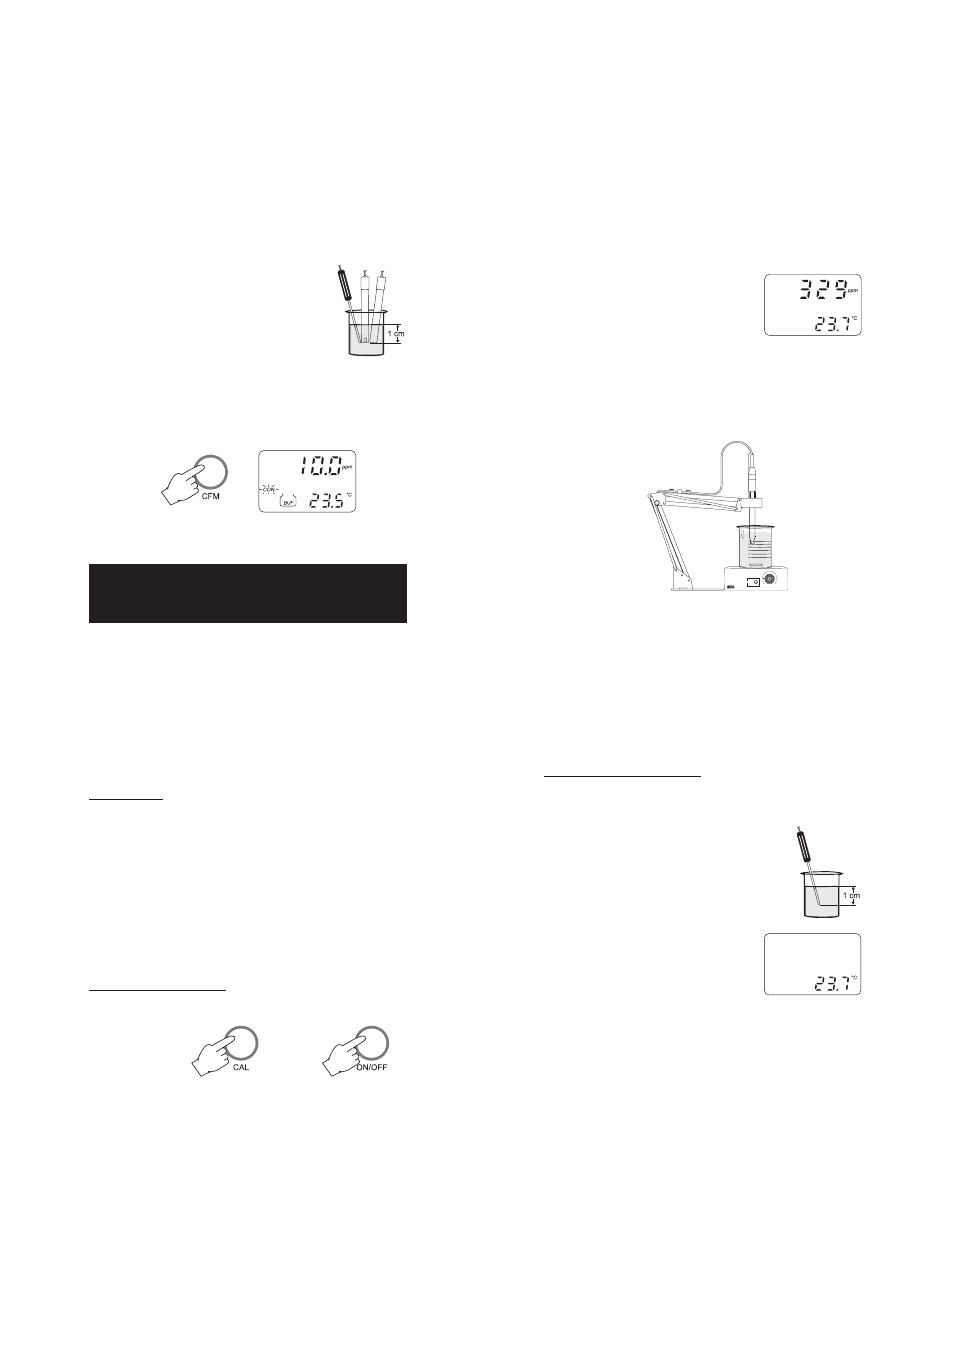
TEMPERATURE MEASUREMENT
The temperature can be measured independently from fluoride con-
centration.
• Immerse the temperature probe to a depth of at
least 1 cm (½”) in the prepared sample.
• Wait for the reading to stabilize. The temperature
of the solution will be shown on the lower
part of the display.
MAGNETIC STIRRER
HI 190M
POWER
SPEED
ON
OFF
MAX
10
TEMPERATURE CALIBRATION
(for technical personnel only)
All the meters are factory calibrated for temperature.
The temperature probes are interchangeable and no temperature cali-
bration is needed when they are replaced.
If, for any reason, the temperature measurements seem inaccurate,
temperature recalibration may be carried out.
For an accurate recalibration however contact your dealer or the
nearest Hanna Customer Service Center.
PREPARATION
• Prepare a vessel containing ice and water and another one con-
taining hot water (at a temperature of around 50°C). Place
insulation material around the vessels to minimize temperature
changes.
• Connect the temperature probe (#1 on page 4) to the connector
on top of the instrument.
Note: If "°C" blinks, it means that the temperature probe is not
connected properly.
CALIBRATION PROCEDURE
• With the instrument turned off, press and hold CAL and then the
ON/OFF switch.
+
• Immerse the fluoride and the reference elec-
trode to a depth of at least 1 cm (½”) in the
second buffer solution. Make sure that the elec-
trodes are not touching the bottom of the beaker.
Immerse the temperature probe close to the tip
of the other electrodes.
• When the CON symbol appears, it means that the second calibra-
tion solution has also been recognized and the reading has
stabilized. Press CFM to confirm.
• Calibration is now complete and the meter automatically returns
to the normal operational mode.