Hall Research UVA-8 User Manual
Page 8
Model UVA-4 and UVA-8
6
3.2 Compensation Adjustment Procedure on URA Receivers
• If possible, display a video test pattern on your video source when
adjusting the URA receiver. This allows the user to properly adjust the
receiver to optimal conditions.
• Apply power to the receiver. Wait until all LED’s are turned off
• Press the SEL button once to enter Adjustment-mode.
• In Adjustment-mode, all three (3) LEDs will be illuminated.
• The UP or DOWN buttons can now be used to adjust the high
frequency (HF) compensation up or down until the video no longer
looks smeared (see figure below).
• While using the UP and DOWN buttons, if an upper or lower limit of
adjustment is reached, the LED’s will blink for each continued press
of the UP or DOWN button.
• Pressing both the UP & DOWN buttons together will reset the high
frequency (HF) compensation back to zero.
• To exit the Adjustment mode at any time, press the SEL button until
all LED’s are OFF (the unit also has a built-in 1 minute timeout)
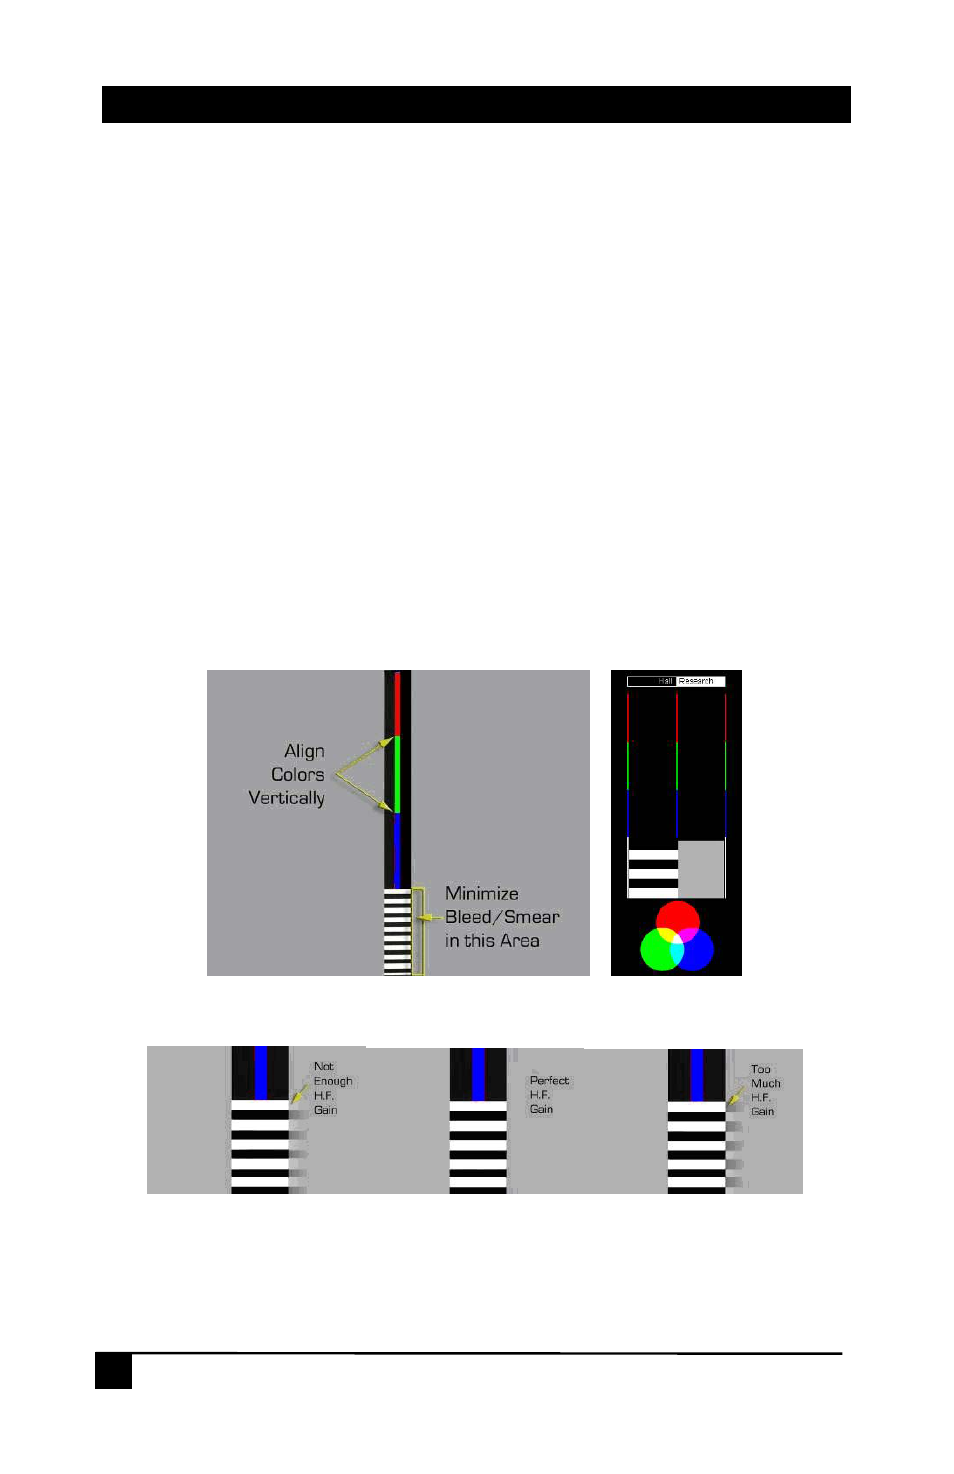
Figure 3 - Typical test patterns used for adjusting compensation
Figure 4 - Effect of adjustment on the smearing