Installation, 6 settings – Glow-worm Clearly Heat Pumps - Standalone System User Manual
Page 16
0020096321_01 - 02/11 - Glow-worm
- 14 -
1
Select Htg curve settings
on the screen.
2A
With Automatic htg curve
activated.
2B
With the Automatic htg
curve deactivated, you must
choose a heating curve.
2B.1
Select Htg curve setting
on the screen.
2B.2
Choose the heating
curve (see curve and
explanations after).
b
Ensure that the heating curve setting is compatible
with the installation.
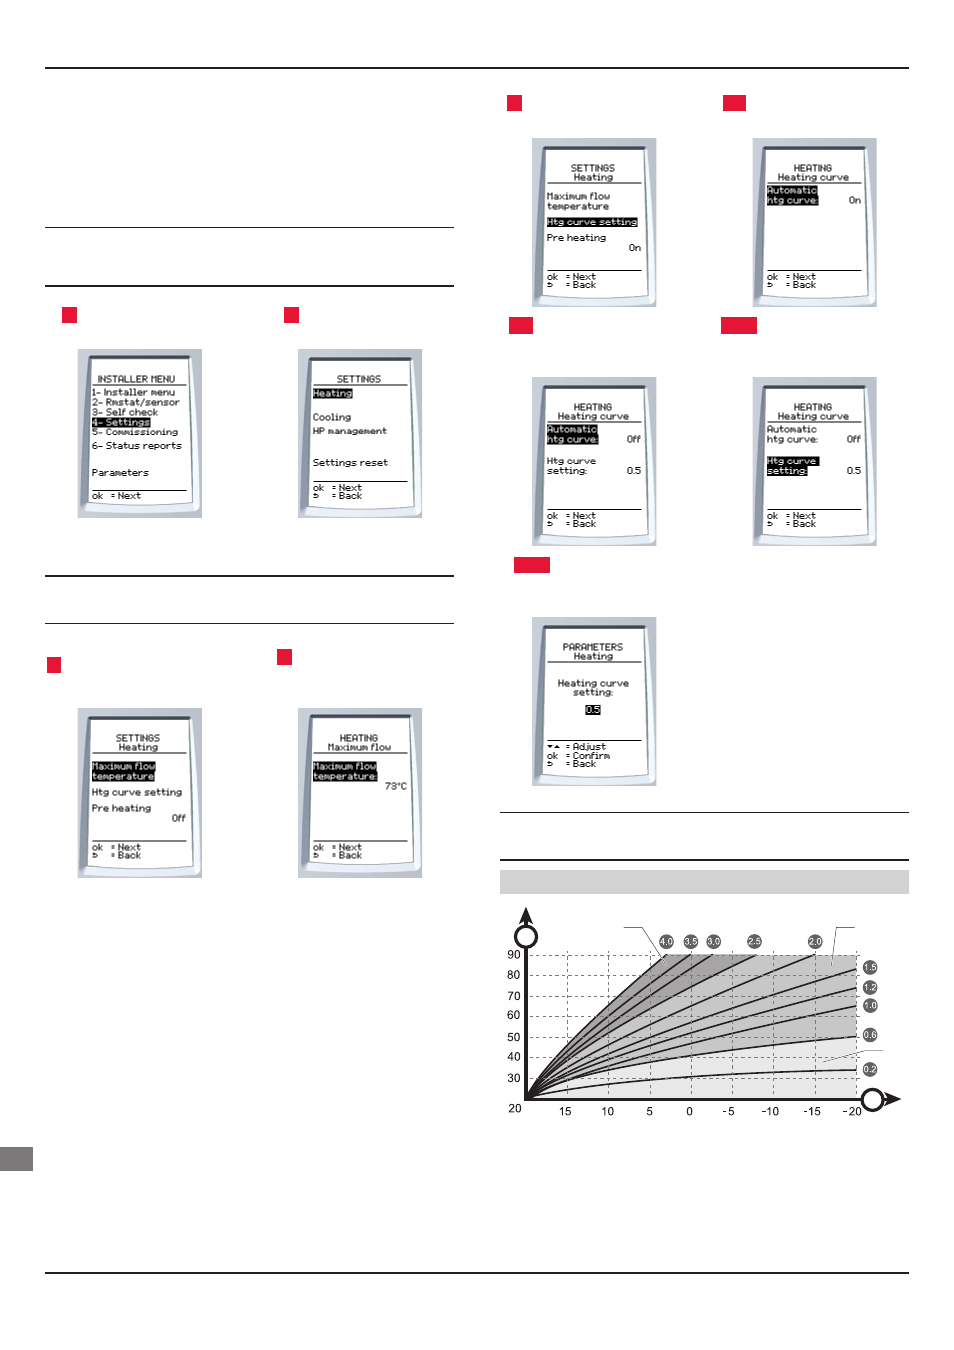
Heating curve
A
B
1
2
3
Key
1 Older
properties
with radiators
2 Standard/modern
house
with radiators
3 Highly insulated modern house with low temperature radiators or
underfl oor heating
A Heating
fl ow temperature (°C)
B External
temperature
6 Settings
This menu allows you to adjust diff erent functions in accordance
with the connected appliances and to reset all the parameters.
6.1 Heating
b
The maximum heating output temperature must be
adjusted in accordance with the characteristics of
your installation.
1
Select Settings on the
screen.
2
Select Heating on the
screen.
6.1.1 Max.
heating
fl ow temperature
b
Ensure that the heating curve setting is compatible
with the installation.
3
Select max. heating fl ow T°
on the screen.
4
Adjust the installation's
max. heating fl ow
temperature.
6.1.2 Heating
curve
The following menu allows you to select the heating curve (value
adjustable between 0.2 and 4 - factory setting: 0.5), which allows
you to obtain the maximum heating demand for the usual minimum
outdoor temperature for the region in which the sensor is installed.
The automatic heating curve function continually and automatically
seeks the most suitable value to ensure your comfort and
the effi ciency of your heating system. The optimum value is
obtained approximately 24 hours after the system is started. It is
recommended to activate this function.
INSTALLATION
EN