FeiYu Tech FY-X4 User Manual
Page 5
GuiLin FeiYu Electronic Technology Co., Ltd
GuiLin FeiYu Electronic Technology Co., Ltd http://www.feiyudz.cn E-mail: [email protected]
Page 4
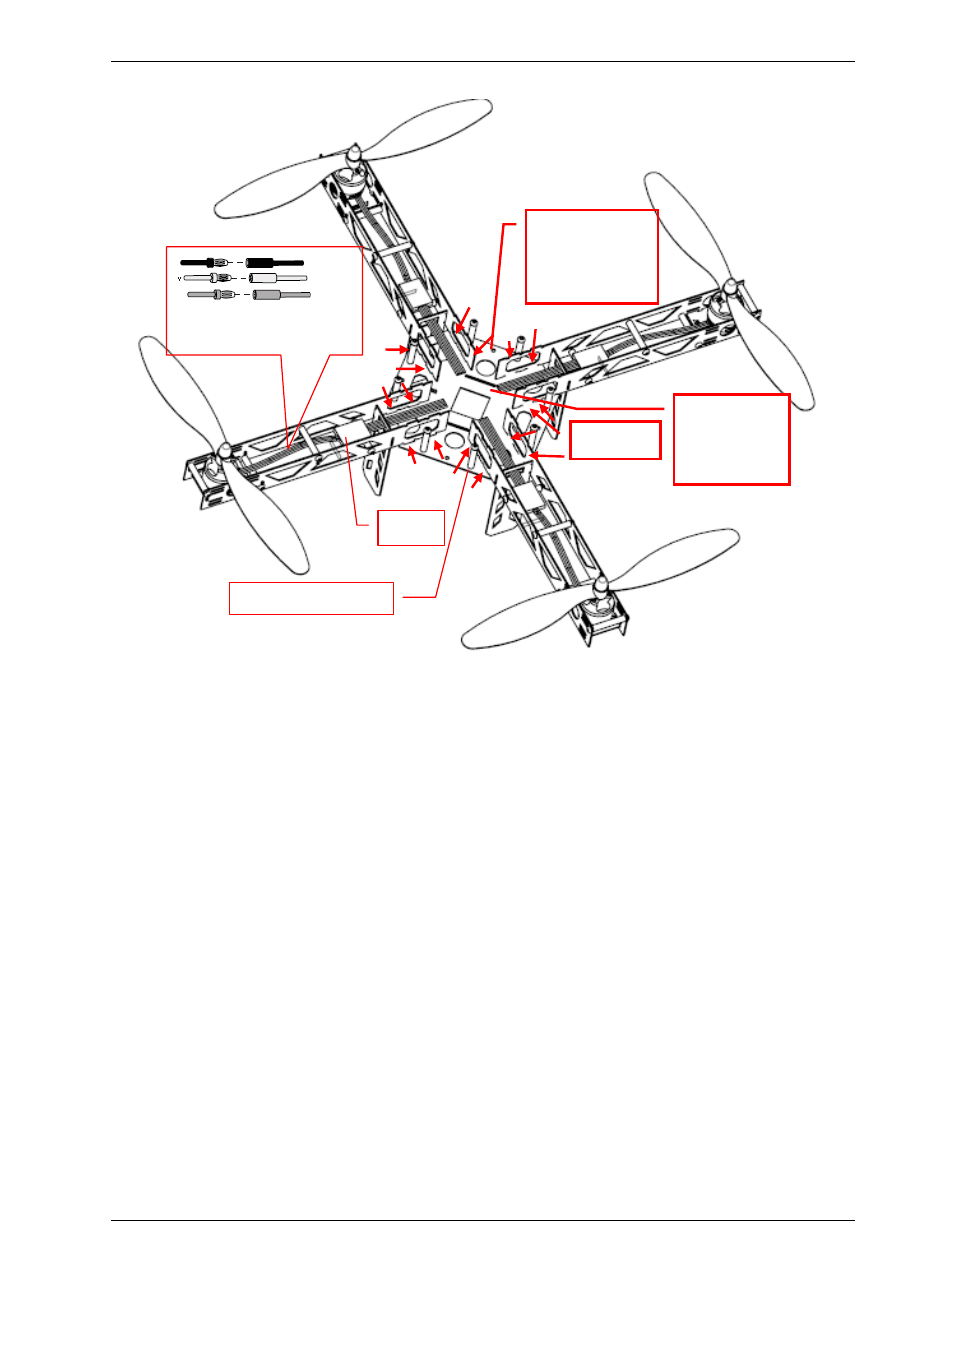
Step 3: Welding (soldering) the frames to the bottom fuse plate with
the electronics.
To accomplish this you will need a small soldering iron aprox. 35w.
Plug in the soldering iron and while it is coming to temperature, gather your Rosen Core solder and safety
glasses.
With the soldering iron at temp. place the tip on the bottom fuse weld point, making sure that the tip makes
contact with both the frame and fuse weld points. Apply solder at this point, you will notice that the solder
will wik (Flow) smoothly and make a gusset. Make sure you don’t have a cold solder joint. I needed,
reheat the joint. Use caution as not to Over Heat the solder joints as this will cause the metal to curl up and
away from the contact point.
Follow this process for the remaining points.
Now remove the top Fuselage plate, this will gain you access to the weld points inside and between the
Frames.
Once inspected and sure that no cold solder joints are there. Connect a 3S Lipo Balance plug to the plug on
the bottom of the Fuselage.
You should have all the led’s lit and the bottom will light up White and will flash for a few seconds then glow
steady. If some of the led’s do not light , inspect all your weld points. You can also take a volt meter and
on DC range, check for proper voltage Aprox. 2.3vdc is present at the weld points.
Once you have the led’s inspected, remove the battery, place the fuselage you removed previously and place
eight button head screws in the corresponding holes and tighten them.
Cross any two wire ,
change Motor rotation
welding
ESC
Fuselage with
Electronic
components
Magic cable
tie
through
square
groove
M3×25mm Pillar