High performance ice fishing gear – Eskimo 69164 User Manual
Page 8
Eskape
™
400 Hardwater Series (69164)
Page 8
GetEskimo.com
HIGH PERFORMANCE ICE FISHING GEAR
1-800-345-6007
®
fIGuRE 8
fIGuRE 9
snap button snapped
in place
door
spreader
poles
spreader poles
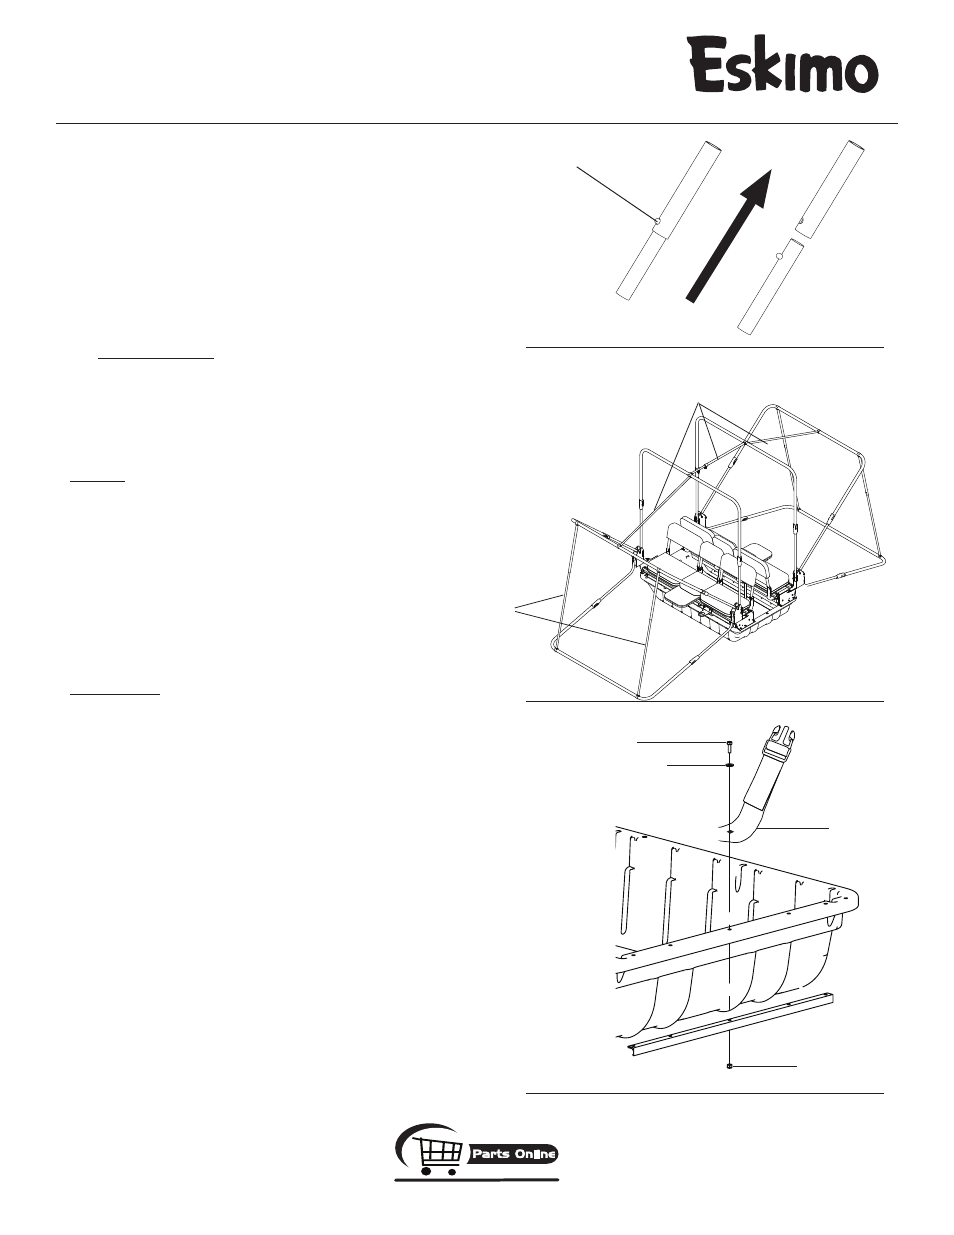
19. Unzip doors and move to the inside of shelter. Attach all door spreader
poles into position by snapping C-clip over cross brace poles. Attach all
Velcro loops to cross brace poles.
SEE fIGuRE 9.
20. Attach the short strap/buckle that is sewn to the wall of skin to the sled
lip and support strap using (2) provided 1/4-20 x1” hex head bolts, nyloc
nuts and washers.
SEE fIGuRE 10. Tighten securely.
21. Push ends of 8’ tow rope through hitch tab or holes provided at the
front of sled and knot each end to secure. This tow rope is designed for
manual pulling by hand only. Do not tow behind a motorized vehicle with
rope. For high speed towing, you should purchase the Eskimo Tow Hitch
accessory.
IMPORTANT NOTE: If purchasing a tow hitch for your Eskimo ice
shelter, it is highly recommended that you also purchase a high
speed tracking kit to help extend the life of your sled and prevent
unnecessary damage. Failure to do so may result in voiding of your
warranty.
SET-uP & uSE INSTRuCTIONS
SET-uP:
1. From the outside of shelter, pull out all cross brace poles and snap into
place. As you pull out each cross brace pole and snap into place, flip all
cross braces over to the in use position.
2. Secure all spreader poles in between all cross brace poles by snapping
C-clips over cross brace poles. The center roof spreader pole is adjust-
able, so you can apply the proper amount of tension to the poles and
skin. Tighten thumb screw at desired location.
3. Snap the two side release buckles together located on each end of the
sled. This will securely attach the long sides of the skin to the sled. Pull
straps tight to apply the correct amount of tension.
TAKE-DOWN:
1. Remove all spreader poles and place in bottom of sled.
2. Detach all Velcro straps on the two center (vertical) cross brace poles.
These Velcro straps all say “Detach Before Collapsing Shelter”
3. Unbuckle the two side release buckles so the skin is no longer attached
to the sled.
4. Remove backrest pads from one seat kit only, it does not matter which
side.
5. Close all window covers, vent covers and zip doors shut.
6. Press the QRS pole clips in and retract all cross brace poles to their
shortest length. Starting with the inner most cross brace poles, flip all
poles back into the transport position by using
fIGuRES 11A and 11B
as a guide line for the proper alternating sequence. The sequence must
start with the inner most cross brace pole that is on the opposite side of
the seat kit that you removed the backrest pads from because this will
allow for that cross brace pole to lay flat against the opposite side seat kit.
Use extreme caution when flipping poles for transport position and make
sure no part of the skin gets pinched, caught or stuck between any poles
or in any pinch points. Fold excess skin inside sled when complete.
NOTE: THIS STEP IS EXTREMELY IMPORTANT TO dETER FROM
dAMAGING POLES ANd SKIN! Use extreme caution so you don’t
rip or tear any portion of the skin, especially around the hinges or
any pinch point areas.
fIGuRE 10
(2) 1/4”-20” x 1” bolts
(2) 1/4” washers
short strap/buckle
from skin
(2) 1/4” x 20” nuts