Ma span, Settdsec 0 alarm3, Λ 20 – ENMET AM-5175 User Manual
Page 16: Settdsec 0 alarm1, Λ 5 settdsec 0 alarm2, Λ 10
AM-5175
ENMET Corporation
14
5.2.4 Alarm Set Points
The
AM-5175
has three alarm set points set at the factory. These alarm points are normally set at established safety levels.
Alarm set points can be changed within limits.
To change any of the three alarm points:
Enter the maintenance menu as shown in Figure 6
AM-5175
Maintenance Menu flow chart.
1.
Press the
M
ENU
button until to display Alarm1 is displayed.
2.
Press the
S
ELECT
button to initiate alarm set point change
3.
Press the
M
ENU
button to change the digit indicated by the underscore cursor
Λ
- Indicates increasing alarm
V - Indicates decreasing alarm
4.
Press the
S
ELECT
button to move the cursor to the next digit
When last digit is entered the
AM-5175
will advance to the next menu
5.
Use M
ENU
and S
ELECT
switches as above to change time delay.
Between 0 and 5 seconds is allowed
6.
Press the
M
ENU
button to advance to the next menu
N
OTE
: Alarms 2 and 3 can not be set below the Alarm 1 setting.
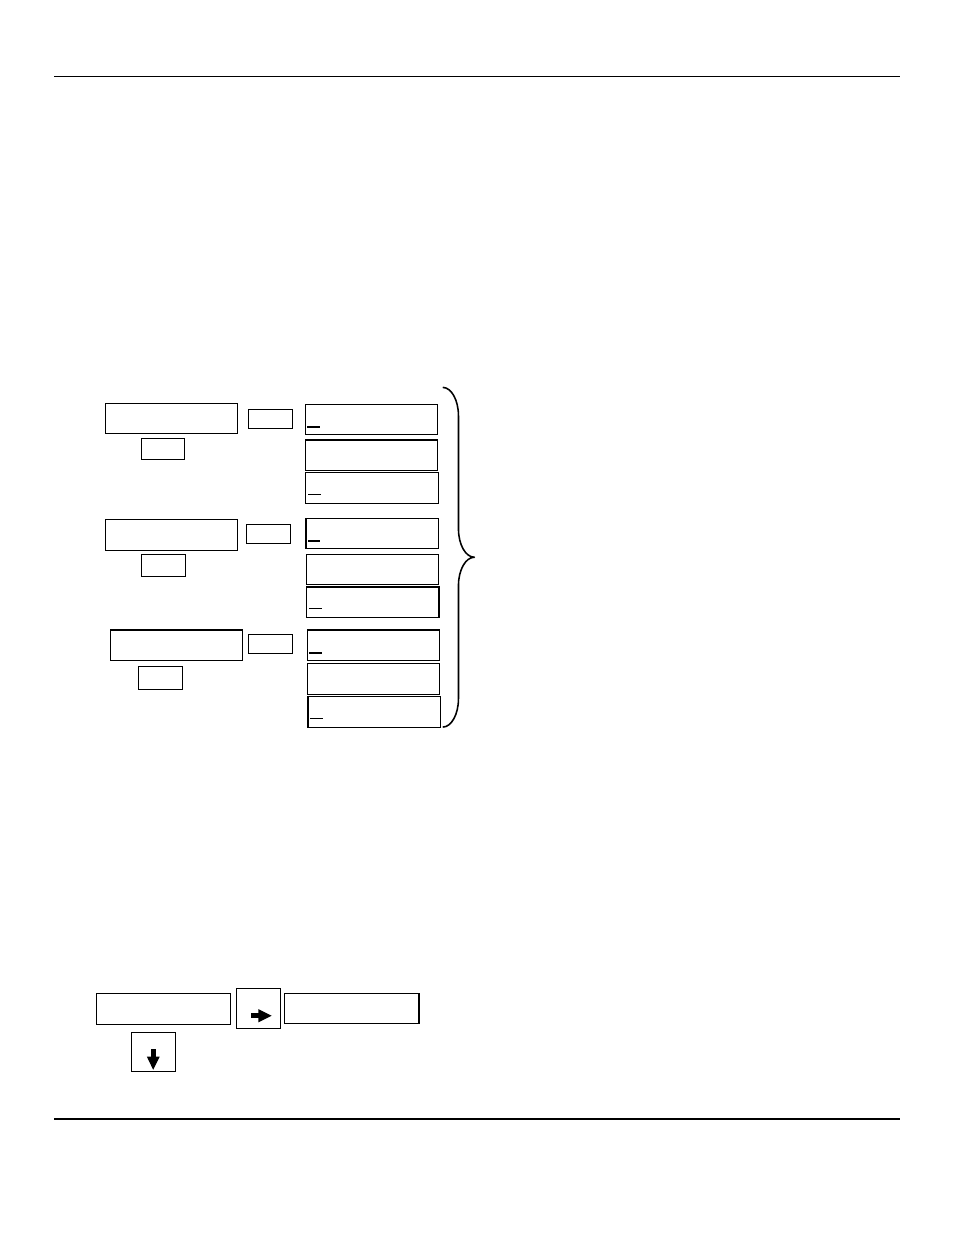
Example of Alarm Set Point menus:
N
OTE
:
Software revision may cause variations of display output.
5.2.5 mA Span Set
The
AM-5175
4-20mA span range is set at the factory, normally to the full scale of the measurement and can be changed
within limits.
To change the span range:
Enter the maintenance menu as shown in Figure 6
AM-5175
Maintenance Menu flow chart.
1.
Press the
M
ENU
button until to display Span is displayed.
2.
Press the
S
ELECT
button to initiate the mA Span menu
3.
Press the
M
ENU
button to change the digit indicated by the underscore cursor
4.
Press the
S
ELECT
button to move the cursor to the next digit
When last digit is entered the
AM-5175
will advance to the next menu
5.
Press the
M
ENU
button to advance to the next menu
Example of mA Span menu:
mA Span
Menu
50
To change mA Span set points:
Press Menu button until mA Span is displayed
Press Select button to display the set point
The Menu button changes digit indicated by underscore cursor
The Select button locks underscored digit and moves to next digit
Select
To change Alarm set points:
Press Menu switch until Alarm to be changed is displayed
Press Select switch to display the set point
The M
ENU
switch: changes digit indicated by underscore
cursor
The S
ELECT
switch: locks in the underscored digit and
moves to next digit
If change is not within range display returns to first digit
If change is within range display moves to Set Time Delay
Use M
ENU
and S
ELECT
switches as above to change time
delay. Between 0 and 5 seconds is allowed
If change is within range display moves to next menu
Λ
- Indicates increasing alarm
V - Indicates decreasing alarm
SetTDsec
0
Alarm3
S
ELECT
Λ 20
M
ENU
SetTDsec
0
Alarm1
M
ENU
S
ELECT
Λ 5
SetTDsec
0
Alarm2
M
ENU
S
ELECT
Λ 10