Slide repair instructions – Bimba Ultra Slide Rodless Cylinder User Manual
Page 2
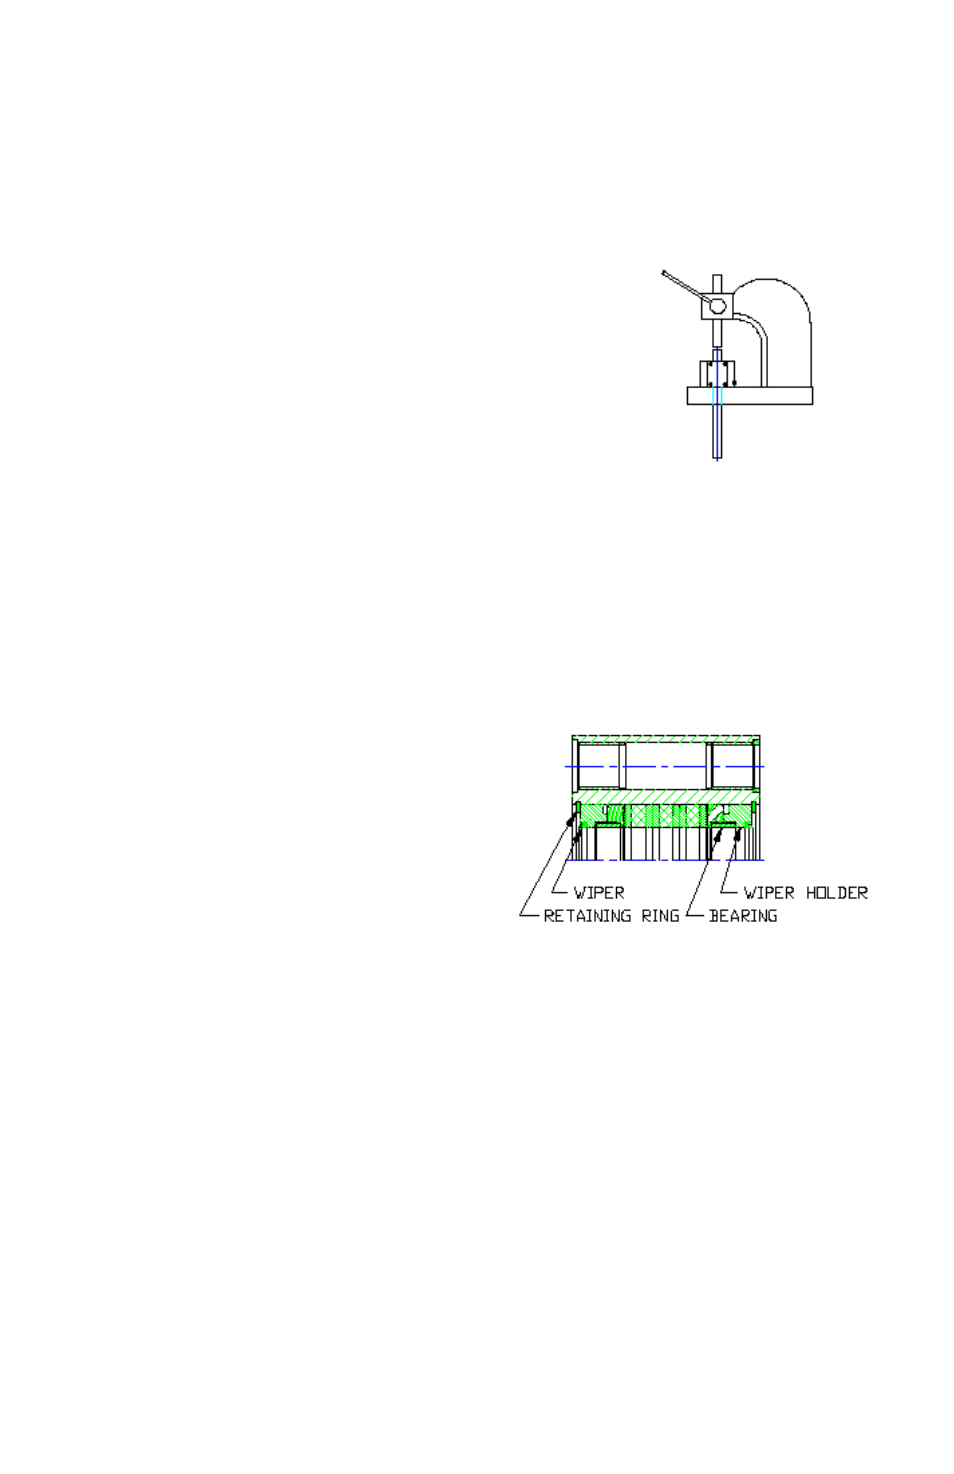
Figure 1:
Figure 2:
Refer to Figure 1 for Steps 1–7
1. Remove air pressure and fittings.
2. Wipe down and clean the unit.
3. Remove the four cap screws that fasten the end
blocks to the guide rods.
4. Remove the end blocks and the guide rods keeping
the carriage, body and piston together as a unit.
5. Remove any grease, dirt or oil from the individual
pieces.
6. Place the carriage, body and piston assembly in
an arbor press. Using a non–magnetic rod or shaft,
press on the piston to uncouple it from the carriage magnets. Do not let the
body slip out of the carriage during this operation.
7. Remove the carriage from the body leaving the piston inside the body. Place
body and piston aside.
Refer to Figure 2 for Steps 8–12
8. Remove retaining ring, wiper holder
and bearing from the center hole on the
carriage. Repeat for both ends.
9. Insert new bearings into both ends.
10. Noting the orientation of the wiper lip,
remove the old wiper from wiper holder
and insert new wipers with the same
orientation.
11. Insert the wiper holder into carriage.
12. Assemble the retaining ring into its
groove in the carriage.
Refer to Figure 3 for Steps 13–17
13. Plug the center hole of the carriage (both ends) with a clean rag or cloth to
prevent bearing contamination.
14. Pry out the four guide shaft wipers or press rings (depending on bore size and/
or option) with a screw driver or similar tool.
15. Press out the four guide shaft bearings using care not to disturb the internal
press rings.
16. For the 3/4” thru 2” bore sizes, press in the new guide shaft bearings to the
bottom of the counterbore using an arbor press. For the 5/16” thru 9/16” bore
sizes, press the bearing into the dimension shown in the chart.
17. Press in the new wipers or press rings, depending on bore size and/or op-
tions.
SLIDE REPAIR INSTRUCTIONS