Austin Hughes IPM-01 User Manual
Page 11
www.austin-hughes.com
UM-IPM-01-Q213V2
P.7
Part II. IP Confi guration and Software
< 2.1 > IP dongle confi guration
1. Prepare a notebook computer to download the IP setup utilities from the link :
http://www.austin-hughes.com/support/utilities/infrapower/IPdongleSetup.msi
2. Double click the IPDongleSetup.msi and follow the instruction to complete the installation.
3. Go to each fi rst level PDU with the notebook computer & a piece of
CAT. 5 / 6 cable
to confi gure the IP dongle by IP
setup utilities as below. Please take the procedure for all IP dongles ONE BY ONE.
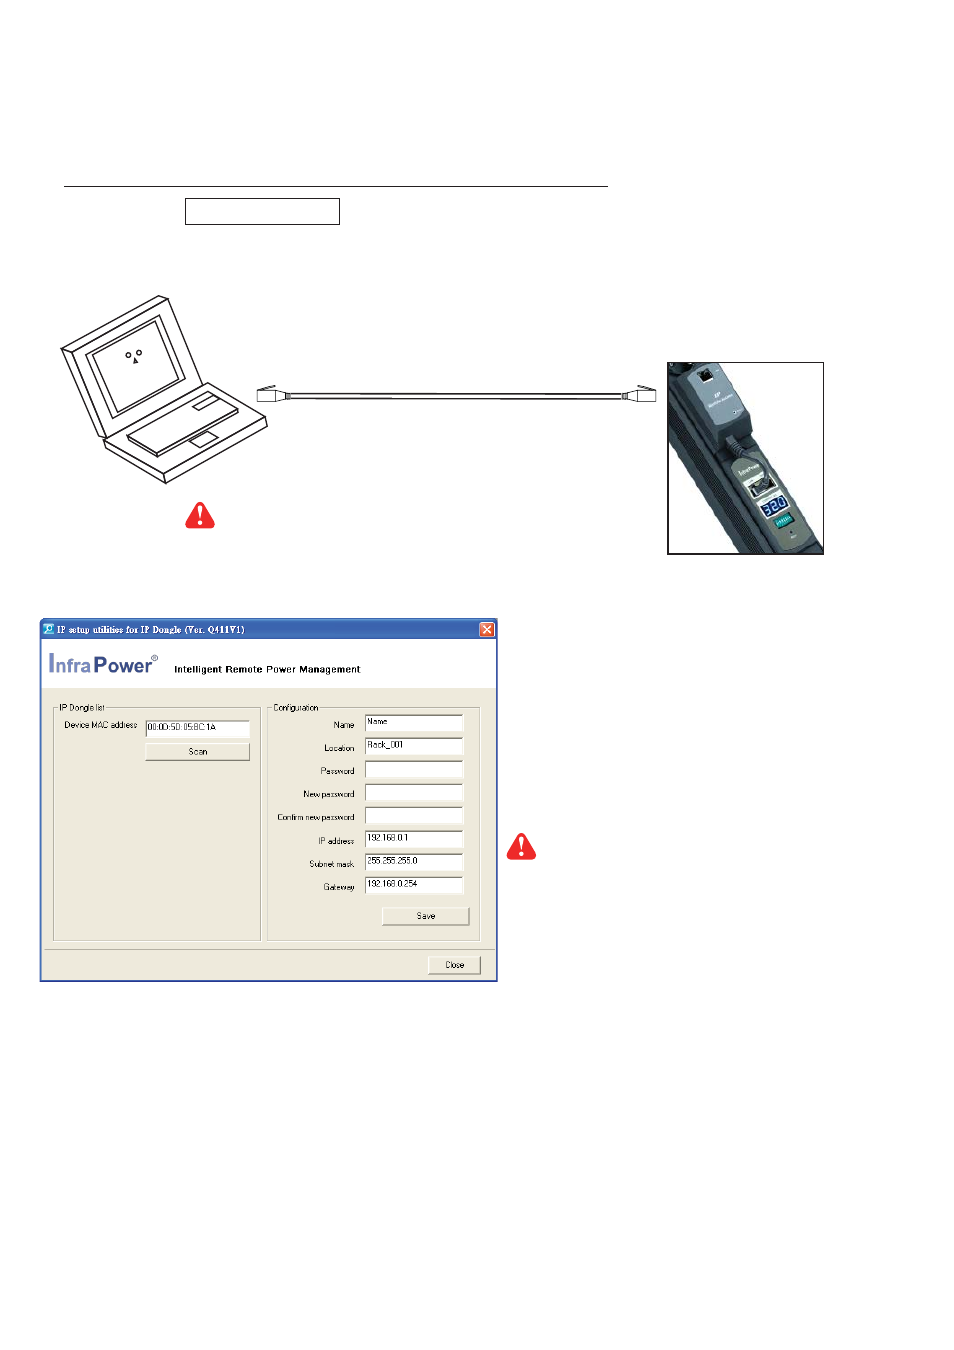
After the completion of IP dongle connection, please take the following steps to confi gure the IP dongle :
IP dongle on 1st level PDU
To IP dongle
LAN port
To notebook computer
LAN port
CAT. 5 / 6 cable
4. Click Scan to search the connected IP dongles
5. Enter the device name in the name fi eld ( min. 4 char. / max. 16 char. ). The default is Name.
6. Enter the location in the location fi eld ( min. 4 char. / max. 16 char. ). The default is Rack_001.
7. Enter the password in the password fi eld for authentication ( min. 8 char. / max. 16 char. ). The default is 00000000.
8. Enter the new password in the new password fi eld ( min. 8 char. / max. 16 char. ).
9. Re-enter the new password in the Confi rm new password fi eld.
10. Change the desired IP address / Subnet mask / Gateway, then click Save to confi rm the setting to IP dongle.
11. The default IP address is as below:
IP address :
192.168.0.1
Subnet mask :
255.255.255.0
Gateway :
192.168.0.254
Reconnect the IP dongle with the network device
( router or hub ), after fi nish IP dongle confi guration.
Ensure the PDU in
power ON status
Write down the new IP address & password
for < Setup > purpose, refer to P.13