3 getting started, 1 installing the cpu, Chapter 3, getting started – ADLINK AmITX-IB-I User Manual
Page 31: Installing the cpu, 3getting started
Getting Started
19
AD-mITX-T40H
3
Getting Started
This chapter provides information on how to install components on
the AD-mITX-T40H motherboard.
3.1
Installing the CPU
The AD-mITX-T40H supports a 22/32nm Intel® Xeon®
E3-1275/1225, Core™ i7/i5/ i3, Pentium/Celeron® processor in an
LGA1155 socket.
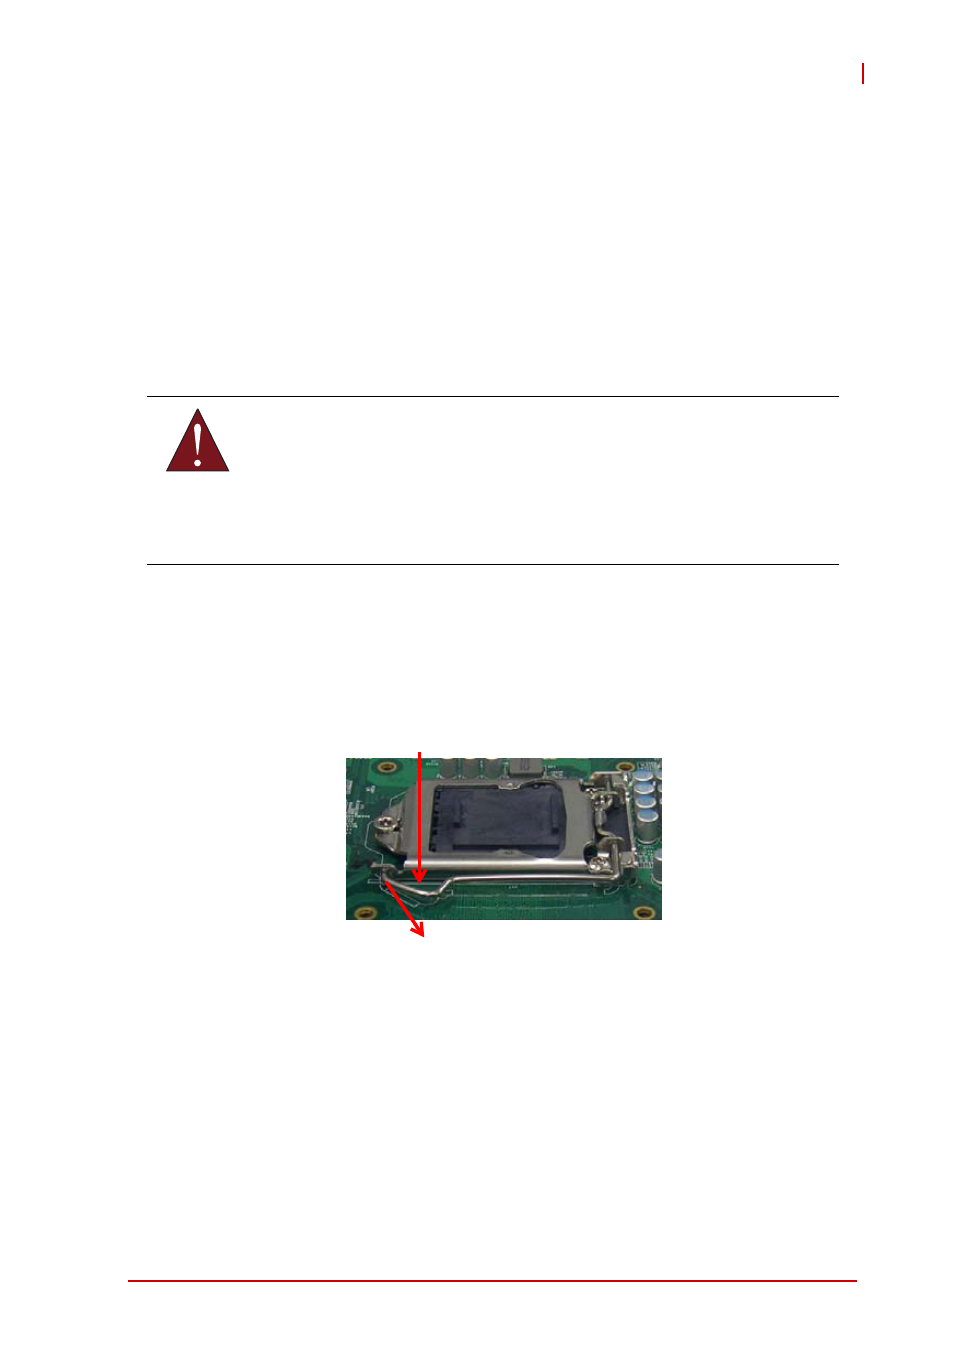
To install the CPU:
1. Press down on the locking arm (A), then push it away from
the socket to disengage it from the retention tab (B).
WARNING:
Disconnect all power to the board before installing a CPU to
prevent damaging the board and CPU.
Do not touch socket contacts. Damaging the contacts voids the
product warranty. Follow the installation instructions carefully to
avoid damaging the board components.
A
B
See also other documents in the category ADLINK Hardware:
- USB-1901 (84 pages)
- USB-1210 (54 pages)
- USB-2401 (60 pages)
- USB-7230 (50 pages)
- USB-2405 (56 pages)
- DAQe-2010 (92 pages)
- DAQe-2204 (100 pages)
- DAQe-2213 (94 pages)
- DAQe-2501 (74 pages)
- PXI-2010 (84 pages)
- PXI-2020 (60 pages)
- PXI-2501 (62 pages)
- cPCI-9116 (98 pages)
- ACL-8112 Series (93 pages)
- ACL-8112 Series (94 pages)
- ACL-8112 Series (92 pages)
- ACL-8216 (75 pages)
- ACL-8111 (61 pages)
- PCM-9112+ (10 pages)
- PCM-9112+ (94 pages)
- cPCI-6216V (47 pages)
- ACL-6126 (28 pages)
- ACL-6128A (40 pages)
- PCM-6308V+ (52 pages)
- PCM-6308V+ (4 pages)
- PCI-7444 (82 pages)
- PCI-7434 (48 pages)
- PCI-7234 (56 pages)
- PCI-7260 (66 pages)
- PCI-7258 (38 pages)
- PCI-7256 (48 pages)
- PCI-7250 (48 pages)
- LPCI-7250 (48 pages)
- PCI-7396 (65 pages)
- PCI-7296 (59 pages)
- PCI-8554 (67 pages)
- PCIe-7360 (94 pages)
- PCIe-7350 (86 pages)
- PCIe-7300A (114 pages)
- PCIe-7200 (51 pages)
- PCI-7300A (112 pages)
- PCI-7300A (83 pages)
- PCI-7200 (96 pages)
- cPCI-7300 (82 pages)
- cPCI-7300 (83 pages)