Installation instructions, Install blower mounting bracket, Install the electrical connection – Dacor Preference PHW User Manual
Page 8: Install the chimney mounting bracket
6
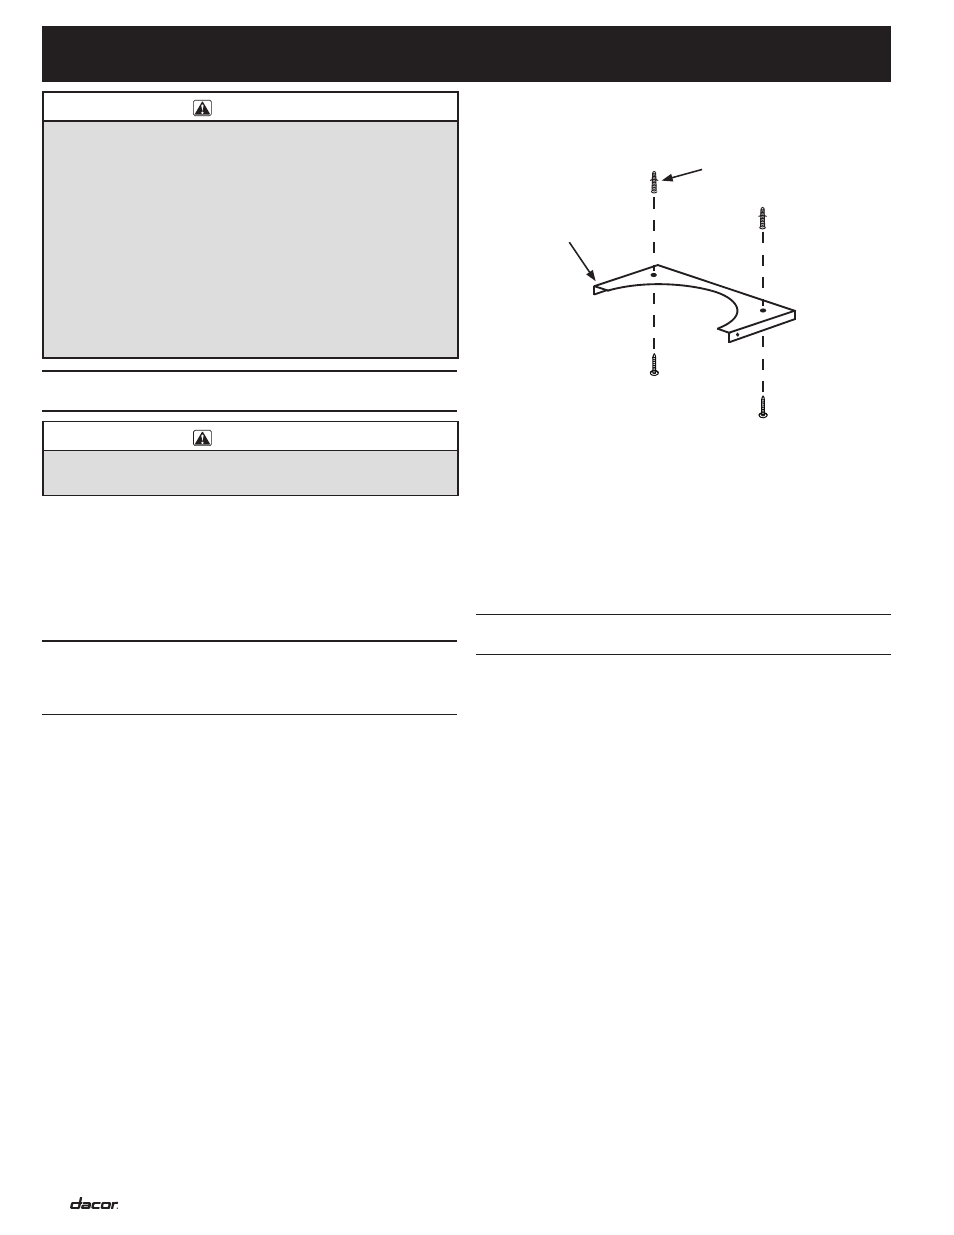
Locate the chimney mounting bracket and position it
4.
against the ceiling as shown. Center it on the vertical
center line drawn on the wall.
Mark the ceiling in two places through the holes in the
5.
top of the bracket. Remove the bracket from the ceiling.
Drill 5/16” holes through the two spots marked on the
6.
ceiling.
Insert the two of the provided wall anchors into the
7.
holes on the ceiling.
Place the chimney mounting bracket against the ceiling
8.
and attach it using two included 1 1/2” screws.
Install blower Mounting bracket
Find the mounting bracket template in the shipping
1.
box. Put the template against the wall and line up the
horizontal line drawn on the wall with the horizontal line
on the template.
Line up the vertical line drawn on the wall with the
2.
center line on the template. Iron out all creases and
folds and tape the template to the wall using tape that
will not damage the wall finish.
Using a sharp object, mark the wall through the
3.
template at the center of the three blower mounting
bracket hole positions (near the top) and the position of
the two “L” brackets, near the bottom.
Remove the template.
4.
InstallatIon InstructIons
WARNING
Do not install the range hood unless the electrical
•
service provided meets the range hood specifications.
Observe all governing codes and ordinances during
•
planning and installation. Contact your local building
department for further information.
A qualified technician must complete the installation
•
of this built-in appliance. The owner is responsible to
make sure the hood is properly installed.
To avoid an electric shock hazard and property
•
damage, locate electric wires and water pipes and
avoid drilling in the vicinity.
Install the electrical connection
The electrical connection box must be:
Connected to a 120 Vac, 60 Hz dedicated, grounded,
•
circuit protected by a 15 Amp circuit breaker or time
delay fuse.
Located a minimum of 17 inches above the bottom of
•
the range hood.
Install the chimney Mounting
bracket
Determine the vertical center line for the range hood.
1.
The center line for the hood is usually the same as the
center line of the range or cooktop.
Using a pencil, mark the vertical center line on the wall
2.
from where the bottom of hood will be located to where
the top of the chimney will be located.
Draw a horizontal line 9 inches long at 90° to the
3.
vertical center line where the bottom of the hood will be
located. The minimum allowable distance is 30” above
the cooktop.
ANCHOR
CHIMNEY
MOUNTING
BRACKET
WARNING
The electrical service to the range hood should be
•
installed only by a licensed electrician.