Chapter 3 system operating manual – Q-See QT17DVR4C User Manual
Page 9
-e7-
LCD WITH BUILT-IN DVR USER MANUAL
LCD WITH BUILT-IN DVR USER MANUAL
-e16-
Chapter 3 System Operating Manual
3.1 Instructions for front panel and
control unit
remote
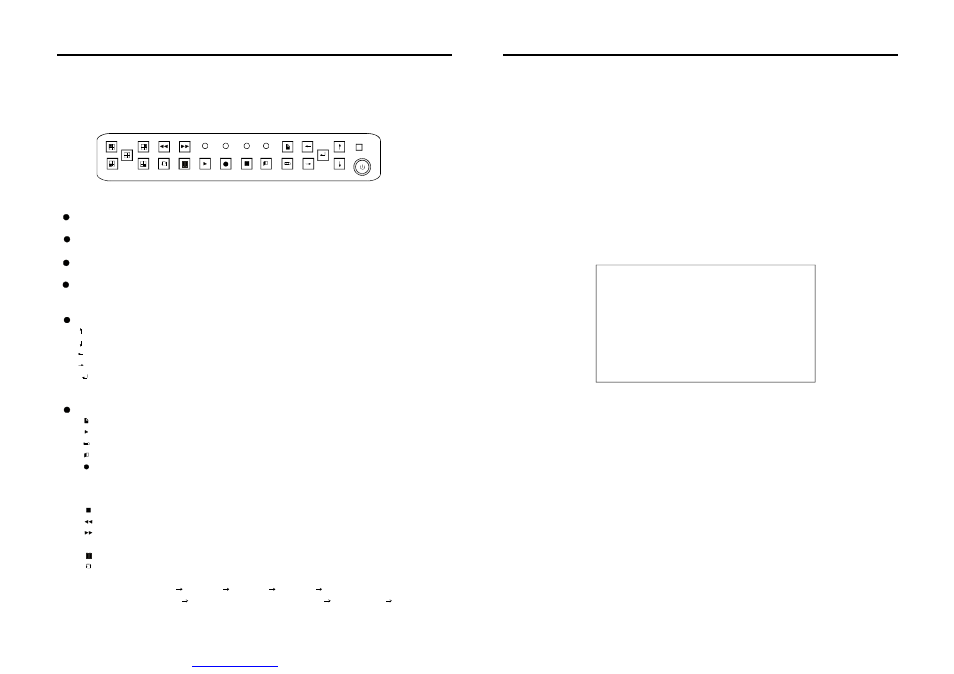
3.1.1 Front Panel
POWER
H.D.
NET
IR
ALA RM
Buttons on front panel and their functions:
① Indicating light area
The alarm light will be on once the alarm is started( no matter what kind of alarm it is for)
The light
when Hard Disk reads and writes the data.
The power is on if the light turns red;
for confirmation,choosing the menu items, and press this button to enter into
the selected sub-menu;Pressing this button can display the real time of the system
when
Main Menu, used for setting each parameters of the system.
Exit button,exit from the current operating menu to last selected menu;
For stopping the recording button and the
recording;
Fast
2 and
4 times;
fast forward button,Play fast forward of the recorded picture at speed of
2
and
4 times;
Used for switching
built-in quad, dual and single picture
:
Channel 1 Channel 2
Channel 3 Channel 4
Dual Views (Channel 1-
Channel 2)
Dual Views (Channel 3- Channel 4)
Built-in quad
Channel1
NET:Indicating light for network
ALARM:Indicating light for alarm
H.D. :Indicating light for Hard Disk
POWER :Indicating light for power
Buttons area
Menu operating buttons
:
【 】button:
【 】Button:
【 】Button:
【 】Button:
【 】Button:
【 】
【
】Button:
【
】Button:
【
】Button:
【
】Button:
【
】Button:
Ч
Ч
Ч
Ч
②
:
Play the existing recording on the hard drive;
Checking the menu buttons, used for checking recorded information on the hard disc;
Recording button,four channels manual recording can be started at the same time
when the screen is
, dual views manual recording can be started
when the screen is under two channels surveillance state; Single channel Manual
recording can be started when the monitor is under single channel surveillance state
;
;
:
:
manual
Rewind button, at speed of
mode
in the following order
Functional Buttons Area
Button:
When network connection is ok, it displays green, and w hen data is transferring it flashes.
turns on
UP Directional button;
Down Directional button;
Left Directional button;
ight Directional button
in built-in quad mode
Press this button continuously to see the picture frame by frame
between
R
playing back the recording;
3.3.8 Basic parameter
Record Settings:
Setup
Buiz Settings:
Close
Language Settings:
English
Fastigium Settings:
Open
Recordbag Settings:
30 minute
USB Settings:
Setup
Video Spot Settings:
05 Second
Basic Settings
3.3.6 Net Parameter
Move the
to the net parameter and press enter to get into the system's net interface setting.
See picture below:
cursor
a).
b).
c).
d).
IP address: Press enter or manually type numbers
IP address line.
Moving cursor upon this selection item and pressing [ENTER] key or input
number directly, set host IP address correctly according to host local LAN
setting according to IP address
This feature can be used to set the speed of transfer of data over the network
Sub-net Mask:
Default Gateway:
Bandwith:
on the
Moving cursor over [System information] and pressing [ENTER] key enter into system
information setting interface.
3.3.7 System Information
(need screen shot)
Moving cursor to [Basic parameter] item (bottom color of character change to white means being
selected) and pressing [ENTER] key enter to this item selection setting interface:
Video recording parameter setting: Moving cursor upon this item and pressing [ENTER] key takes
you to the corresponding interface.
Image quality: Divided into "1-8" different parameters. Press [Enter] to change this parameter
The smaller the digit, the better the image quality.
Frames per second: When system has been set to PAL format, it can divide into "25、12、06" three
ranks, when system has been set to NTSC format, it can divide into "30、15、08、"three ranks.
Moving cursor upon this item and pressing [ENTER] key will change its parameter.
Format: Moving cursor upon this item and pressing [ENTER] key can switch system's video record
coding format: VBR、CBR.
Denotes changeable code flow's coding format, this coding format shows, image quality is
invariable, but data code flow's size can change according to moving object's scale inside, the larger
the moving object occupied in image's scale, the larger the code flow.
After entering into sub-menu, move cursor up and down to scroll through the sub
menu.
VBR:
PDF created with pdfFactory trial versi