Operating the grill, Using as a grill, Gas supply – Beko DVG 695 User Manual
Page 10: Natural gas, Gas leaks, Lp cas, Gas flexible hose, Connection, Gas connection
Attention! The text in this document has been recognized automatically. To view the original document, you can use the "Original mode".
operating the grill
1-shelf
I
Parts may become hot when the grill/top
oven is in use, children must be kept away.
When the door is fully open, it remains tilted
slightly, so that any spillage will be directed
away from you.
There is a safety device that prevents the
build-up of gas inside the cavity if the burner
doesn't light or goes out for any reason.
The control knob operates the top cavity as
a grill or as an oven depending on whether
you turn it clockwise or anti-clockwise.
Using
as a
grill
The door must be kept open during grilling
at all times.
1
Open the door.
2
Position the shelf in a suitable position.
3 Press and turn the control clockwise to the
large flame symbol.
4
While keeping it depressed, press the ignition
button to light the burner.
5 Keep the control depressed for 15 seconds
after the burner has lit to over-ride the safety
device.
6
Allow the grill to preheat for 5 minutes.
7 The grill can be operated at the max setting.
8
To switch off turn the knob anti-clockwise
to the • off position.
If the burner doesn't light the first time,
press the ignition button once or twice
again. If it still doesn't light, turn off and
wait for 1 minute to allow gas to disperse
before trying again.
Do not hold the control in for more than
15 seconds.
Ensure the food is correctly positioned on
the grill pan under the grill burner.
Oiling the grill rack prevents meat sticking
on the wires.
Do not line the grill pan with aluminium
foil. This will result in an increase in
temperatures and could result in damage
to your cooker or increased risk of fire.
Always remove the grill pan from the
compartment as soon as you have finished
grilling, it makes the pan much easier to
clean. When grilling, if meat is placed too
near the grill burner, the fat may ignite.
17
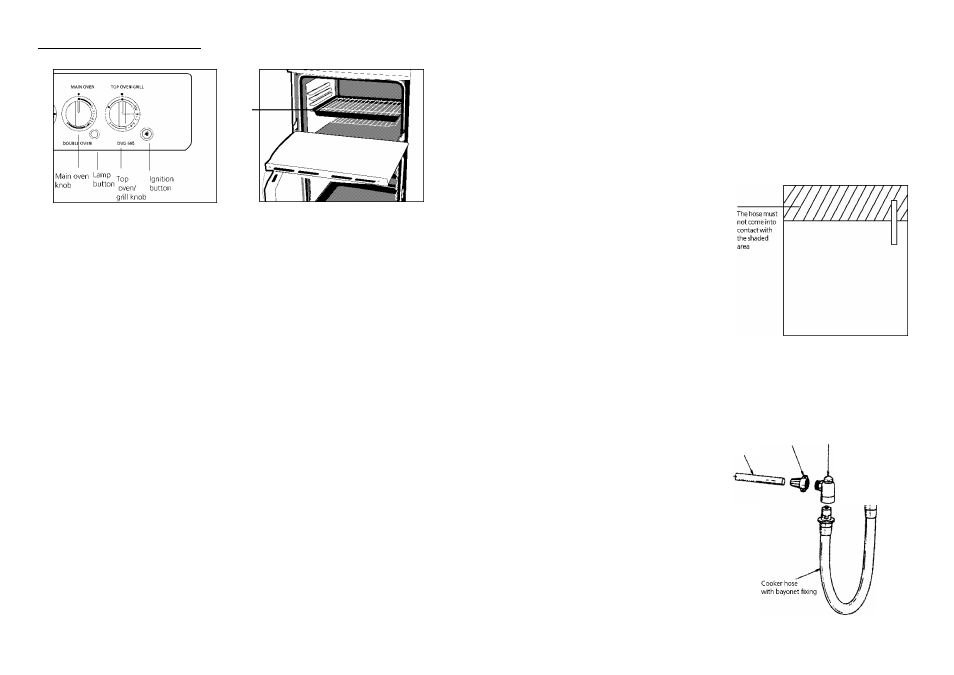
gas connection
Gas supply
Your oven must only be used on natural
gas or LP gas.
Natural Gas
The cooker is designed for UK installation
using a flexible connection with tubing in
accordance with the regulations in force. Length
of 900mm is recommended.
Gas leaks
If you smell gas, turn off all gas controls
and extinguish any open flame. Open a
window to ventilate the room. Don't touch
any electrical switches. Contact your local Gas
Supplier immediately.
LP cas
For flexible connections use a bayonet type
hose, suitable for use on LP Gas up to 50 mbar
pressure rise the flexible hose should be
coloured black with a red stripe, band or label.
Gas flexible Hose
If a flexible hose is used it must not come
into contact with the top 150mm/6 inches {the
shaded area on the diagram) of the rear of the
appliance.
Do not pass the hose through the hot region
behind the oven.
Connection
Connect the flexible gas hose to the oven
as follows.
1 Use nonsetting gas sealant on the
connection to the cooker.
2 Connect the gas supply pipe (nat. gas) at
the rear of the cooker Rp 1/2. (1/2 in BSP)
3 Assemble burner caps and rings fit pan
supports in position, (left and right sides)
4 Turn on the gas supply and check for
soundness.
5 Light two burners and check that the
pressure is correct.
Shut-off-valve
Right angled
bayonet socket
incorporating
Adaptor spring loaded
backplate valve
Copper pipe
10