Operating controls and adjustments, Raising and lowering the spindle, Adjusting the fence – Black & Decker SR650 User Manual
Page 9
Attention! The text in this document has been recognized automatically. To view the original document, you can use the "Original mode".
purpose. These holes should be used to anchor the shaper/router to
your workbench or other stationary rigid frame. Alternately, to
enhance portability, if can be mounted to
a
piece of wood that can be
"C" clamped to your work surface or Workmate® Workcenter.
CAUTION: Failure to permanently mount or "C" clamp the
shaper/router to the work surfoce con be hazardous.
Operating Controls and Adjustments
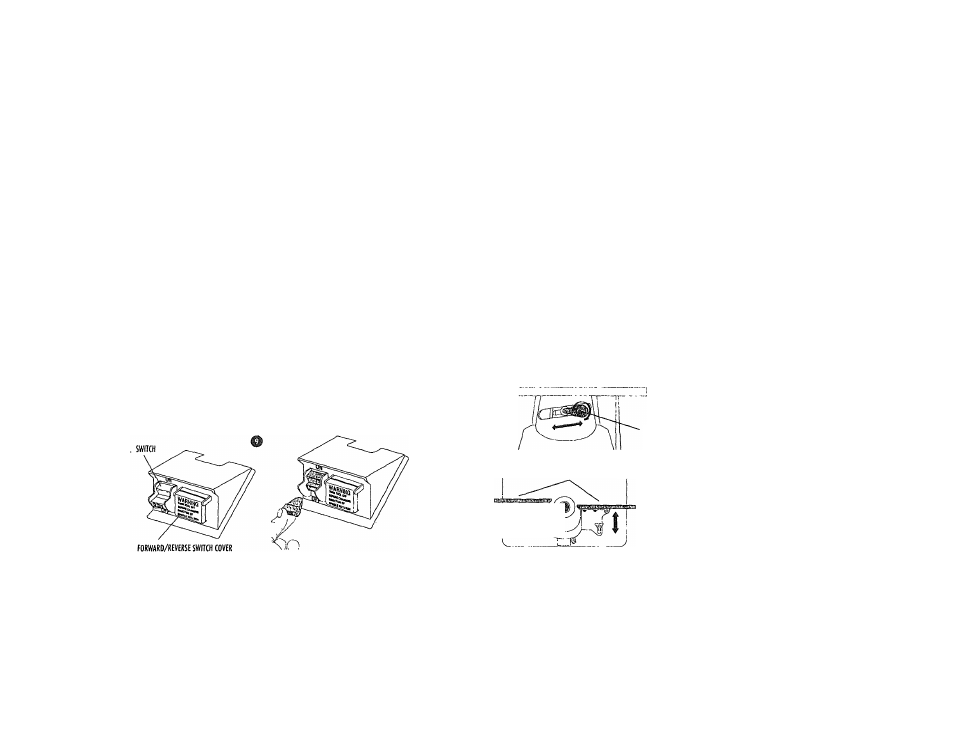
SWITCHES (FIGURES 9 AND 10)
We suggest that when the tool is not in use, the switch be locked in the
OFF position.
The switch is located on the Shaper/Router as shown in Figures 9
and 10. To turn the tool ON, flip the toggle upward. To turn the tool
OFF, flip the toggle down. The switch will stay in either position without
being held. For safety, the red switch toggle may be removed when the
switcn is in the locked OFF position. This will prevent unintentional
starting by others.
FORWARD/REVERSE SWITCH
The forward/reverse switch is provided for reversing the direction of
the cutter when it is desirable to work from left to right rather than right
to left. To reverse the cutter direction from counterclockwise (working
from right to left) to clockwise (working from left to right) or vice-verse,
turn the tool off and raise the plastic door over the forward/reverse
switch. Depress the left side of the switch for counterclockwise rotation
, and the right side for clockwise rotation.
When changing the direction of rotation, be sure to turn the cutter
over as necessary to assure that all cutting is done by feeding the work
against the rotation of the cutter. Be sure to close the plastic cover
before turning the tool on.
Only shaper bits which can be inverted can be used for left to right
cutting. Router bits can only cut from right to left.
Raising and Lowering the Spindle
The spindle can be raised or lowered on your machine for the
purposes of mounting and removing bits and cutters and for cutting at
various heights. To raise or lower the spindle, turn the handle end
counterclockwise to loosen it and then swing it to the right to raise the
spindle and left to lower it, as shown in Figure 11. When it has been
adjusted to the desired height, turn the handle end clockwise to lock it
into position.
Adjusting the Fence
Begin by positioning the fence so that the bit or cutter is located
directly between the wooden fence boards and that the boards are as
close to the guard as possible without touching it.
e ctmiHG DEPTH HANDLE WOODEN FENCE BOARDS FENCE BRACKET KNOB 0