Agri-Fab Utility Cart 45-01001 User Manual
Page 4
Attention! The text in this document has been recognized automatically. To view the original document, you can use the "Original mode".
Start 1/4"
X
1/2" hex bolts and 1/4" hex lock
nuts through flanges, only nnake finger tight
until all six (6) bolts are in place. See figure 2.
Tighten all six (6) bolts.
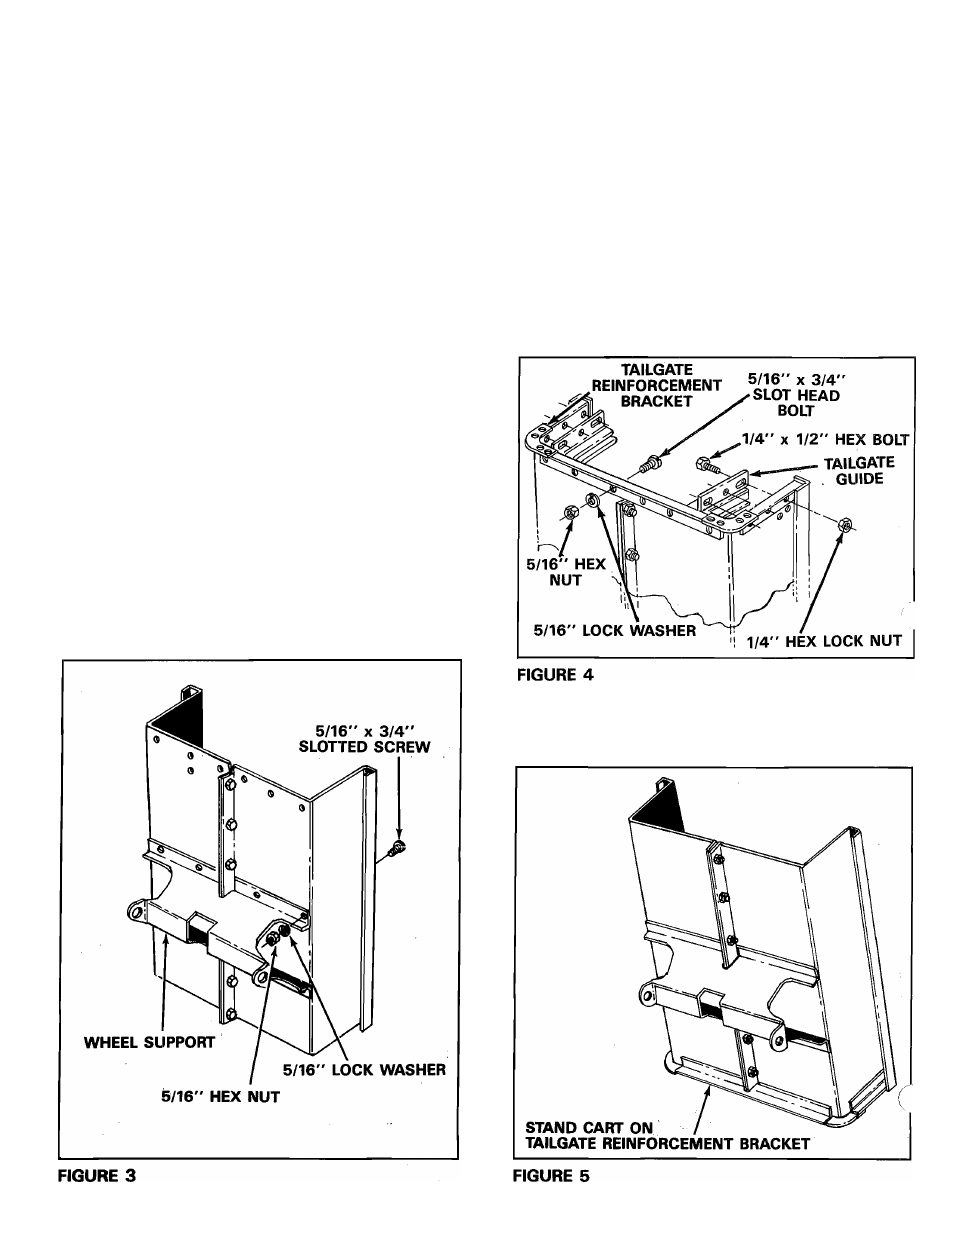
4. Position the wheel support in place on the
bottom of cart. See figure 3.
5. Assemble wheel support to cart with eight
5/16" X 3/4" slotted head screws, 5/16" lock
washers and 5/16" hex nuts. See figure 3.
Heads of screws go to the inside of cart and
should be tightened at this time.
6.
Position the tailgate reinforcement bracket
over end of cart. See figure 5.
7.
Start 5/16"
X
3/4" slotted screws through
bottom of cart (heads of screws to the insic
of cart) and reinforcement bracket. Secure finger
tight with 5/16" hex nuts and 5/16" lock
washers. See figure 4.
8.
Position the tailgate guides so that the holes
line up with reinforcement bracket and cart
body. Refer to tailgate guide detail in figure 4.
9.
Secure tailgate guides with six 1/4" x 1/2" hex
bolts and 1/4" hex lock nuts. See figure 4.
Tighten bolts assembled in steps 6, 7, and 8 at
this time. Do not tighten others.
10.
Reverse the cart position and stand up on
tailgate reinforcement bracket and proceed with
assembly steps 11 through 18. See figure 5.