Note, Rear wheel track adjustment, Leveling the deck – Bolens 138-784-401 User Manual
Page 14: Steering wheel adjustment, Brake adjustment, Warning, Carburetor adjustments
Attention! The text in this document has been recognized automatically. To view the original document, you can use the "Original mode".
NOTE
DO NOT set the parking brake or the
relief valve.
A
WARNING
Be careful of the cooling fan on the front
of the hydrostatic transmission.
6. Turn the connecting rod back and forth until the
rear wheels do not rotate.
7. Shut off the engine.
8. Tighten both lock nuts on the connecting rod.
9. Remove the blocks under the tractor frane and
test the tractor operation.
REAR WHEEL TRACK ADJUSTMENT
The distance between the rear wheels can be cl langed
from wide to narrow by removing the rear whe(}ls one
at a time and reversing them on the hub.
With the rear wheels in the narrow position, t ie out
side of the rear wheels is even with the inside of the
front wheels.
With the rear wheels in the wide position, the inside
of the rear wheels is even with the inside of the front
wheels.
LEVELING THE DECK
1. Check tire pressure in all four tires. Recorr mend
ed pressure is 10 p.s.i.
2. Make certain all deck wheels are mounted ii i same
relative location.
3. On a level surface, engage the PTO and lo\ /er the
deck until it reaches the ground.
All four deck wheels should reach the ground at
the same time. If they do not, adjust the dec k links
as necessary.
■^NOTE
When adjusting the deck links, dis
engage the PTO. Remove the hairpin
clip and washer from the weld bolt.
Thread eyebolt up or down the link as
necessary, and reassemble.
4. Raise the deck
1
/
2
" to 1" above the aground.
Check to be certain the distance from the bottom
edge of the deck to the ground is the same c n both
sides of the deck. If it is not, adjust the links on
the left side of the unit.
Check to be certain the front of the deck is 1/4"
to 3/8" lower than the rear of the deck. If it is not,
adjust the two front links to obtain this distance.
STEERING WHEEL ADJUSTMENT
There are four height positions for the steering wheel.
To adjust the height of the steering wheel, remove the
hex bolt and hex lock nut on the steering shaft. Place
the steering wheel in the position desired and secure
with hex bolt and hex lock nut. Refer to figure 6, inset.
NOTE
When raising the height of the steering
wheel, stretch the steering bellow to
cover the steering shaft.
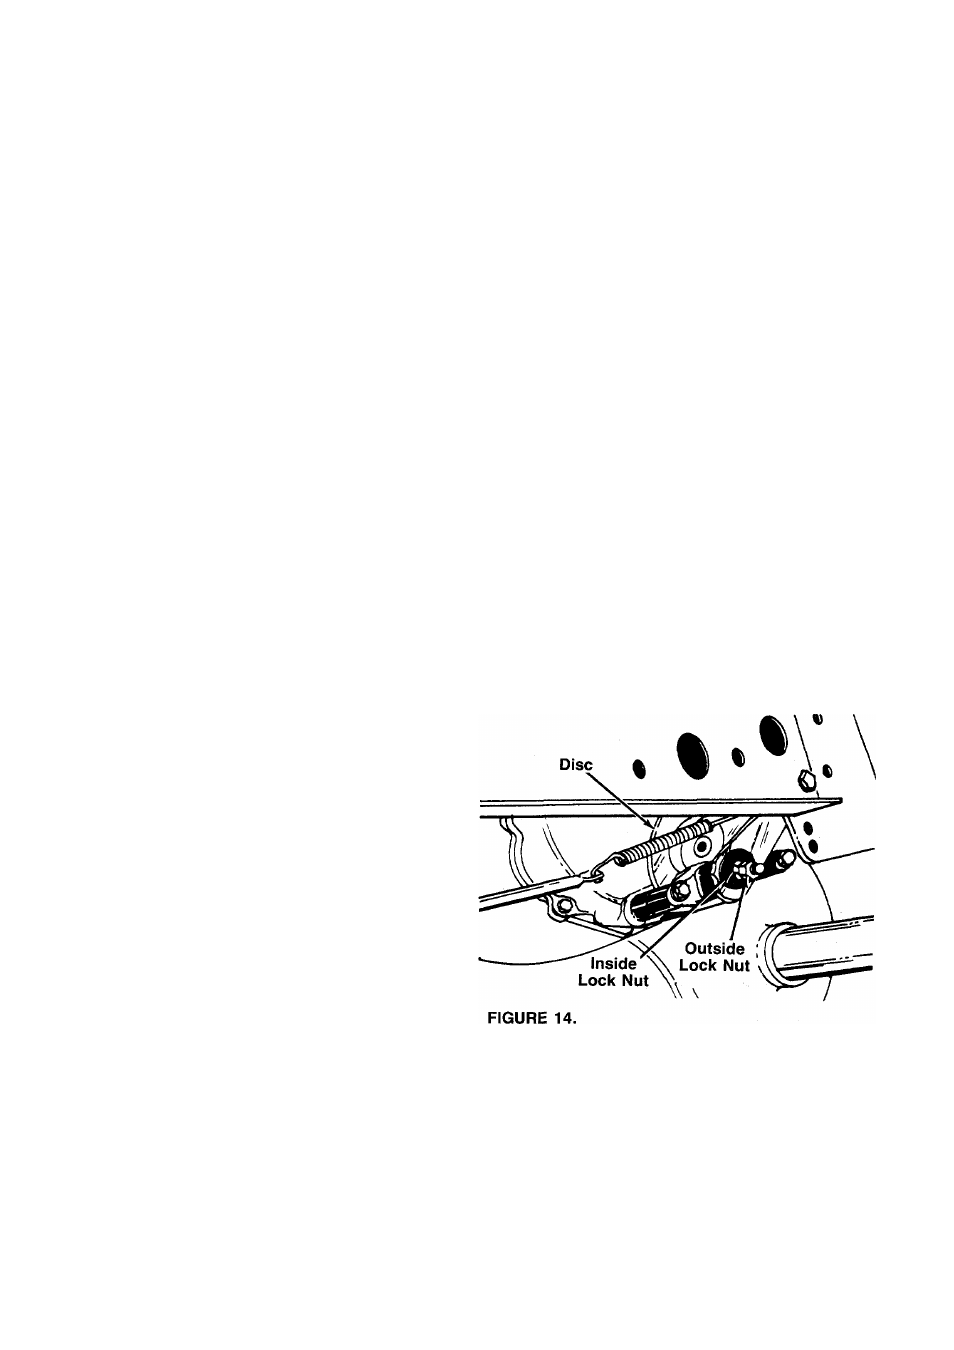
BRAKE ADJUSTMENT
During normal operation of this machine, the brakes
are subject to wear and will require periodic examina
tion and adjustment.
Ac
WARNING
Do not adjust the brake while the
engine is running. Be sure to block
the
wheels
of
the
tractor
before
making the brake adjustment.
1. Loosen the outside lock nut. See figure 14.
2. Turn the inside lock nut in until it locks the disc.
Back off the inside lock nut one complete turn.
Tighten the outside lock nut.
3.
4.
5. Test the brake operation.
CARBURETOR ADJUSTMENTS
A
t WARNING i
If any adjustments are made to the
engine while the engine is running
(e.g.
carburetor),
disengage
all
clutches and blades. Keep clear of
all
moving
parts.
Be
careful
of
heated surfaces and muffler.
14