Tine operation check (see fig. 19), Service and adjustments – Poulan 163760 User Manual
Page 14
Attention! The text in this document has been recognized automatically. To view the original document, you can use the "Original mode".
SERVICE AND ADJUSTMENTS
MID^WIDTH TILLING ^ 24“ PATH (See Fig, 171
• Assemble holes “A” in tine hubs to holes “C" in tine
shaft.
1
( .
i V
1
o O ; i O
J.jot
■
i
"o' I
'
FIG. 17
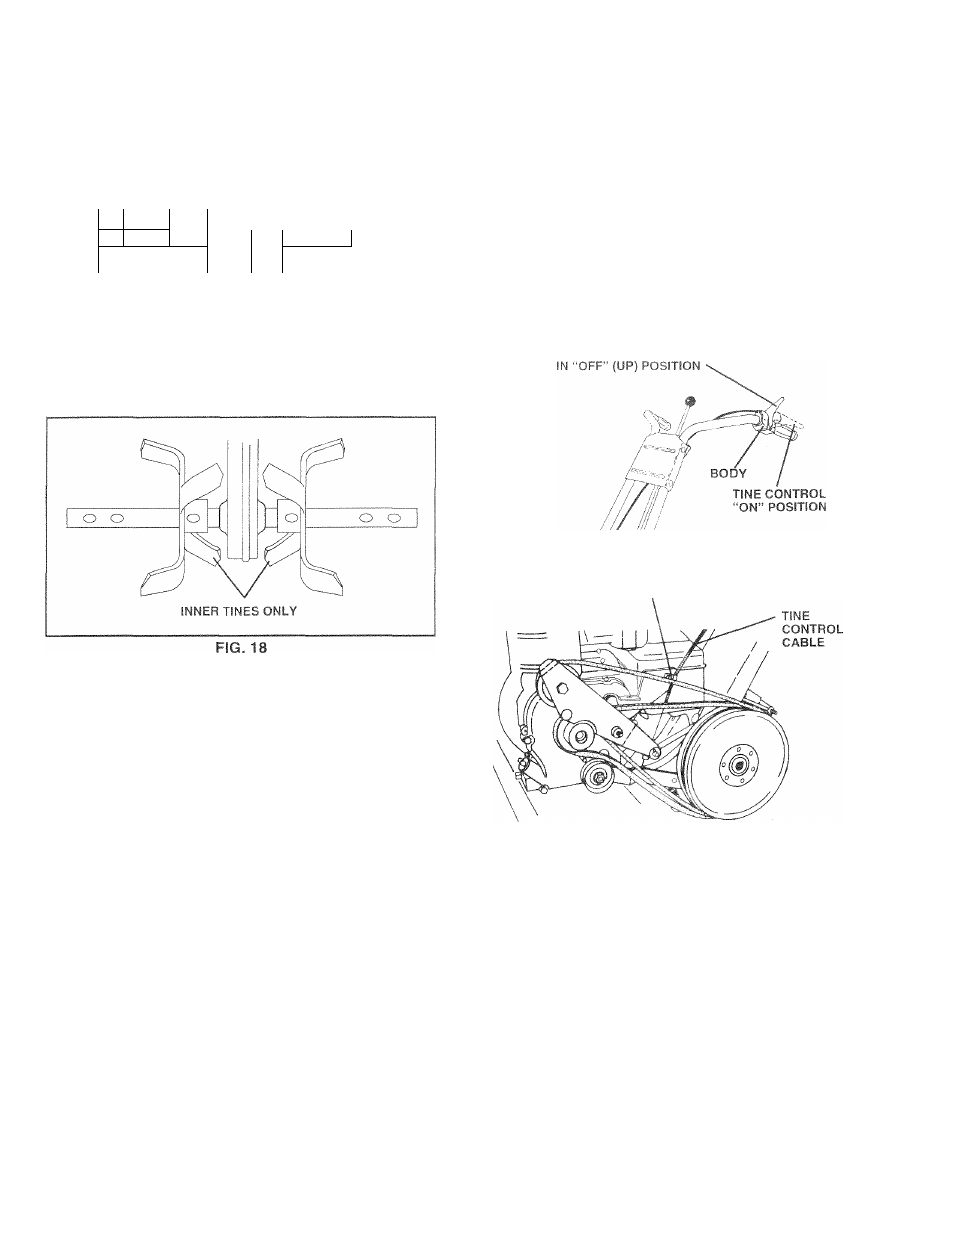
NARROW TILLING/CULTIVATiNG ^ 12-3/4" PATH (See
Fig. 18)
» Remove outer tines.
NOTE: When reassembling outer tines, be sure right tine
assembly (marked “R”) and left tine assembly (marked “L”)
are mounted to correct side of tine shaft.
TINE OPERATION CHECK (See Fig. 19)
A
WARNING: Disconnect spark plug wire
from
spark
plug
to
prevent
starting
while checking tine operation.
Forpropertine operation, forward tine control lever must be
against control body and all slack removed from inner wire
of control cable when control is in the “OFF” (up) position.
If lever and cable are loose, loosen cable clip at lower end
of cable. Pull up on cable to remove slack, without
extending spring on end of cable, and retighten cable clip.
FINAL CHECK “OFF” POSITION
•
With tine control “OFF” (up), push down on handle to
raise tines off the ground.
•
Slowly pull recoil starter handle while observing tines.
Tines should not rotate.
•
If tines rotate, inner wire of control cable is too tight
which is extending lower spring and engaging tines.
Loosen cable clip and push down on cable only enough
to relieve spring tension. Tighten cable clip.
•
Recheck in “OFF” position and adjust if necessary.
FINAL CHECK “ON” POSITION
With tine contro
on handle to ra
hi (fir,
' 1
11
, n|pi
íes off the ground.
I'
N
1/ LCM, > !l 1 I ti fi (
I j '
1
1 es nr I ii(i 1 t<- 1
\'i
.If i
hdown
bservinq tines.
l i i P _ h r , n
I | | f V K S ’
npliol
(
role
I S u n
lOose Lou-i-ti Cdtlf Clip idpuliuabK up lO lemove
siacK ana rengnien cup.
• Recheck in “ON” position and adjust if necessary.
NOTE: If “ON” position check required adjustment, re
check “OFF” position adjustment to insure tines do not
rotate when control is “OFF" (up).
FORWARD TINE CONTROL
CABLE
CLIP
FIG. 19
14