A. pre-operation checks, Control devices, C. starting instructions (refer to the – Poulan PRO 305 User Manual
Page 11: Section for location of controls.), Using your saw
Attention! The text in this document has been recognized automatically. To view the original document, you can use the "Original mode".
USING YOUR SAW
A. PRE-OPERATION CHECKS
Each time before operating; your saw, always:
1. >^Checkoverthe safety rules and precautions
in this manual. Make certain you completely un
derstand and can apply each one.
2.
Check protective gear. Always use eye, hearing,
and head protection devices; safety footwear; protec
tive gloves; and snug fitting clothing.
Check the saw for loose bolts, nuts, or fit*
3.
4.
tin^. Tighten, repair, or r^lace paits as necess^.
Tools required are listed in '^Getting Ready” section.
Check the air filter. Clean the filter before
starting the engme. For location, see the “Air Filter”
section.
5. P^Check the saw chain. The chain should be sharp
and at the correct tension.
6.
Check the fuel tank and oil tank. Both tanks
should be filled.
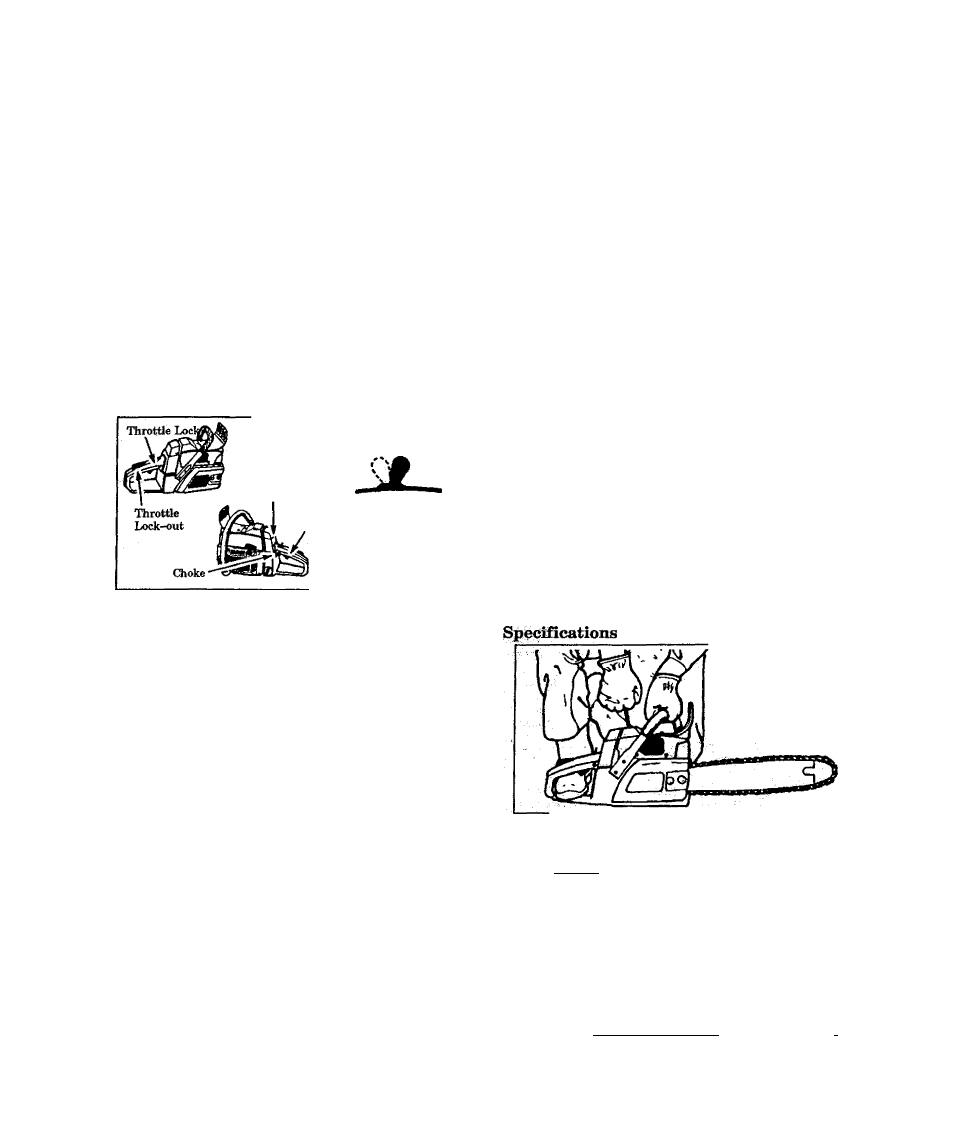
7. P^Check the handles. Handles should be free of fuel mixture and oil. 8. P-^Check weather conditions. Do not use your saw at night or during bad conditions such as strong wind, rain, snow; etc. 9. P^Check the work area. Keep children, bystand ers, and animals a safe distance away from tne work area when starting or operating the saw—a mini 3. CONTROL DEVICES Understanding the control devices on your saw and safely operate the unit. Start/Stop Trigger START/STOP SWITCH STABT STOP . I OFF HALF I ^ POLL ■ CHOKE Figure 14 1. The Start/Stop Switch is moved forward for the “Start” position and rearward for the “Stop” posi tion. 2. The two-position Choke helps to start the saw by controlling the air flow the the fuel system. 3. The Trigger accelerates and controls the speed of the engine and is designed to be used with the 4. The Throttle tiocfc-out prevents the trigger from becoming accidentally engaged. The throttle lock vated. 5. The Throttle Lock holds the throttle lock-out and trigger in position while the engine is being started. C. STARTING INSTRUCTIONS (Refer to the « A WARNING Always wear shoves; safety footwear; snugHtting clptmng; and eye, hearing, and head protection devices when operating a chain saw. 1. BASIC PROCEDURE a. Hold saw firmly on the ground as shown in Fig ure 15 . Make sure the saw clmih is free to turn without contacting any object. b. Move Start/Stop Switch to the “Start” position. Figure 14. c. Push down on the throttle lock-out, then squeeze the tri^er. Press and hold down the throttle lock, d. Adjust the choke according to “Starting Procedure for Varying ConditiohSi ” this pa^. . e. Hold the front hemdlebar with your left hand and place your right foot through the rear handle to stabilize the saw: f. Pullthestarterropequicklywithyourrighthand. g. After the engine has started, squeeze the trigger to release the throttle lock, allowing the engine to return to idle. A WARNING The chain must not move when the engine runs at idle speed. Refer to the «Carburetor Ac(just- iiients** section for correction. h. Stop the engine by moving the Start/Stop Switch to tne “Stop” position. Figure 14 . ” section for location of controls.) Hold Front Handlebar and Place Right Foot Through Handle 2 . FigurelS STARTING PROCEDURE FOR VARYING CONDITIONS NOTE: Be sure to follow “1. Basic Procedure,” as de scribed on this page. For a cold engine: 1. ) Pull choke lever to full choke. Figure 14 . 2. ) Pull starter rope quickly vdth ypur right hand until engine attempts to start, then push the 3. ) Pull the starter rbpe qmckly with your right hand until the engine starts. Figure 15. 4. ) Allow the engine to run for approximately five seconds. Then, push the choke lever to the off position. Figure 14 . _______. A WARNING Avoid bodily contact with the muffler when start- ihg or using a warm engine to avoid serious bums. -11-
mum of 30 feet.
is an important part of learning how to properly
Switch
throttle lock-out.
out must be pressed before the trigger can be acti
Release the throttle lock after the engine is started
by lightly squeezing the trigger.
then slowly release the trigger.
choke lever to the half ppsitioh. Figure 14.