Operation, How to use your tiller – MTD 406 User Manual
Page 9
Attention! The text in this document has been recognized automatically. To view the original document, you can use the "Original mode".
OPERATION
•V
IMPORTANT:
Engine is shipped
without
oil.
BEFORE STARTING
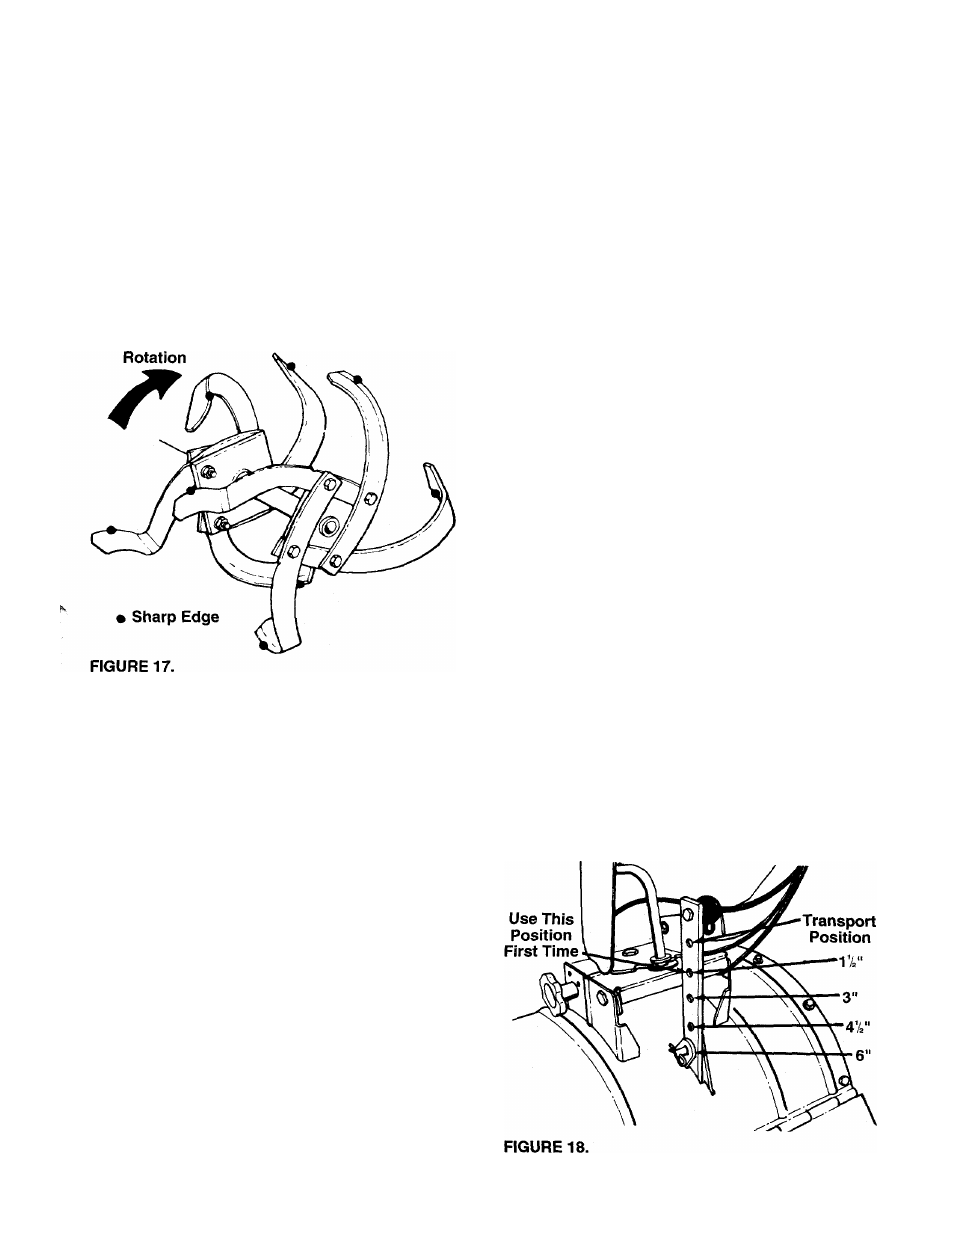
1. Before operating tiller for the first time or if tines
have been removed and reassembled for any
reason, check to be certain the tines are assem
bled correctly. The sharp edge of the tines must
enter the soil first as shown in figure 17. (Figure
17 illustrates the left hand tines, viewed from the
left hand side of the tiller. Right hand tines rotate
in the same direction as the left hand tines.)
2.
Service engine with oil
as instructed in the sep
arate engine manuai packed with your unit.
3. Fill fuel tank with clean, fresh, lead-free, low-lead
or regular grade leaded gasoline.
TO START ENGINE
A
WARNING: BE SURE NO ONE IS STAND
ING IN FRONT OF THE TILLER WHILE
THE ENGINE IS RUNNING OR BEING
STARTED.
1. Place the throttle control lever in START position.
2
. Move choke lever to CHOKE position.
NOTE:
A warm engine may not require choking.
3.
4.
Stand at side of tiller. Grasp the starter handle
and pull out slowly, until it pulls slightly harder.
Let rope rewind slowly.
Pull starter handle rapidly. Do not allow handle to
snap back. Allow it to rewind slowly while keeping
a firm hold on the starter handle.
5. Repeat steps 3 and 4 until engine starts.
6
. As engine warms up and begins to operate even
ly, move choke lever gradually to OFF position. If
engine falters, return to choke position, then slow
ly move to OFF position.
Refer to engine manual for additional engine informa
tion.
TO STOP ENGINE
1. Move throttle control to OFF position.
2. Disconnect spark plug wire and ground to prevent
accidentally starting while equipment is un
attended.
HOW TO USE YOUR TILLER
A
WARNING: When operating the tiller for
the first time, use the depth bar setting
that gives 11/2 inches of tilling depth
(second hole from the top). Refer to fig
ure 18. Use slow speed only.
Tilling depth is controlled by the depth stake which
can be adjusted to five different settings. See figure
18. Adjust the side shields as shown in figure 19, as
you adjust the depth stake. Be certain spark plug wire
is disconnected and grounded against the engine.
1. When using the tiller for the first time, use the
second adjustment hole from the top (1-1/2” of till
ing depth). See figure 18.