Important, Assembly, S figure 1 – MTD 249-623-003 User Manual
Page 5: Unpacking, Parts in cartons (see figure 1), Tools required for assembly, Attaching tongue to reservoir tank
Attention! The text in this document has been recognized automatically. To view the original document, you can use the "Original mode".
IMPORTANT
This
unit
has
been
shipped
without
gasoiine
or
oil
in
the
engine.
After
assembiy,
refer
to
separate
engine
manual for proper fuel and engine oil
information.
„ .
.
„
Beam Support/
Engine and
Reservoir
Latch Bracket
Pump Assembly Tank Assembly
I
Beam
Hinge
Bracket
ASSEMBLY
Wedge, Beam and
Cylinder Assembly
-Hitch
Assembly Tongue Assembly
s FIGURE 1.
UNPACKING
Remove the log splitter parts from the cartons by cut
ting the corners of the cartons. Make certain all parts
and literature have been removed from the cartons
before the cartons are discarded.
All hardware for assembly of the log splitter has been
placed in position on the various parts.
-Parts in Cartons (See figure 1)
Carton marked 1 of 2:
Reservoir Tank Assembly
Engine and Pump Assembly (Bolted to bottom of
carton)
Beam Hinge Bracket
Fenders (Not Shown)
Carton marked 2 of 2:
Tongue Assembly
Wedge, Beam and Cylinder Assembly
Hitch Assembly
Beam Support/Latch Bracket
Tools Required for Assembly
(2) 9/16" Wrenches*
(2) 1/2" Wrenches*
(1) Adjustable Wrench
(1) Knife (to remove cable tie)
(1) Screwdriver
*Adjustable Wrenches may be used.
Other Materials Required for Assembly:
Engine Oil
Unleaded Gasoline (regular grade gasoline is an
acceptable substitute)
Approximately 7.6 Gallons of Dexron II Automatic
Transmission Fluid
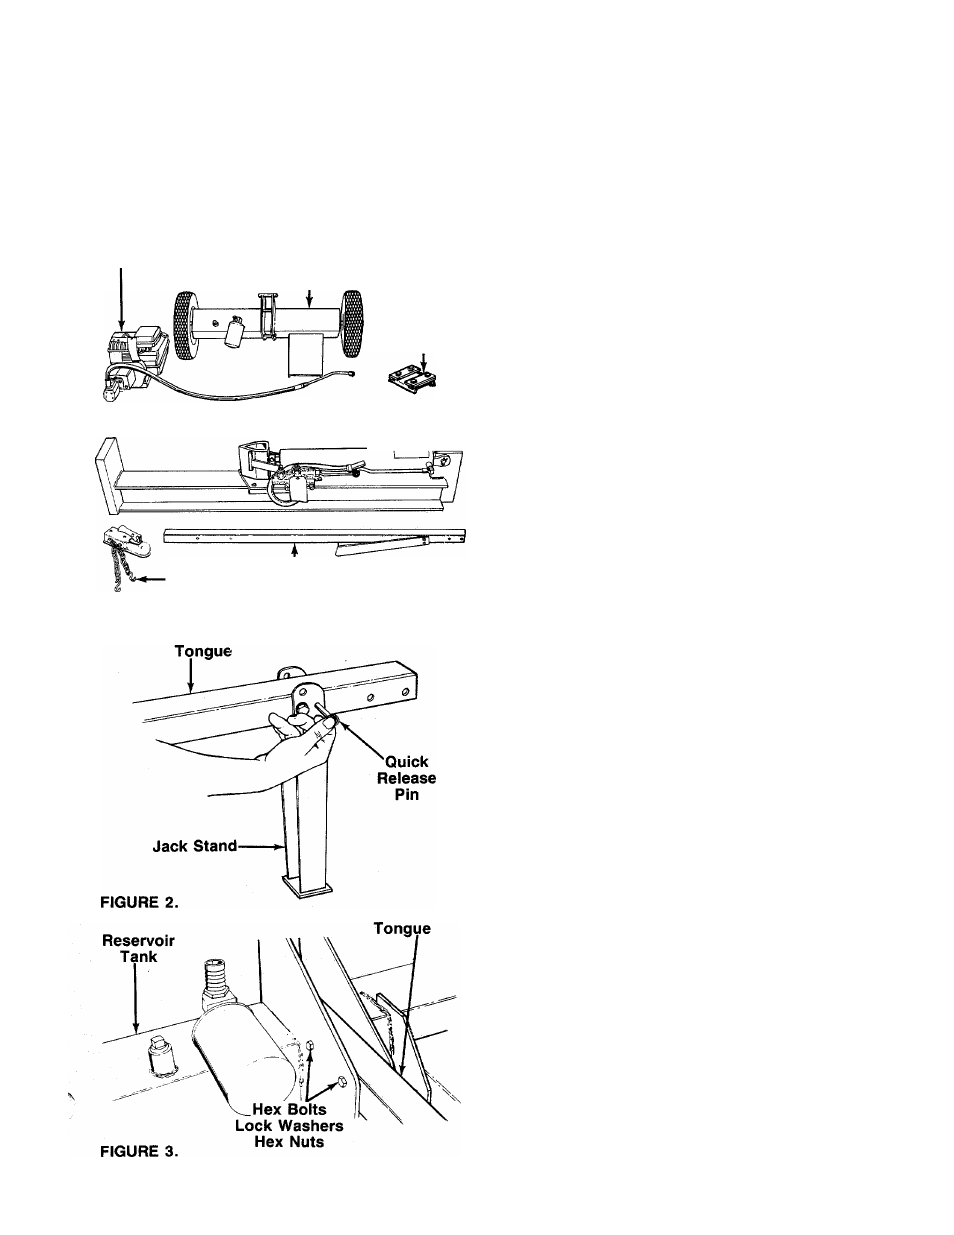
ATTACHING TONGUE TO RESERVOIR TANK
—1. The tongue is shipped with the jack stand already
attached to the tongue. The jack stand is in the
transport position. Remove the quick release pin.
Pivot the jack stand to the operating position (90°),
and secure with the quick release pin. See figure 2.
2.
Remove the two hex bolts, lock washers and hex
nuts on the front of the reservoir tank. Two 9/16"
wrenches are required. Place the tongue in posi
tion, and secure with hardware just removed. See
figure 3.