To transport log splitter, Adjustment, At warning – MTD 249-623-003 User Manual
Page 11: Log dislodger, Splitting wedge, I warning i, Note, Maintenance
Attention! The text in this document has been recognized automatically. To view the original document, you can use the "Original mode".
A
WARNING
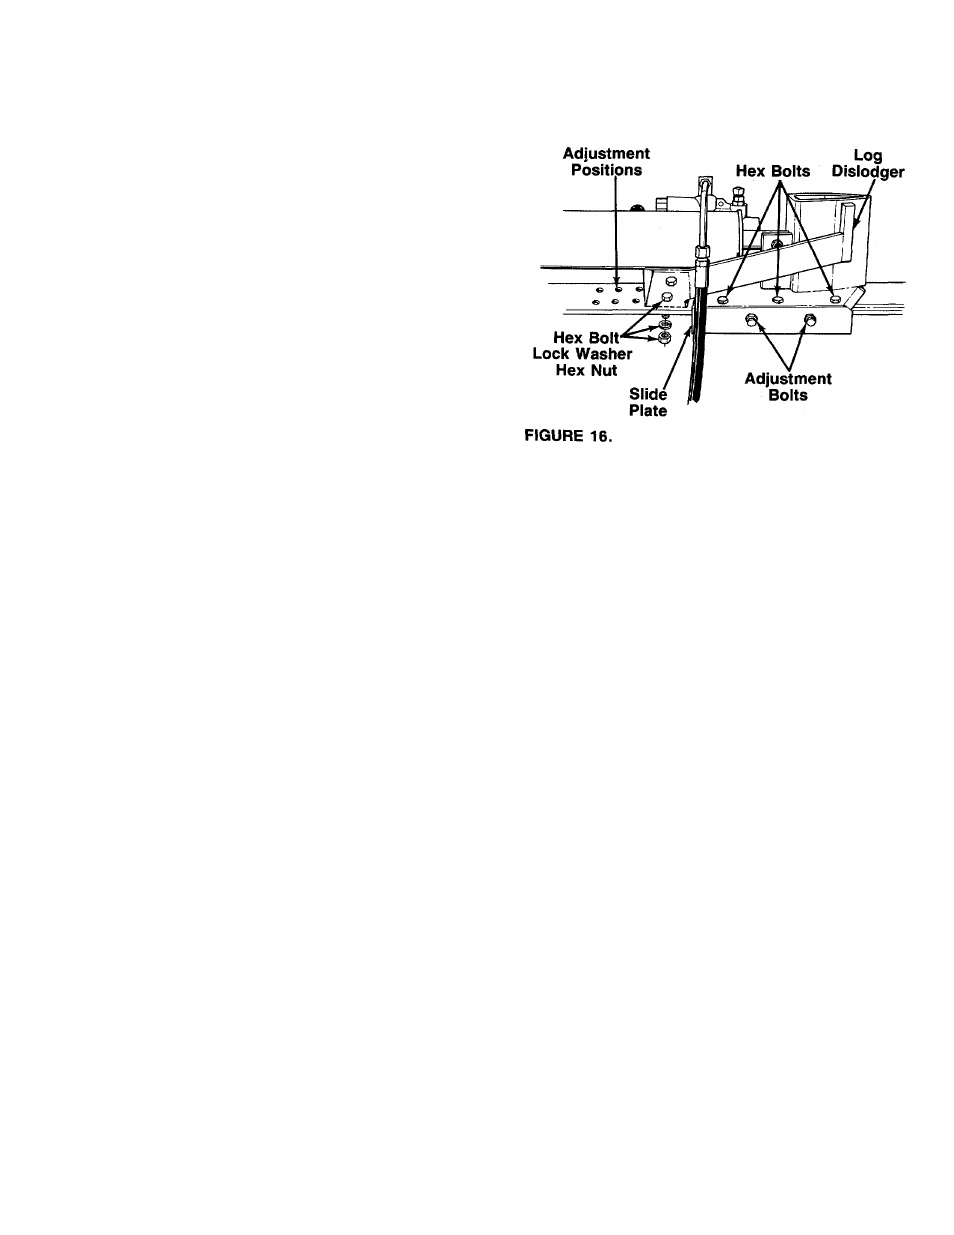
3. Retighten the three hex bolts on top of the slide
plate.
If the fluid becomes excessively hot at
any time during operation, stop the unit
and allow the fluid to cool down. Maxi
mum performance will not be obtained
from your log splitter if the fluid is too
hot. Use extreme caution as contacting
hot fluid could result in serious personal
injury.
TO TRANSPORT LOG SPLITTER
1.
Lower the beam to its horizontal position. Make
certain the beam is latched securely with the lock
ing rod.
2.
Remove the quick release pin which secures the
jack stand. Pivot it up against the tongue, and
secure with the quick release pin.
3.
Attach the hitch to a towing vehicle, making cer
tain to latch securely. Attach the safety chains to
the towing vehicle.
ADJUSTMENT
At
WARNING (
Always stop the engine and disconnect
the
spark
plug
wire
before
performing
any adjustments.
LOG DISLODGER
If the logs to be split are all of a standard length less
than 24", adjust the log dislodger as follows. See figure
15.
1. Remove the hex bolts, lock washers and hex nuts
which secure the log dislodger to the beam.
2. Move the log dislodger to the hole desired. Secure
with hardware just removed.
Tighten securely.
Adjusting
the
log
dislodger to accommodate smaller
logs will shorten the time required for the wedge to
make a complete cycle.
SPLITTING WEDGE
As normal wear occurs, periodically adjust the bolts on
the slide plate (beneath the splitting wedge) as follows
to eliminate the excess space between the wedge plate
and the beam. See figure 16.
1. Loosen the three hex bolts on top of the slide plate
(beneath the splitting wedge).
2. Back the two adjustment bolts on the side of the
slide plate out
slowly
until the wedge assembly will
slide on the beam. Tighten the lock nuts securely
against the base of the slide plate to hold the bolts
in this position.
CARBURETOR ADJUSTMENT
A
i WARNING i
^ ^ ^ ^ ^ ^ ^
▼
If
any
adjustments
are
made
to
the
engine
while
the
engine
is
running
(e.g. carburetor), keep clear of all moving
parts. Be careful of heated surfaces and
muffler.
Minor carburetor adjustment may be required to com
pensate for differences in fuel, temperature, altitude or
load. Improper adjustment will cause stalling when split
ter is under load, hard starting and higher fuel con
sumption.
Refer to the separate engine manual packed with your
log splitter for carburetor adjustment information.
NOTE
A DIRTY AIR CLEANER WILL CAUSE
ENGINE TO RUN ROUGH. BE CERTAIN
AIR
CLEANER
IS
CLEAN
AND
AT
TACHED
TO
THE
CARBURETOR
BEFORE ADJUSTING CARBURETOR.
DO
NOT
MAKE
UNNECESSARY
ADJUSTMENTS.
FACTORY
SETTINGS
ARE
SATISFACTORY
FOR
MOST
APPLICATIONS AND CONDITIONS.
MAINTENANCE
Ac V
arn
*
ng
Always stop the engine and disconnect
the
spark
plug
wire
before
performing
any maintenance or repairs.
11