Step4: install forward clutch cable – Troy-Bilt TUFFY 630C User Manual
Page 7
Attention! The text in this document has been recognized automatically. To view the original document, you can use the "Original mode".
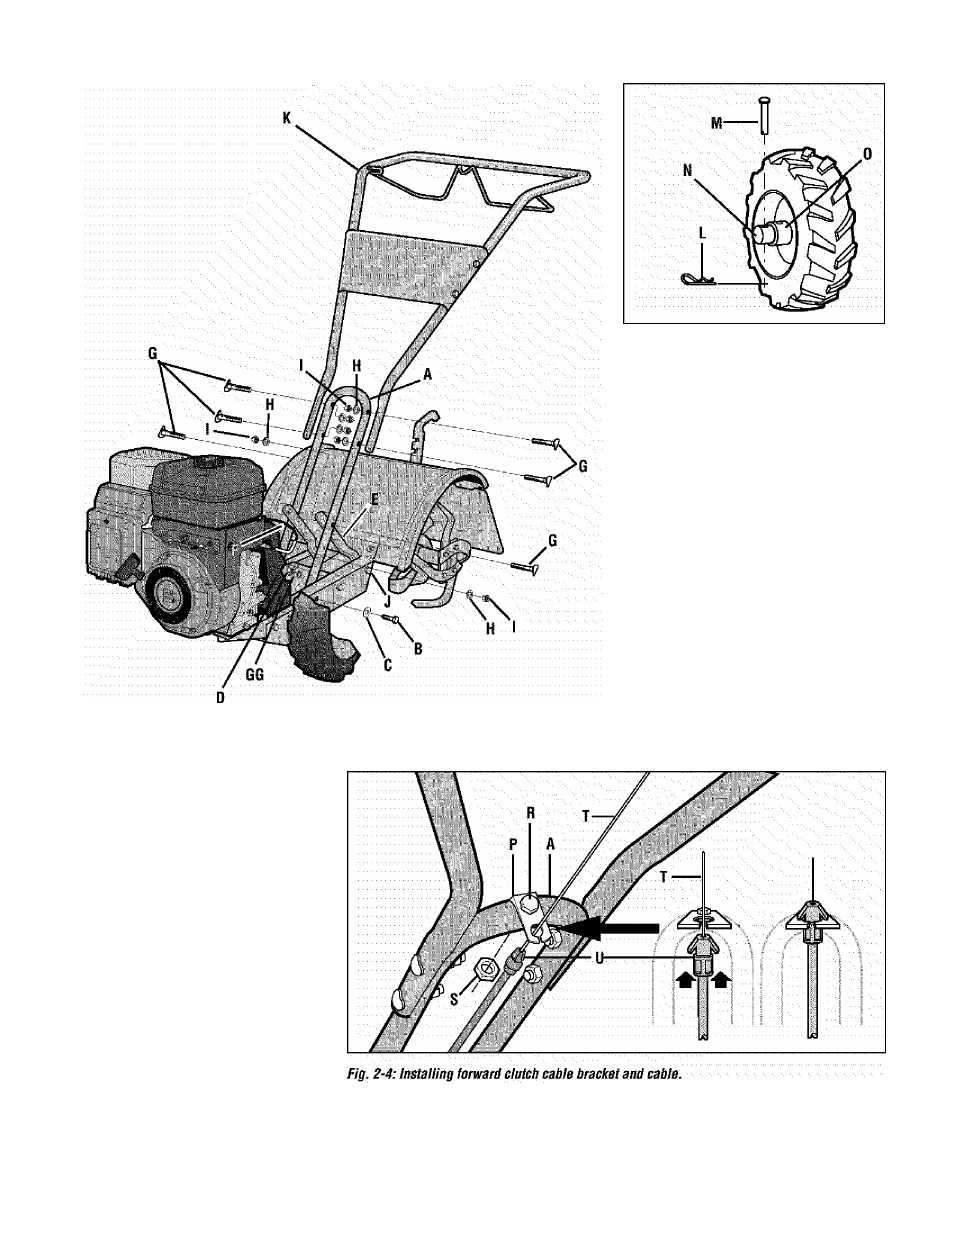
Fig. 2.2: Attach handlebar.
Fig. 2-3: Wheel In FREEWHEEL position
STEP4: INSTALL FORWARD
CLUTCH CABLE
1. Attach the forward clutch cable bracket
(P, Fig. 2-4) to the handlebar support (A)
with a 1/4“-20 X1-V4“ hex hd. screw (R)
and 1/4"-20 hex locknut (S). Tighten se-
curely.T\; T;: \;;v T
t
: T : : : : ' ' . T
2. Carefully unwrap the forward clutch ca
ble (cable without an attached knob) from
its shipping position and siide the thin ca
ble wire (T, Fig. 2-4) into the slot in the ca
ble bracket. Push the cable connector (U,
Fig. 2-4) up through the hole in the bracket
until the groove in the connector snaps
into place.
3. Insert the #10-24 x 2" slotted hd. screw
(V, Fig. 2-5) down through the hooked end
of the cable spring (W) until the screw
threads extend through the s p r i n g . : ^
2. Remove the hairpin cotter (L, Fig. 2-3)
and wheel drive pin (M) from the wheel
hub
(0)
and wheel
shaft (N). T^ ■
t
3. Slide the wheel fully inward on the wheel
shaft (N, Fig. 2-3). Reinstall the wheel
drive pin (M) through the wheel shaft only
(not through the wheel hub). Secure the
wheel drive pin with the hairpin cotter (L),
pushing the hairpin cotter in as far as It will
go. The wheel should now spin freely ■
(freewheel) on the wheel shaft. Repeat
with the other wheel. :
:
:
4. Use the handlebar to roll the tiller to a
flat area. T \ '
:
IMPORTANT:
Before starting the engine,
the wheeis must be piaced in the WHEEL
DRIVE position (pins through wheel hubs
and wheel shaft). This procedure is
described in Wheel Drive Pins in Section 3.