Setting the needle, Winding the bobbin, Winding the bobbin -9 – SINGER W7911 User Manual
Page 8
Attention! The text in this document has been recognized automatically. To view the original document, you can use the "Original mode".
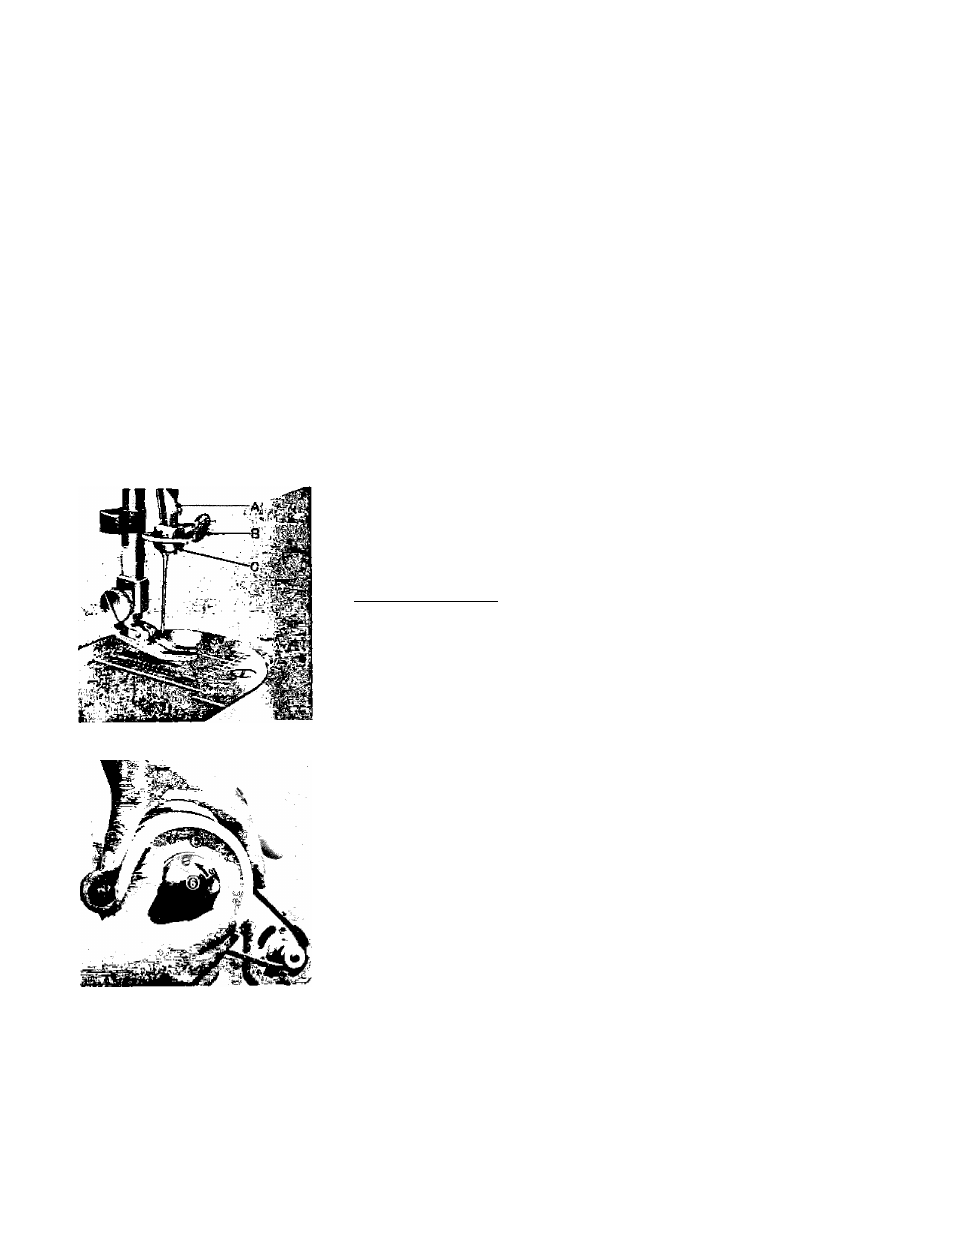
Fig. 3
Flat surface
of needle
shank
/
r
Fig. 4
SETTING THE NEEDLE
See Fig. 3. Raise the needle bar A to its highest
point, turning wheel toward you by hand.
Then loosen the needle clamp screw B and the
needle
can
be
inserted
into
clamp
C.
Place
needle
(flat side to right) in the needle clamp and push it
upward as far as it will go into the needle clamp
hole,
tightening
the
needle
clamp
screw
securely
with a screw driver.
After
changing
the
needle
make
one
complete revolution of the balance wheel by
hand to be sure the needle is in the correct
position.
WINDING THE BOBBIN
Disengage
the
hand
wheel
(5,
(Fig.
4)
from
the
stitching
mechanism by turning the clutch 6 toward you or counterclock
wise.
Place a spool of thread on one of the spool pins, lead thread
through the upper thread guide on the arm, and down through
the tension disc (10, (Fig. 5) at the base of the machine. Run
end
of
thread
through
a
hole
in
the
bobbin
edge
and
place
bobbin B on spindle of bobbin winder 7, fitting the notch on
bobbin
over
small
pin
on
spindle.
Push
bobbin
winder
pulley
against
hand
wheel.
Hold
thread
end
loosely
and
start
machine
slowly.
Bobbin will stop winding when it is filled. Turn clutch away
from
you
until
sewing
mechanism
is
again
engaged
so
that
needle moves when you turn the hand wheel.
Break off loose thread end used to start the winding.