Changing needles, Removing needleplate, Replacing needleplate – SINGER 484.1544180 (Sold at Sears) User Manual
Page 10: Removing needle plate, Replacing needle plate
Attention! The text in this document has been recognized automatically. To view the original document, you can use the "Original mode".
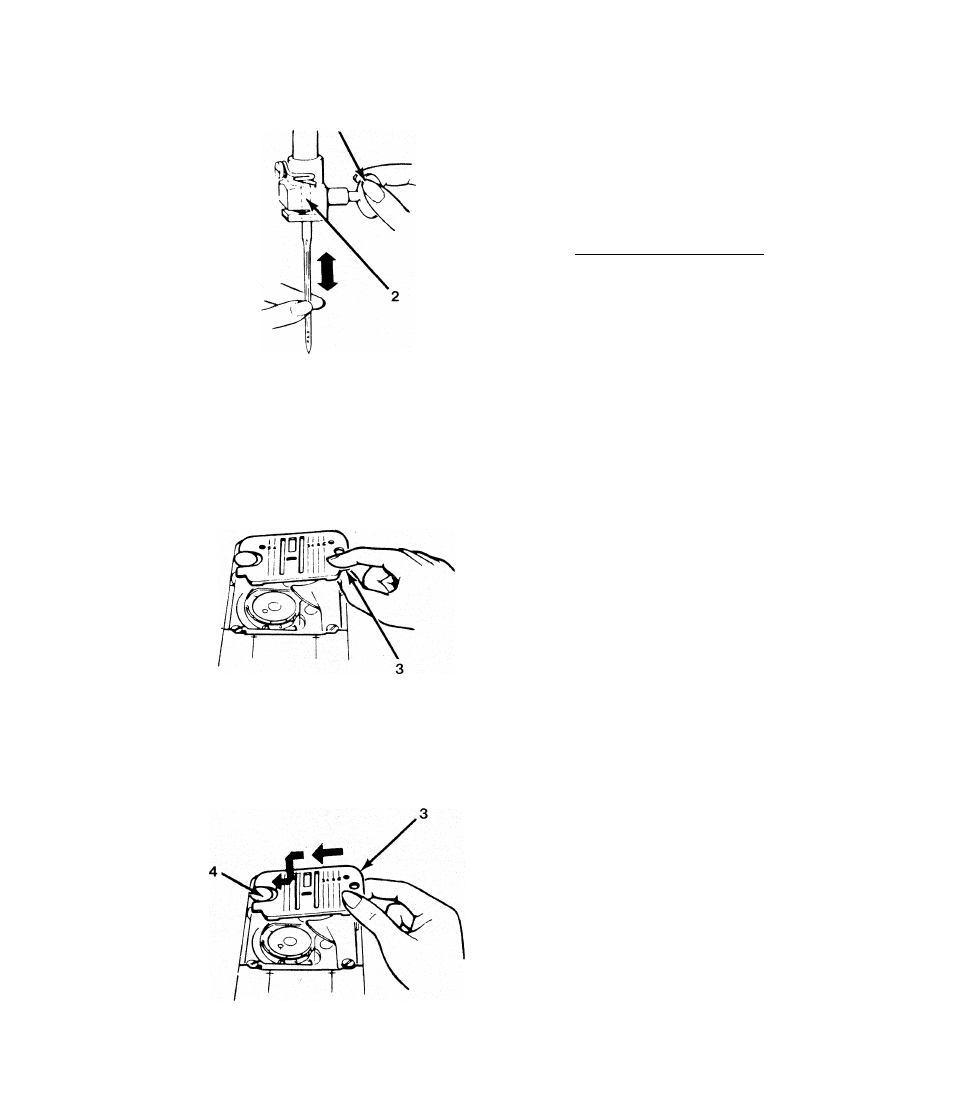
Changing Needles
^ Raise needle to highest position by turning
handwheel towards the operator.
^ Loosen needle clamp screw (1) and remove
needle.
^
With flat side of needle to the back, insert new
needle into clamp (2) as far as it will go.
^ Tighten needle clamp screw (1) securely.
Check the Fabric, Thread and Needle Chart in
this book for correct needle and fabric
combinations.
For best results always use genuine singer^
needles.
Removing Needleplate
For either cleaning or use of the optional straight
stitch plate (423134), available from Sears parts
department, do the following:
Raise needle and presser foot to their
highest positions.
^
Open slide plate and place thumb under right
side of needle plate (3).
^
Lift up and pull plate to the right to
remove it from the machine.
Replacing Needleplate
^
Holding needle plate as shown, slide it to the
left under the head of clamping pin (4).
^
Press down on right side at (3) until it fits se
curely in place.