2) standard 1-needle, 3-thread overedge stitching, Always remove the left needle – SINGER 14U64A User Manual
Page 13
Attention! The text in this document has been recognized automatically. To view the original document, you can use the "Original mode".
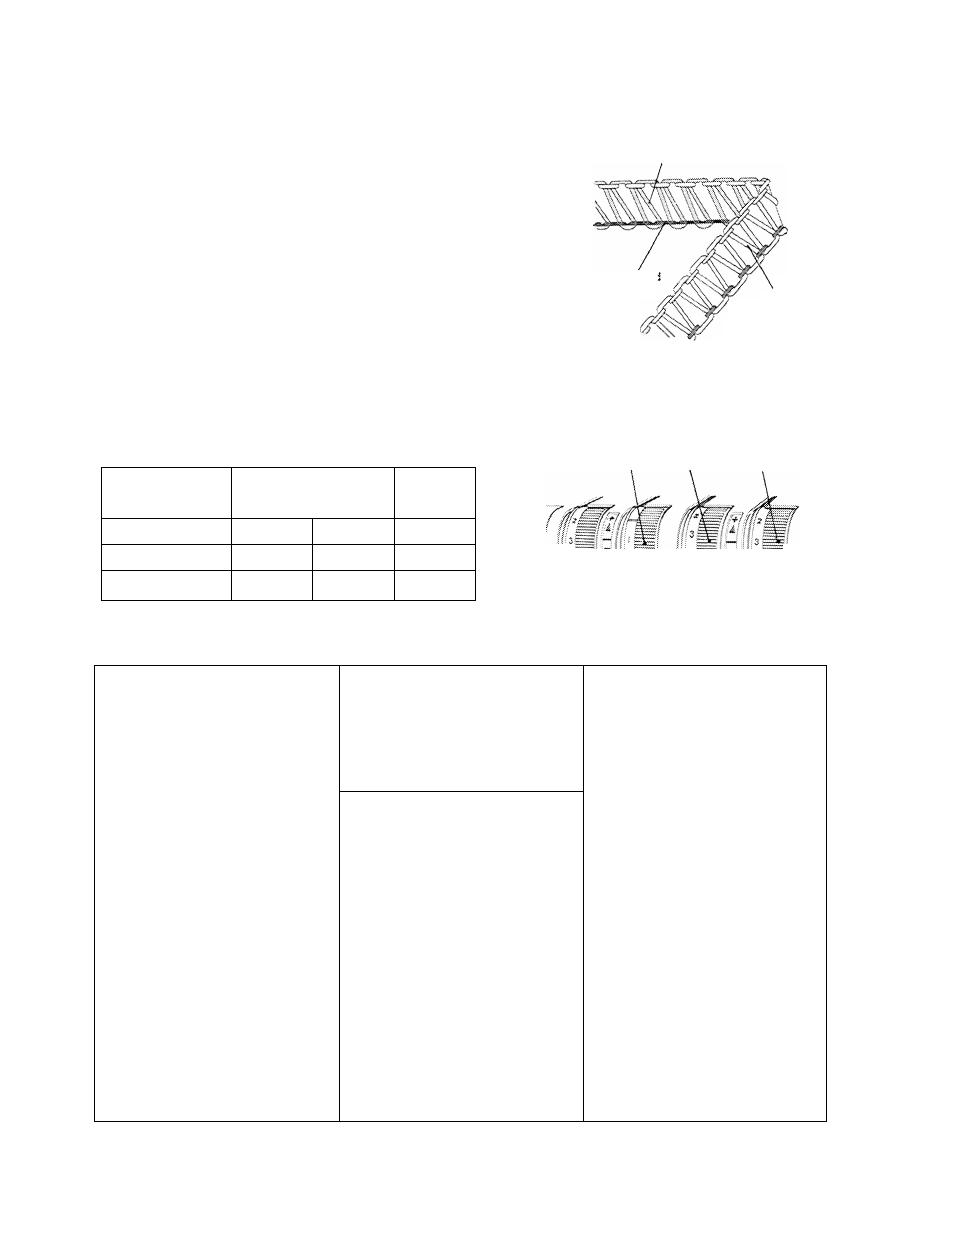
2) Standard 1-needle, 3-thread overedge stitching
This machine can do I -needle. 3-thread overedge stitching by using only the right needle.
Always remove the left needle
♦ Correct thread tension
Be sure the threads are correctly threaded otherwise
proper thread tension cannot be ohtzined (See page 6).
Set each of the thread tension dials to the settings shown
below and test sew.
Right looper thread
L
Needle thread
Topside
Left iooper
thread
Underside
Thread tension Right needle Right looper
Left looper
Fabric
thread
thread
thread
Light weight
2
6
2
Medium weight
3
6
2
Heavy weight
5
7
2
Needle thread Right looper Left iooper
tension dial
, thread tension thread tension
(green)
\ dial (orange)
dial (yellow)
With following figure as reference, adjust the thread tension dials to obtain correct tension.
When right looper thread hes
on the underside of fabric.
When left looper thread
appears on the top.
When needle thread tension is
too loose.
Left looper
thread
\
Needle thread
Right looper-'T?-^^^ ^ ,
thread Left looper
thread
Topside Underside
Right looper /
\
thread
y
Needle^
thread
Topside ^ Underside
Right iooper
Left looper
thread thread
Topside
t t ^
Underside
Turn right looper dial (orange)
toward the (+) mark.
Or, turn left iooper dial
(yellow) toward the
{—)
nnark.
Turn left looper dial (yellow)
toward the (-^) mark.
Or, turn right looper dial
(orange) toward the (—) mark-
Turn needle thread tension
dial (green) toward the (+)
mark.
__
y
11