1) 2-needle. 4-thread overedge stitching, Cswifel^^w » wc, V*^ ^w»wv>ov*w*i – SINGER 14U64A User Manual
Page 12
Attention! The text in this document has been recognized automatically. To view the original document, you can use the "Original mode".
S
&
■ * &
Adjust thread tension to suit the type of material and si
2
e of the thread used. The thread tension dials on
this machine are a one-tum system and as the number on the thread tension dials increases, the thread
tension becomes tighter.
CSWifel^^W
» WC
a
.V*^ ^W»wv>Ov*W*i
1) 2-needle. 4-thread overedge stitching.
• Correct thread tension
Be sure the threads are correctly threaded otherwise
proper thread tension cannot be obtained (See page 6).
Set each of the thread tension dials to the settings shown below
and test sew.
Ki^ht
looper
thread
\
\“ T
MSf /
^
Left 7**
Right
needle
needle
threQd^
thread
Topside
—.... ■ ......... —'
Extension
Fabric^v^
Left
needle
thread
Ri^hl
needle
thread
Right j Left
looper looper
thread thread
Li$ht
wieght
3
2
6
2
Medium
weight
5
3
6
2
Heavy
^ weight
6
5
7
/
2
Ri9ht needte
thread tension
dial (green)
Left looper
thread
Underside
Left loo pet
thread tension
dial (yellow)
Left needle
thread tension
dial (blue) \
Right looper
thread tension
dial (orange)
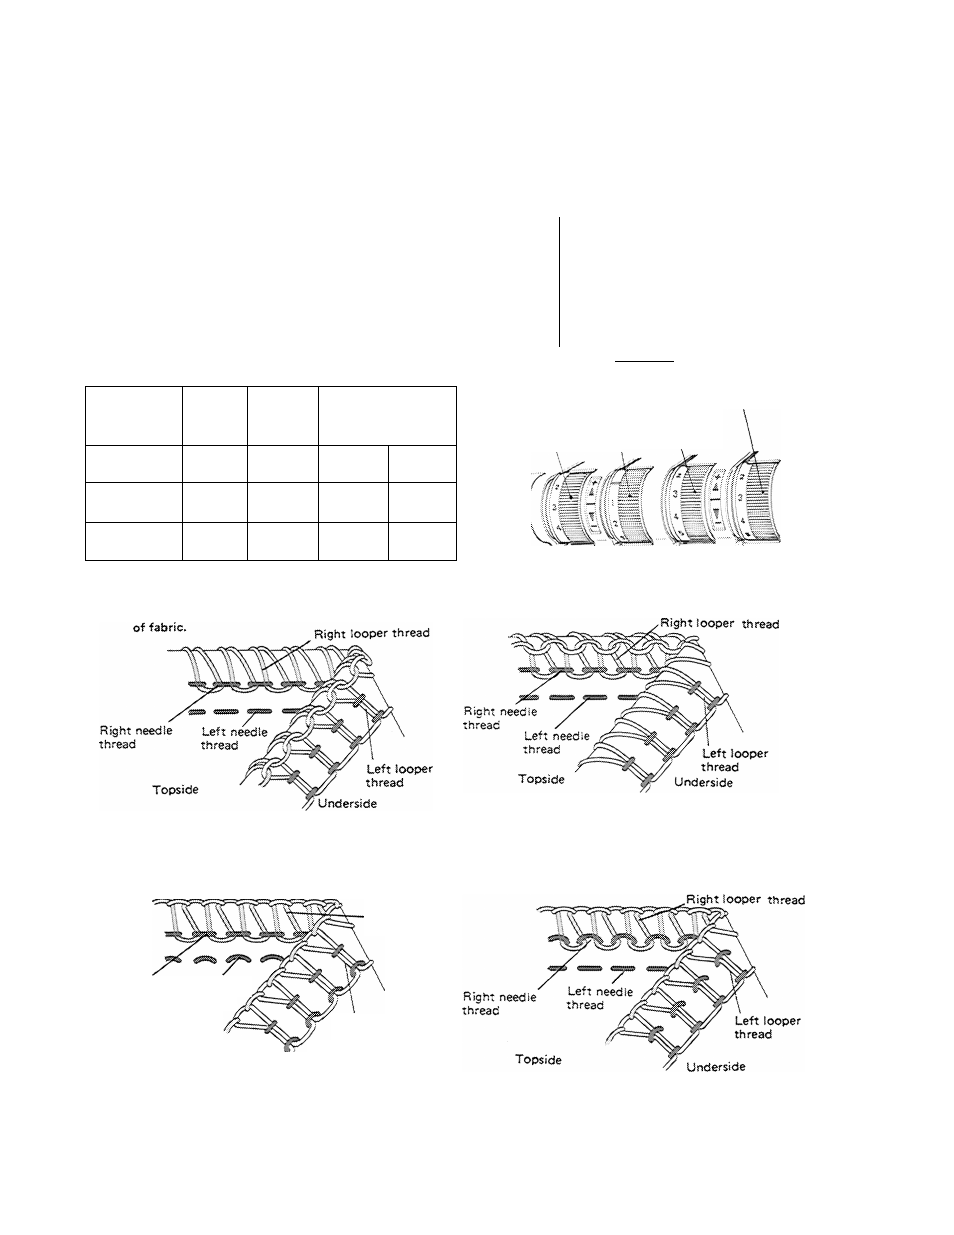
With following figure as reference, adjust the thread tension dials to obtain correct tension.
vihen left looper thre^ appears oh the top.
When right looper thread lies on the underside
Turn right looper dial (orange) toward the
i^)
mark. Or, turn left looper dial (yellow) toward
the {—) mark.
When left needle thread tension is too loose.
Right looper
thread
Right needle teft needle
thread
thread
Topside
Lett looper
thread
^
Underside
Turn left needle thread tension dial (blue)
toward the (+) mark.
Turn left looper dial (yellow) toward the (+)
mark.
Or, turn right looper dial (orange) toward the
(~) mark.
When right needle thread tension is too loose.
right needle thread tension dial (green)
i urn
toward the (+) mark.
...y'
10