Installing sewing head in cabinet, As far, They^will go. , / caieiiiuy – SINGER W712 User Manual
Page 48: Head onto head hinges, Sure {ingers ace inserted, They can go into head hinge, The head to rest in its tilted* back position, Both set, Enrely with, Driver
Attention! The text in this document has been recognized automatically. To view the original document, you can use the "Original mode".
47
“CP-L;GJH i
:^t„GGS
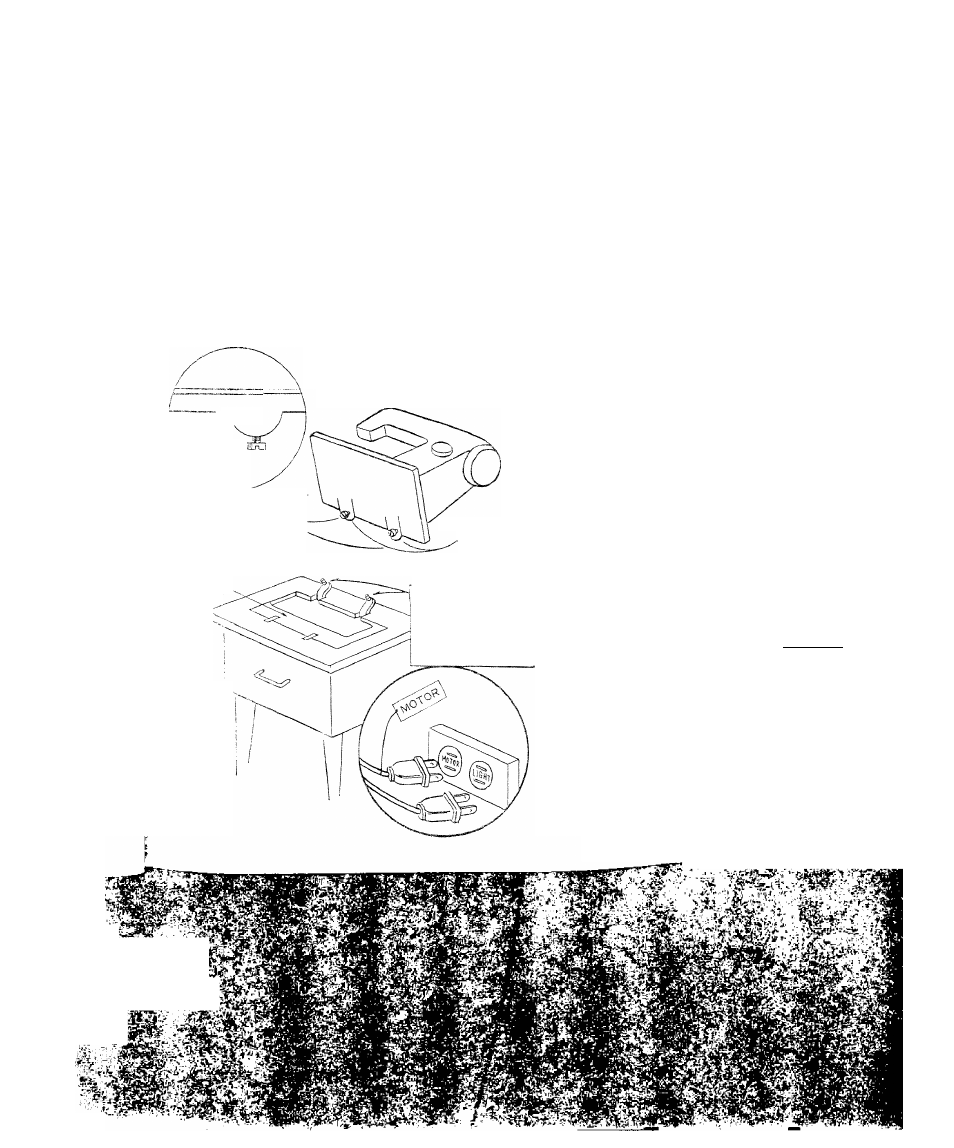
INSTALLING SEWING HEAD IN CABINET
O
BACK OFF '
SET SCREW
TO CLEAR
HINGE HOLE
1
.
-lEAD rnNGE SET
SCREWS
2
.
3.
"LAP
TO LC'VER
i-EAD TITO
CABINE
HEAD HINGE
HOLES
HEAD HINGES
HINT: STRETCH
A RUBBER BAND
ACROSS THE TWO
HINGi^S
TO
Ht-LP
HOLD THEM UP
RIGHT WHILE
MOUNTING THE
SEWING HEAD,
Loosen both.
hmmA Mag« smt screws
until head hiag#' hole ^ is clear.
Tilt head hiage,
ap and back
as far
as
they^will go. , /
CaieiiiUy
sMp
head onto head hinges
- - making
sure {ingers ace inserted
as
far
as
they can go into head hinge
holes.
4. Allow
the head to rest in its tilted*
back position.
5.
Tighten
both set
screws
—
enrely with
screw
driver,
6
.
Plug
electrical leads into sockets lo-
Gated
inside cahinot. Cord identiiied
with
"motor* tag must be plugged
into
socket marked *motor*. Un
tagged
cord goes to *Uaht* eodeet
. 'alT-Vu U.S,,:
l
-A
j
A,;.'
AT, L
i
' ■ tн