To remove the needle bar rock frame rock shaft, To re-engage the safety clutch – SINGER W203 User Manual
Page 12
Attention! The text in this document has been recognized automatically. To view the original document, you can use the "Original mode".
20
To Remove the Needle Bar Rock Frame Rock Shaft
Remove the face plate and needle bar rock frame, then loosen the
clamp screw at (C,Fig.?) and draw out the rock shaft.
To Remove the Arm Shaft Connection Belt
from within the Arm
Slide the connection belt off the lower belt pulley; remove the
balance wheel; loosen the three screws In the arm shaft bushing near
the balance wheel and remove the bushing; lift the belt up through the
arm cap hole as far as possible and draw It out through the space
normally occupied by the bushing.
Owing to the fact that the sewing hooks make two revolutions to
one revolution of the hook driving shaft, and that the feed lifting
eccentric Is on the hook driving shaft. It Is possible to have the
sewing hooks correctly timed without having the feed correctly timed.
To overcane this, the plate (J,Flg.5) Is attached to the underside of
the bed of the machine. This plate Is marked with an arrow at Its
lower end and directly aloTigslde of the plate Is the collar (K, Flg.5)
mounted on the hook shaft, which Is also marked with an arrow. After
replacing the belt over the upper pulley, replace the arm shaft bushing
and securely fasten It In position by Its three screws; replace the
balance wheel. With the belt on the upper pulley, turn the balance
wheel fron you until the thread take-up lever Is at Its highest point.
Then turn the hook shaft with the fingers until the two arrows, one on
the plate (J) and the other on the collar (K), are directly In line.
New, without disturbing either the arm shaft or the hook shaft, slip
the belt over the lower pulley. The feed will then be correctly timed
with the needle bar.
Fig. 22. Putting Belt on Lewer Pulley with
Belt Replacer 265058
21
To facilitate the replacing of the belt on the lower pulley, use
belt replacer 265068 (A, Fig. 22). Rest the replacer In the loop of the
the belt and slide It ov'er the hub of the pulley, as shewn In Fig. 22,
having the notches In the replacer engage the two set screws In the
hub of the pulley. Catch the belt clips In the groove at the lower
part of the pulley and turn the balance wheel toward you until the
belt Is fully over the pulley, assisting the belt clips from under the
pulley rhn with a screwdriver when necessary. Then remove the replacer.
NOTE: As belt replacer 265058 will serve for several machines
It Is not regularly furnished with the machine, and must be ordered
separately.
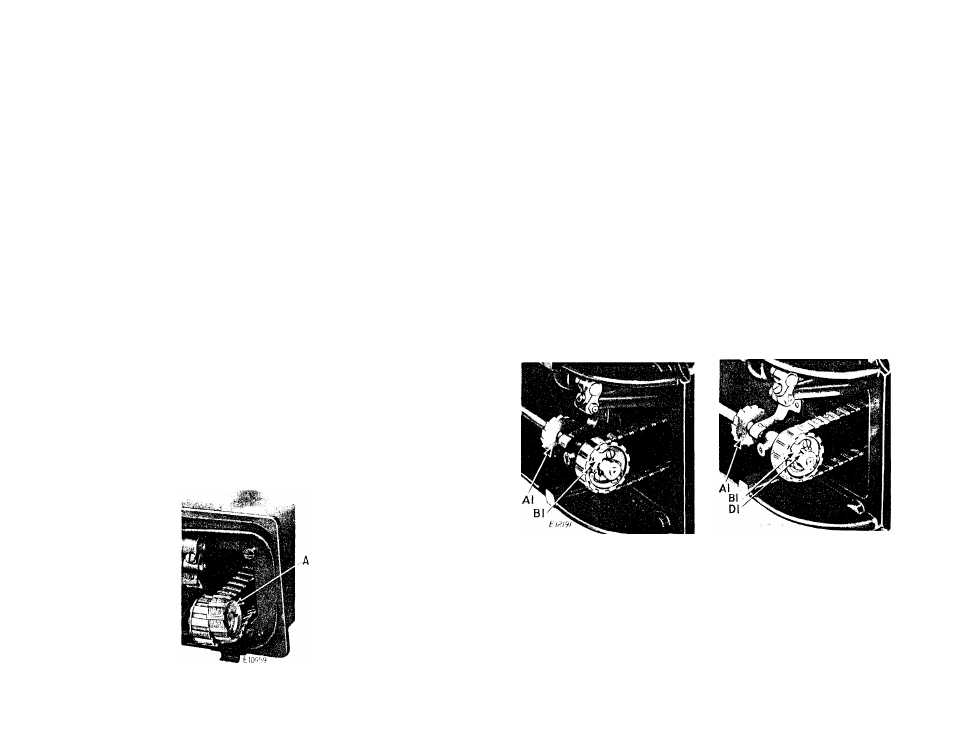
To Re-engage the Safety Clutch
The hook driving shaft and the shafts of the sewing hooks are
spllned to prevent the hooks from getting out of time. The safety
clutch located In the lower belt pulley prevents damage In the event
of any unusual strain on the sewing hooks by releasing the locking
lever In the pulley from the notch
hook driving shaft.
(Dl,Flg. 24) In the collar of the
Fig. 23. Safety Clutch Disengaged
Fig. 24. Operating Position
Draw back the bed slides, turn the balance wheel back and forth
slightly, and remove the material that may be Jamming the hooks. If
necessary to re-engage the clutch, press down the lock stud (B, Fig, 2)
^near the base of the arm to engage the hook driving shaft lock ratchet
(Al,Flg. 23) which will prevent the hook driving shaft from turning
backward. Turn the balance wheel away fron you until the locking lever
(Bl) snaps Into the notch (Dl) In the shaft collar as shewn In Fig.
24
.
Release the lock stud and resume sewing.